Workflows - Creating a Batch
All workflows in your Ovation LIMs begin with a Create Batch Activity Step. This activity allows you to define which samples and controls will be processed together as a workflow batch under the same workflow ID.
1. Click the “Create batch” activity step

2. If applicable, confirm that positive and negative external controls are selected
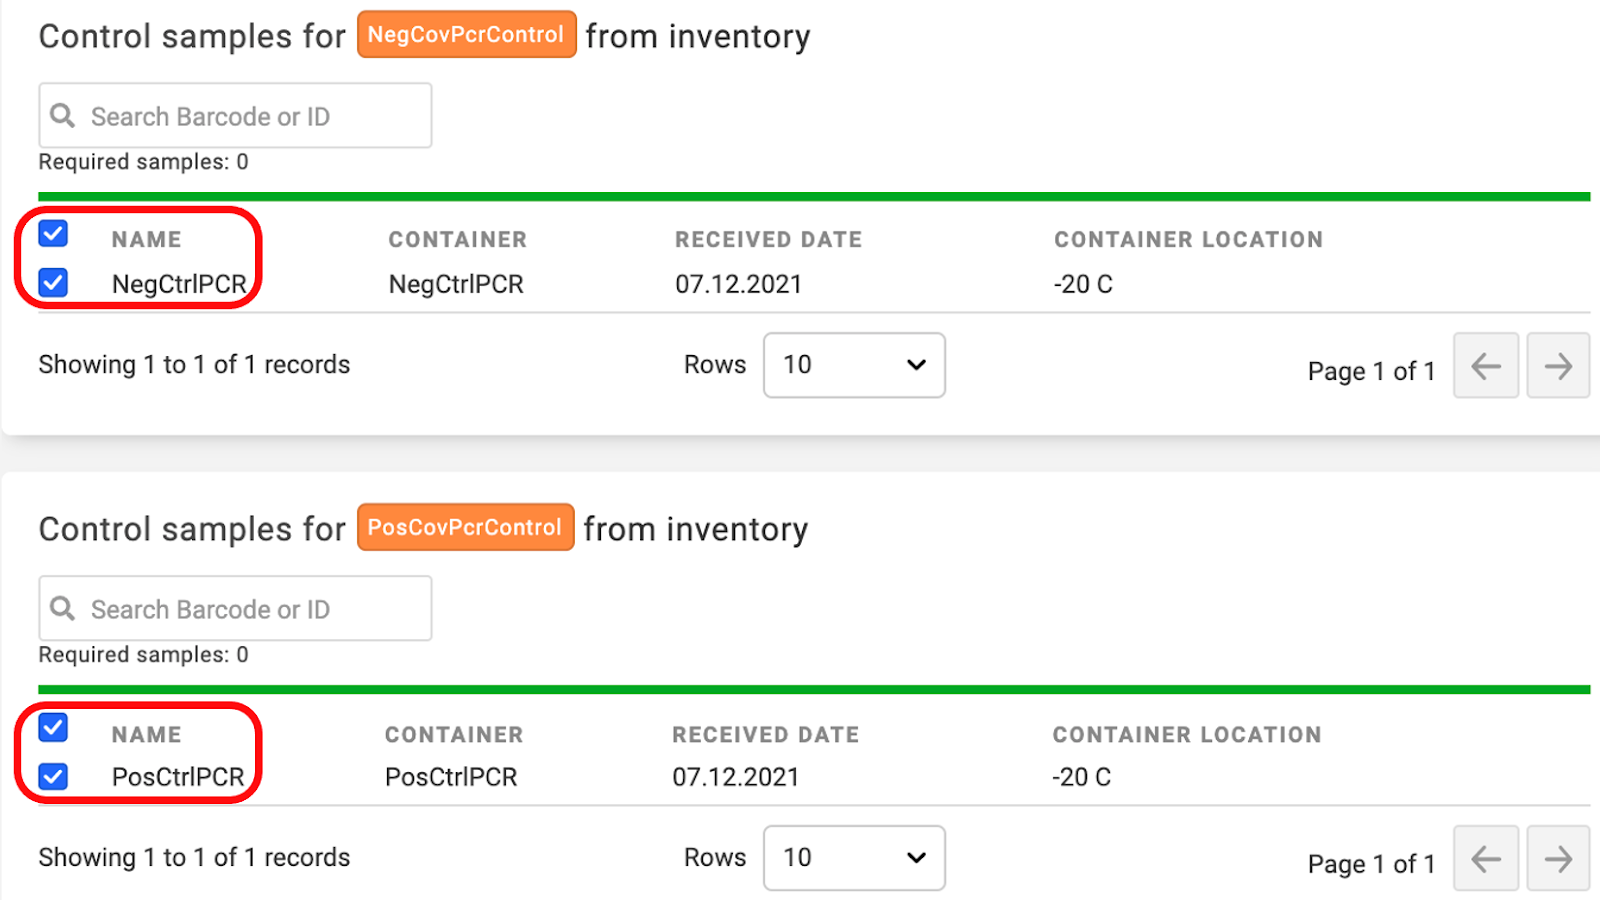
Note: Not all ‘Create Batch’ Activity Steps require external controls. If required, External controls are selected by default. You can deselect the external controls to exclude them from the assay. External controls can also differ by workflow. For example, Extraction workflows may include a no template control (NTC) while PCR workflows may include both a positive and negative external control.
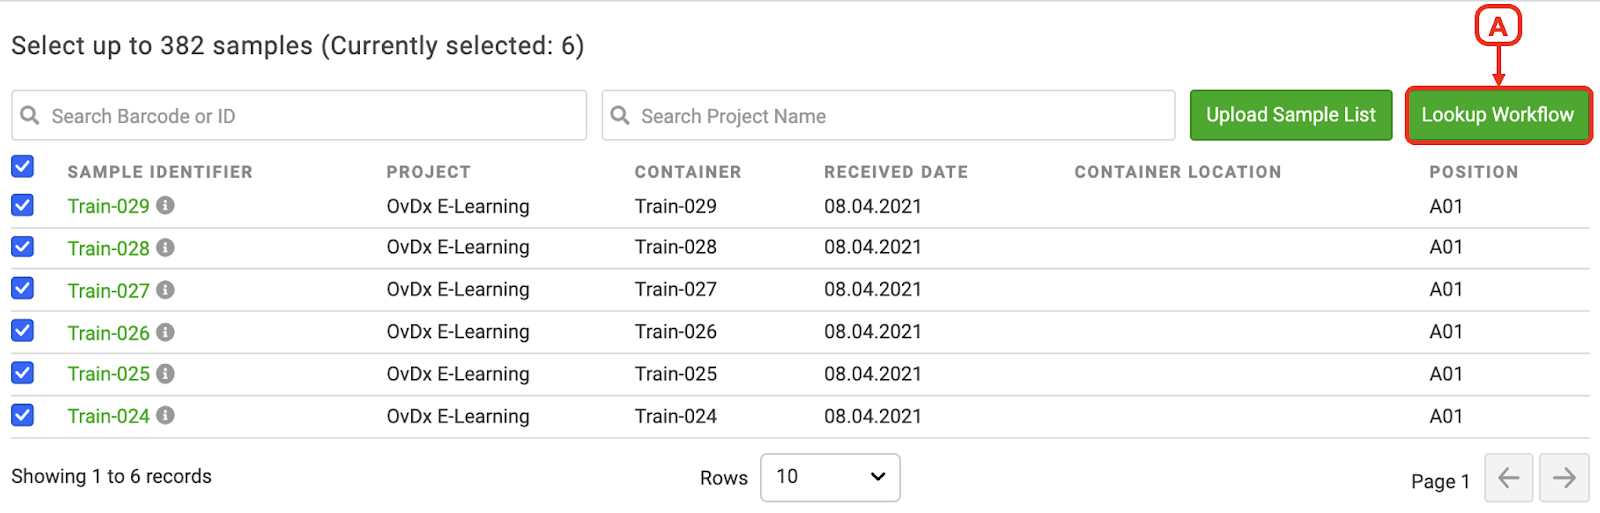
3. Choose one of the following methods to add your samples to the batch: Manual selection, Upload sample List, or Lookup Workflow
Note: The maximum number of samples and controls that can fit in the selected container type will be auto-selected based on your workflow configuration. In the 96-well plate example below, there is one default external control that is auto-selected. The remaining 95 container positions for the batch are then auto-selected from the list of available queued samples. The Create Batch screen can show a maximum of 100 queued samples if you set the “Rows” window to 100. If your container type holds more than 100 samples (i.e., 384-well plate), all 382 samples will still be auto-selected, and you will need to use the page arrows to see the rest of the batch.

Manual Selection
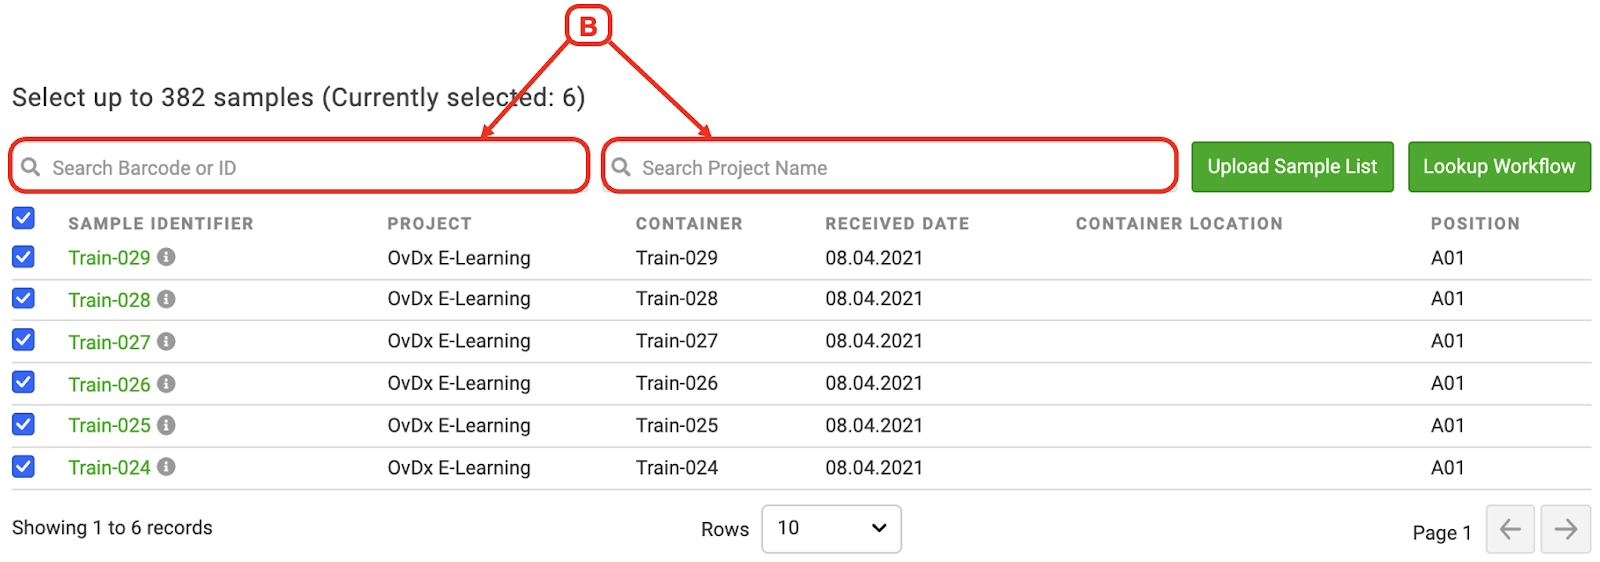
A. Select individual samples by checking the box next to the sample identifier. You can select/deselect all samples by clicking the box to the left of “Sample Identifier”

B. Scan the barcode or enter the Sample ID or Container ID to search for individual samples in the search box. Available samples can also be filtered by entering the Project Name into the project box
C. Skip to Step 4 of this section under Create Batch
Upload Sample List
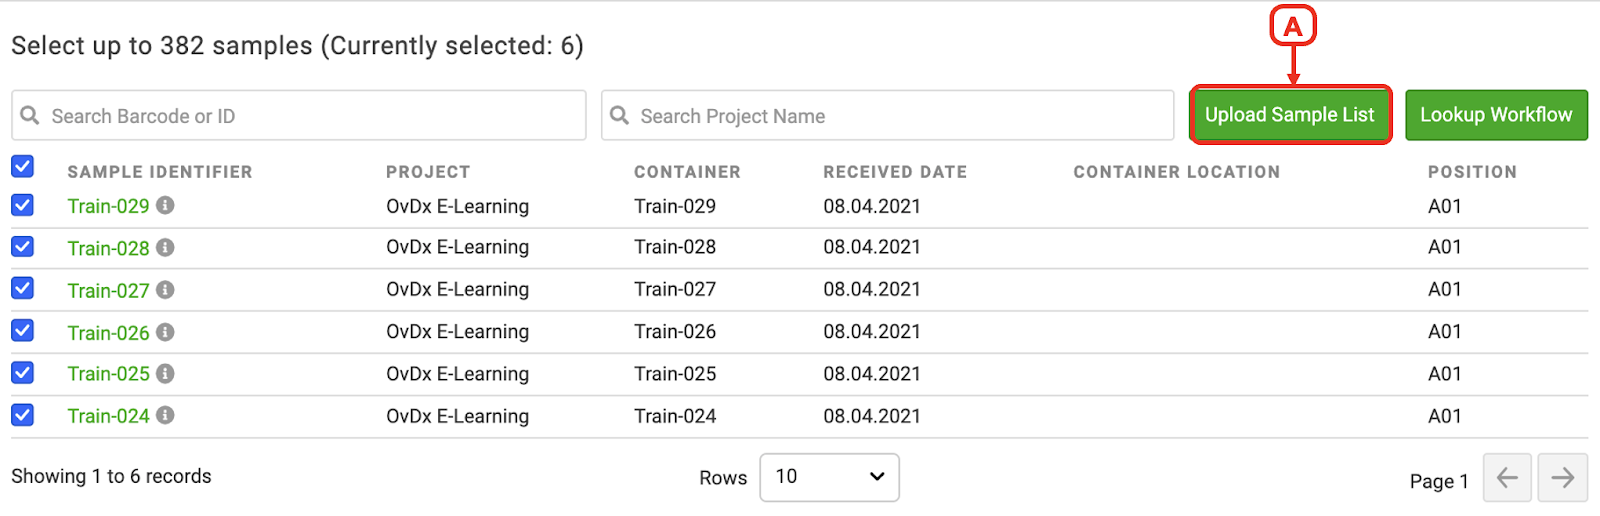
A. Click the “Upload Sample List” button
B. Drag and drop your CSV file with your sample batch list
C. Click the green “Submit” once the file loads

Tip: Click the green “Download example file” shown in the previous image if you are unsure or get an error in your upload. CSV’s must include the column header “Identifier”. Sample IDs or Container IDs of the samples you want to include in your batch should be listed beneath “Identifier” in one column. You can use a barcode scanner to help make your upload file by scanning the Sample or Container IDs into the CSV “Identifier” column.

D. Skip to Step 4 of this section under Create Batch
Lookup Workflow
A. Click the “Lookup Workflow” button
B. There are two choices in the Lookup Workflow Modal: Add to Batch or Replace Batch. Choose Add to Batch to add the samples from your selected workflow to the current list of selected samples. Choose Replace Batch to replace the current selected samples with the samples in your workflow of choice
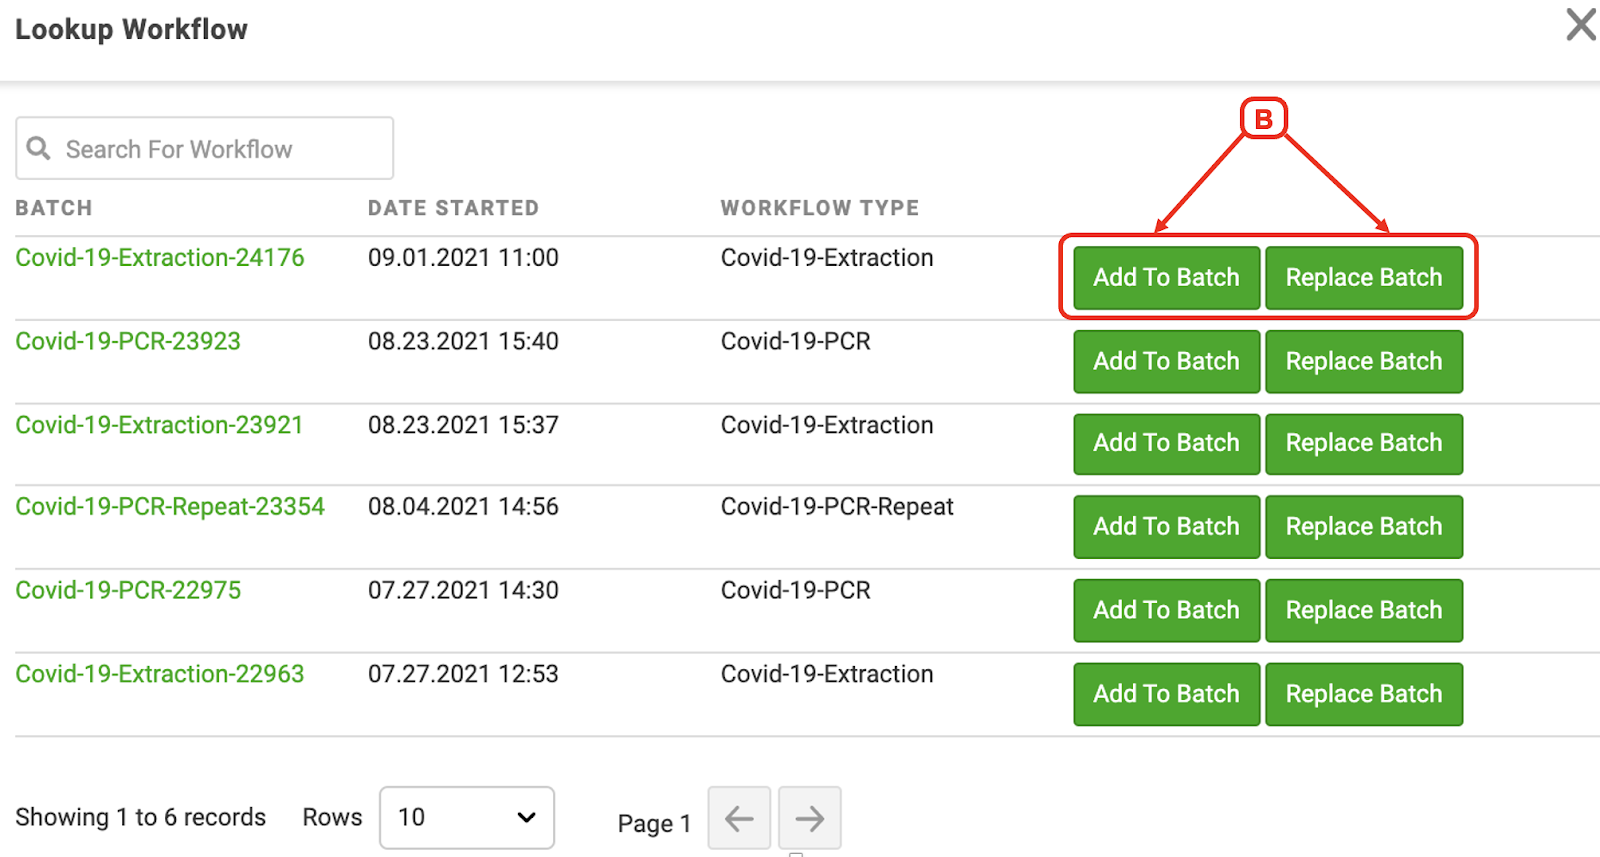
C. Go to step 4 below
4. Verify your selected controls and samples samples are shown on the right side of the screen
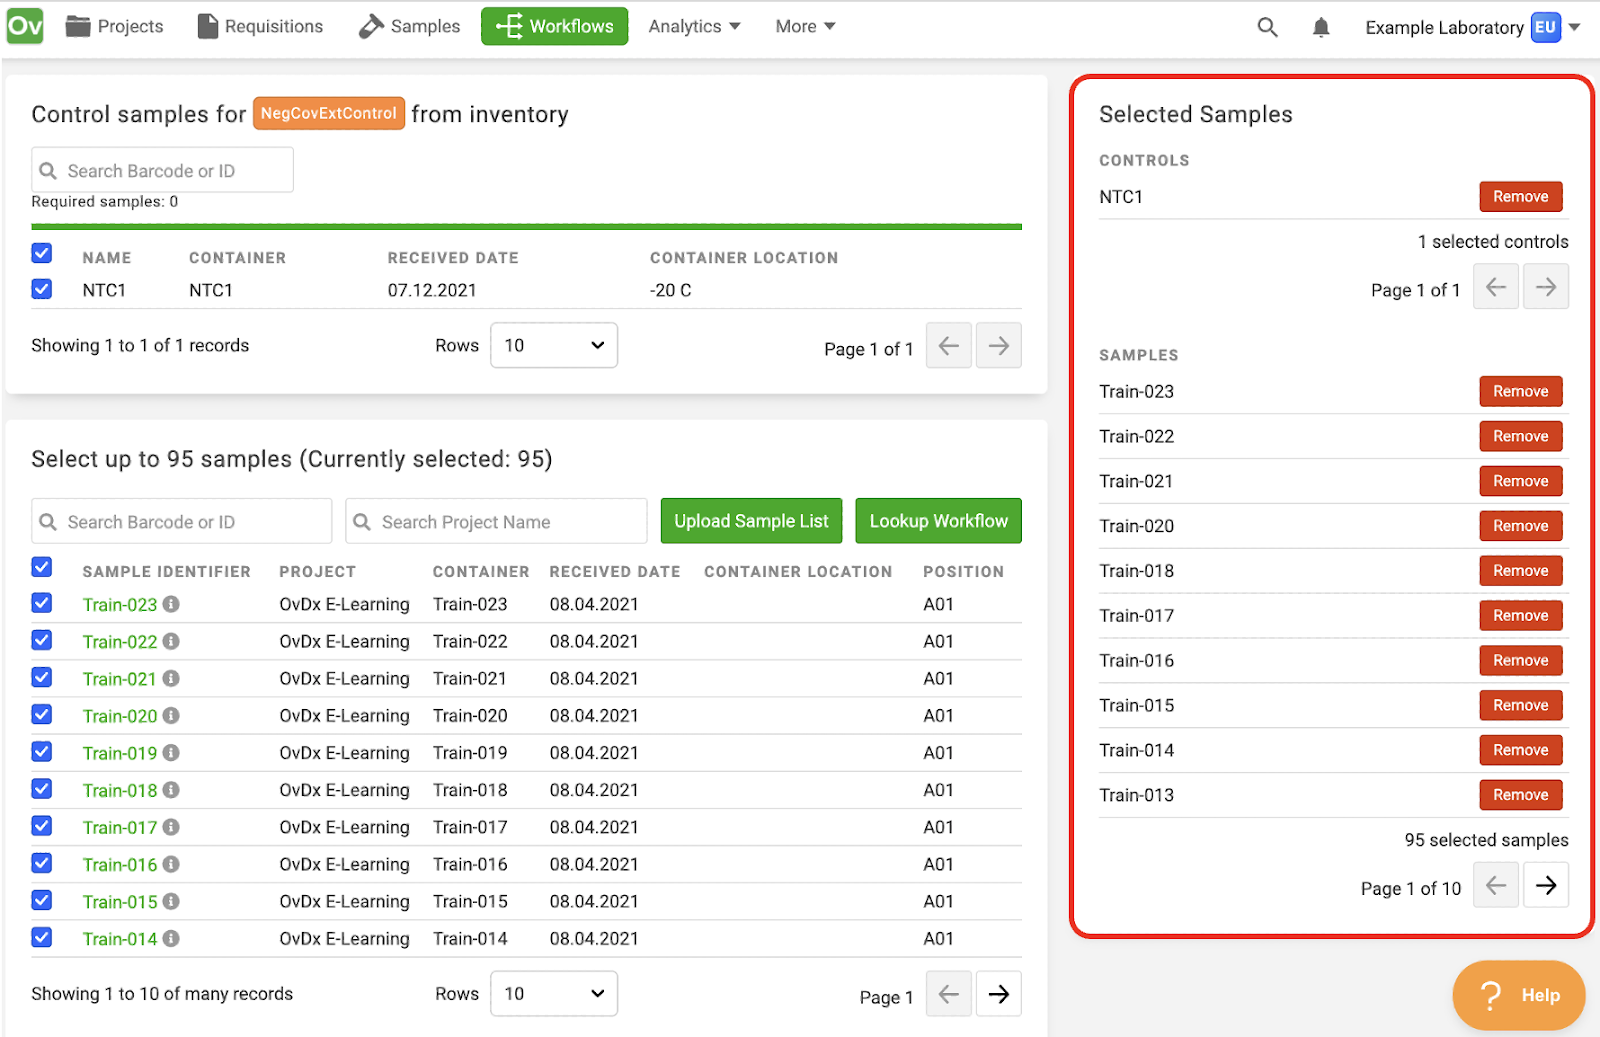
Note: Clicking the red Remove button will remove that control or sample from the batch.
5. Scroll up and click the green “Submit” button, then click “Return to Workflow”


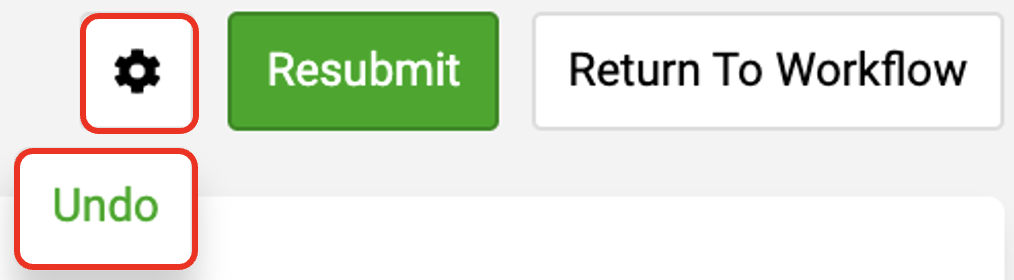
Note: You can click the gear in the top right corner of the most recently submitted activity step to undo that step.