
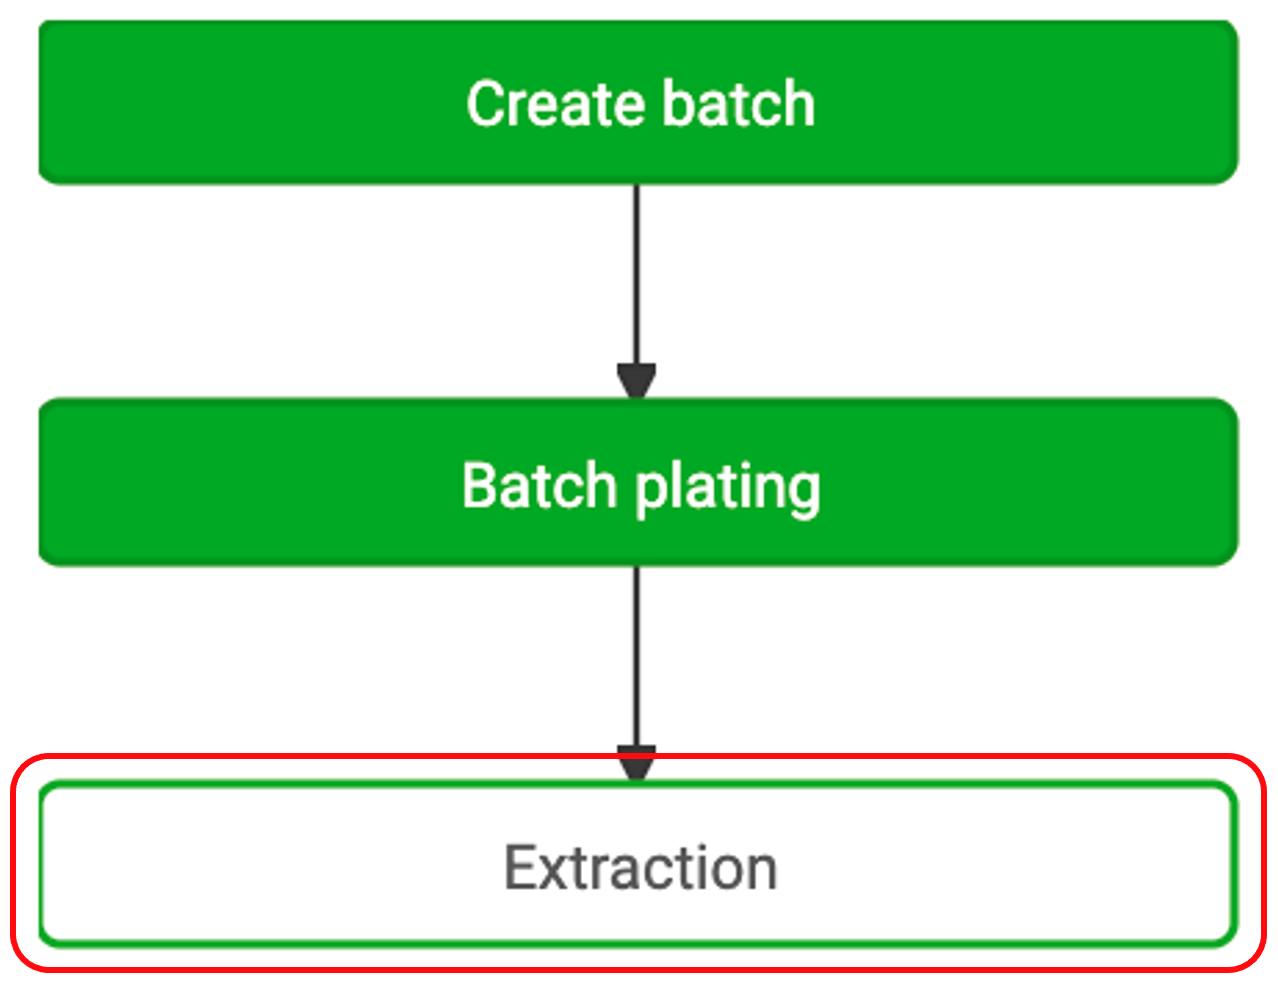
Workflows - Extraction
Extraction activity steps allow users to track the extraction of nucleic acids from their primary samples. Details for plating, metadata, and files can be associated with an Extraction Activity Step.
1. In the workflow, click “Extraction”
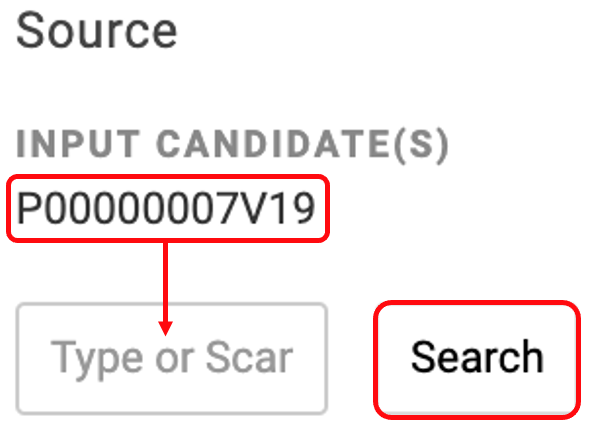
2. Copy and paste the input candidate container ID into the source container search bar, then click search. The source container will display after search
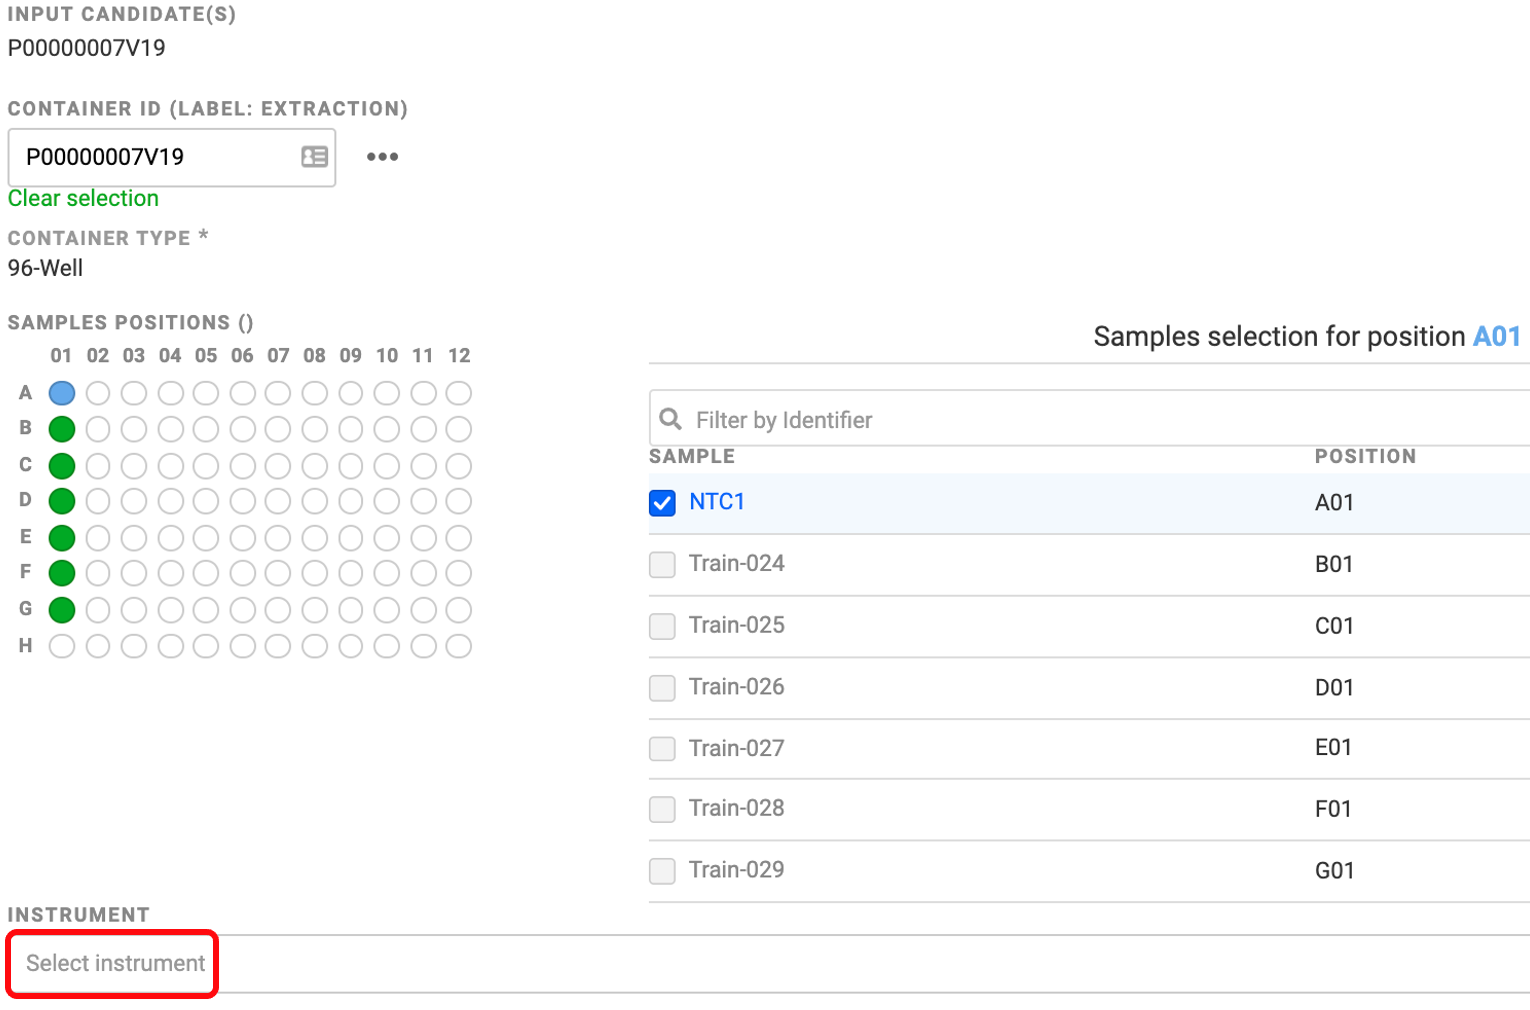
3. Optional: Scroll down and select an instrument from the dropdown menu if you wish to capture this metadata
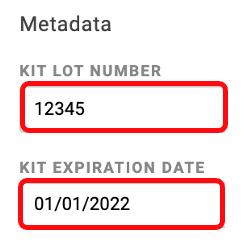
4. Optional: Scroll down and enter information for the metadata fields (here Kit Lot Number and Kit Expiration Date)
5. Scroll down to results and add a Destination Container for the samples (elution)
Do you have an existing Container ID? If yes…
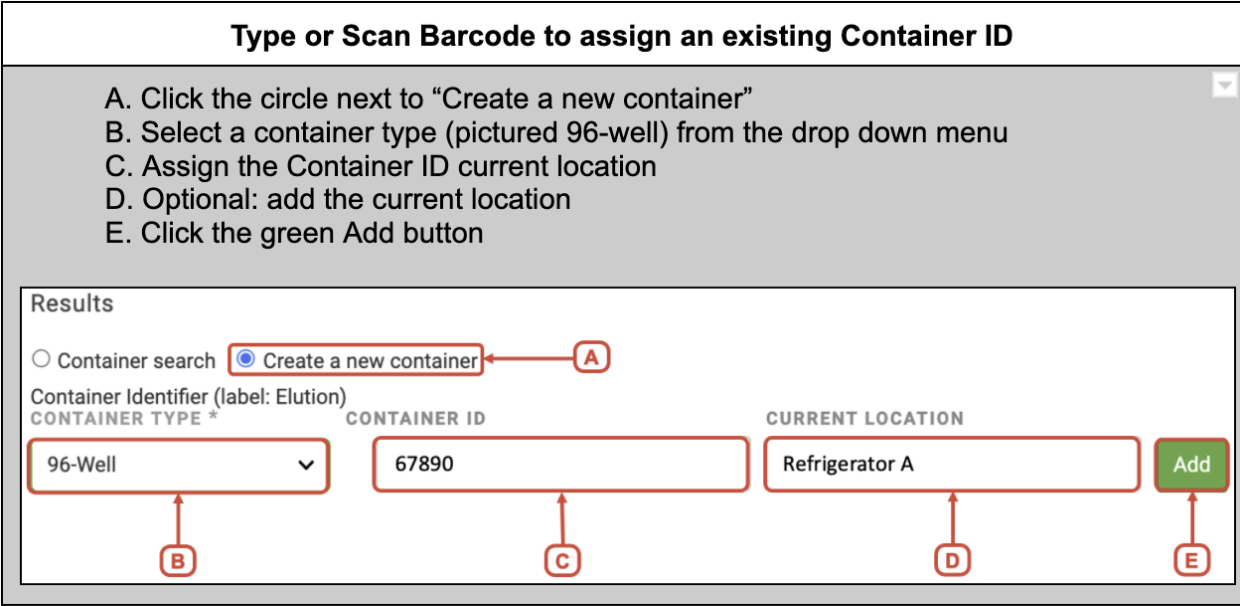
If you do not have an existing Container ID…

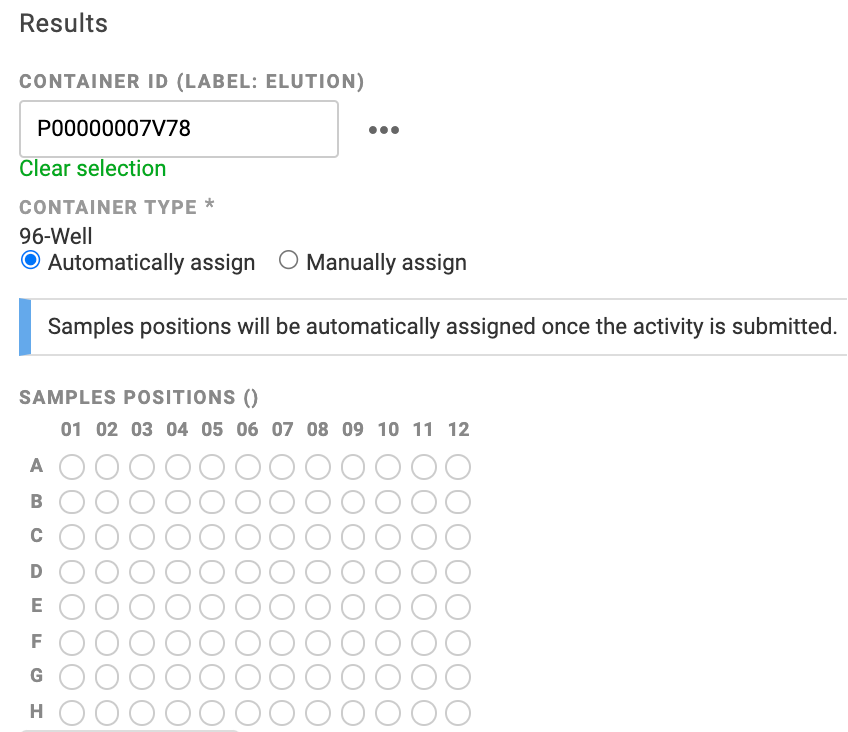
6. Scroll down and select a plating option. Leaving “Automatically assign” selected will put the samples in the same position as the source container above (see step 2)
7. Optional: Scroll down after selecting a plating option for the samples. Click “Add Files” to add any files you want associated with the samples. Click the box under “Notes” to document any notes
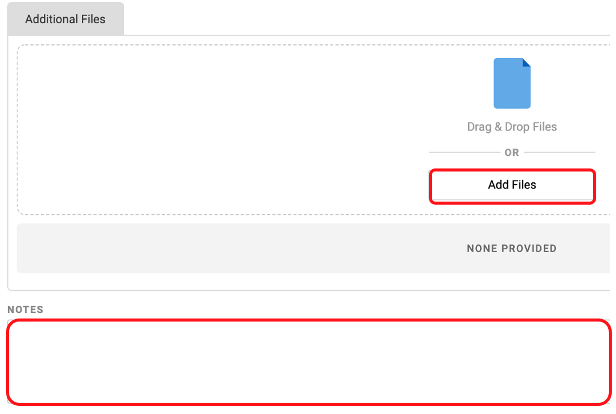
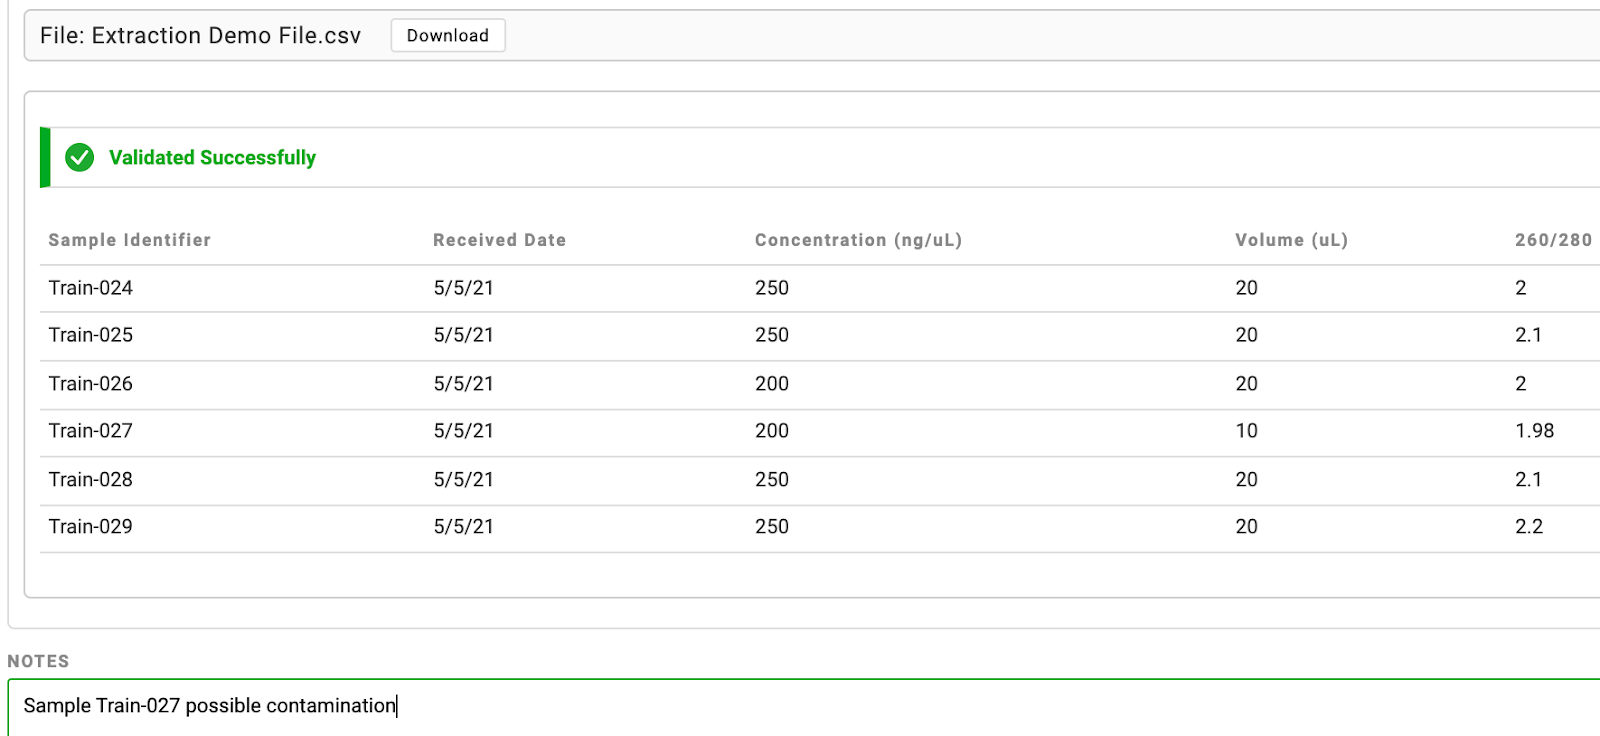
Note: Files and notes display within the workflow and any attached files can be downloaded here.