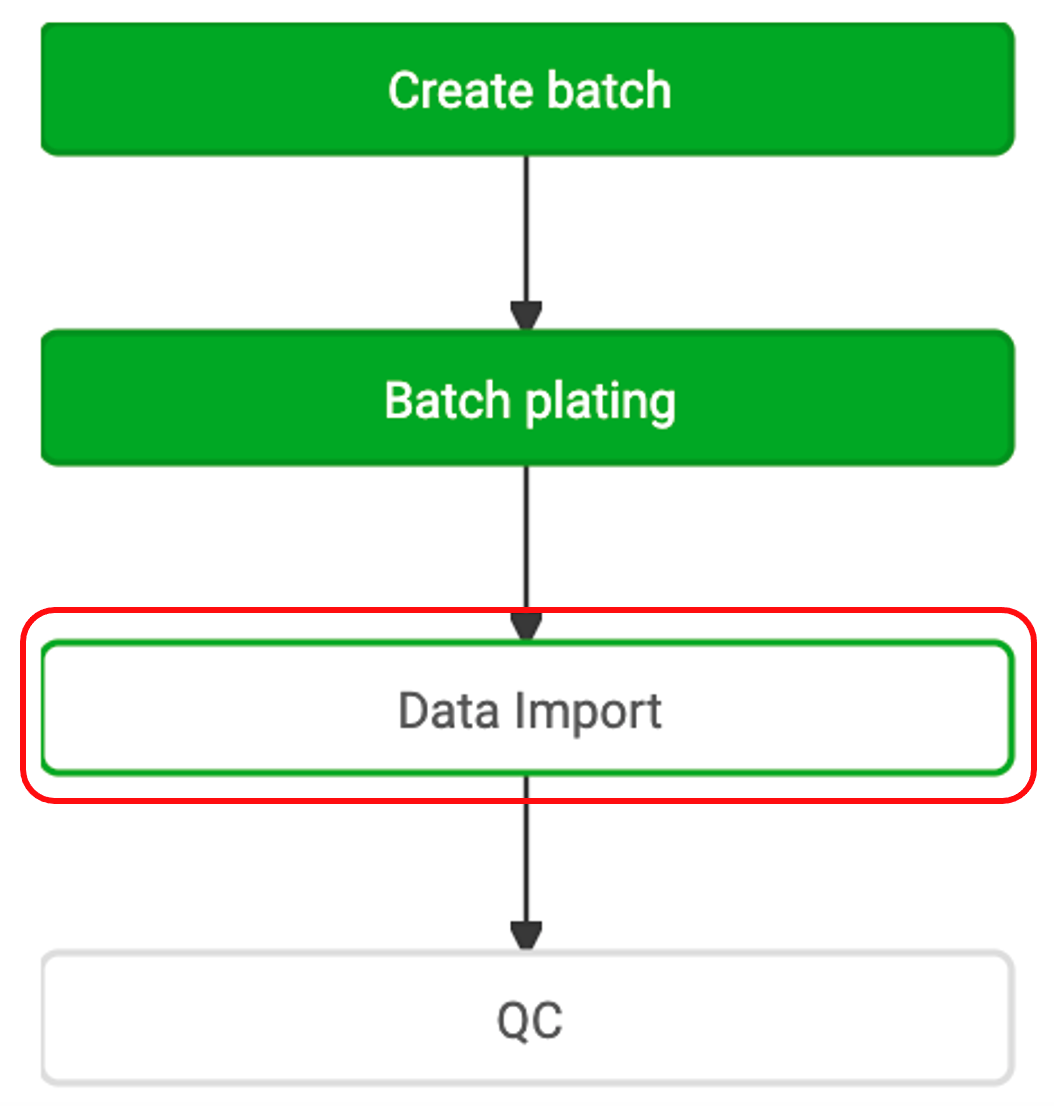
Workflows - Data Import
Data Import activity steps allow users to upload data files from their instruments. Metadata about the instruments used and run details can also be documented at this step. In some workflows, such as Covid and Infectious Disease, Ovation Lambda will parse the data to deliver to the next activity step, Quality Control (QC).
1. In the workflow, click “Data Import”
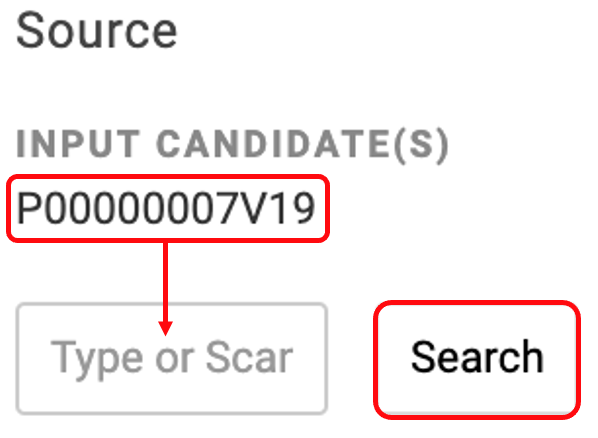
2. Copy and paste the input candidate container ID into the source container search bar, then click search. The source container will display after search
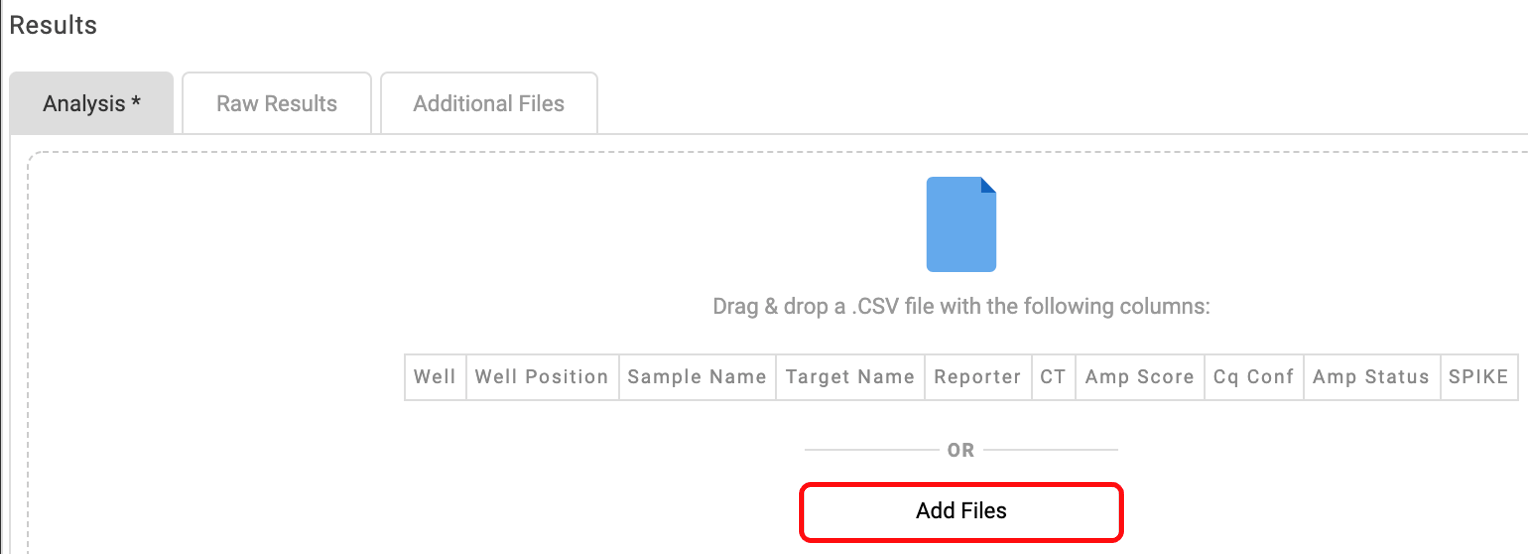
3. Open your instrument data file. Check that the file has all the matching column headers. Then make sure to save your file in the appropriate file format (TXT or CSV). The required column headers and required file type are displayed in the window under Results
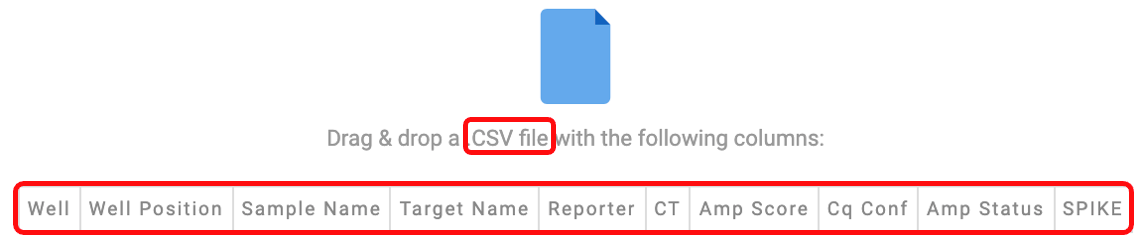
4. Scroll down to Results. Click “Add Files” or drag and drop your datafile to upload
5. Check for the green “Validated successfully” box
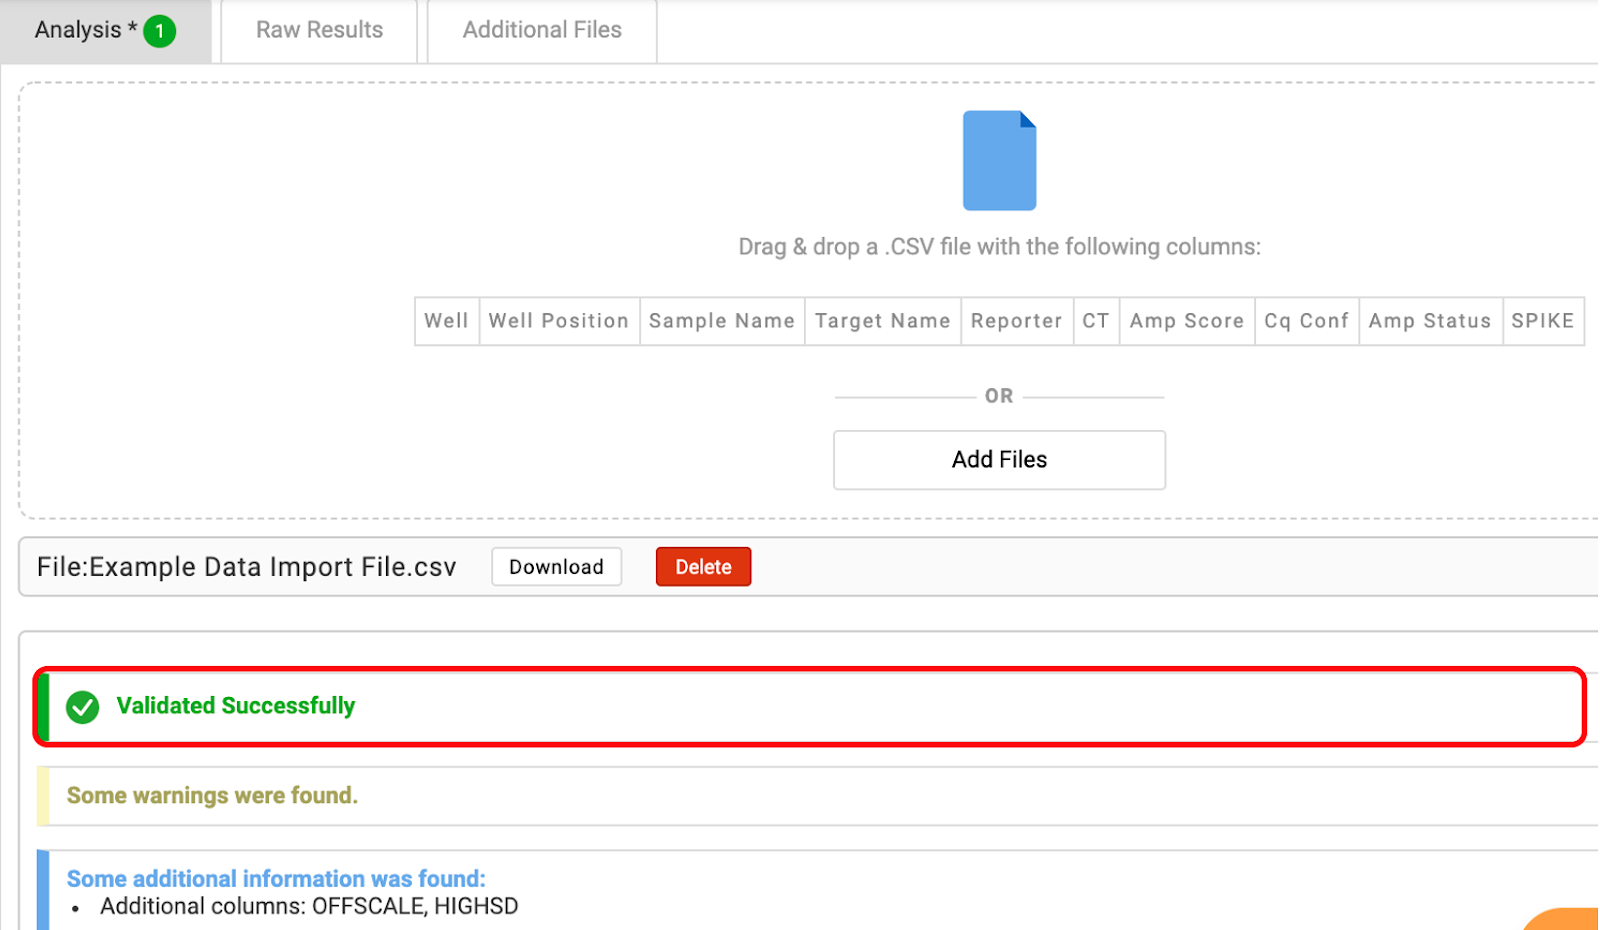
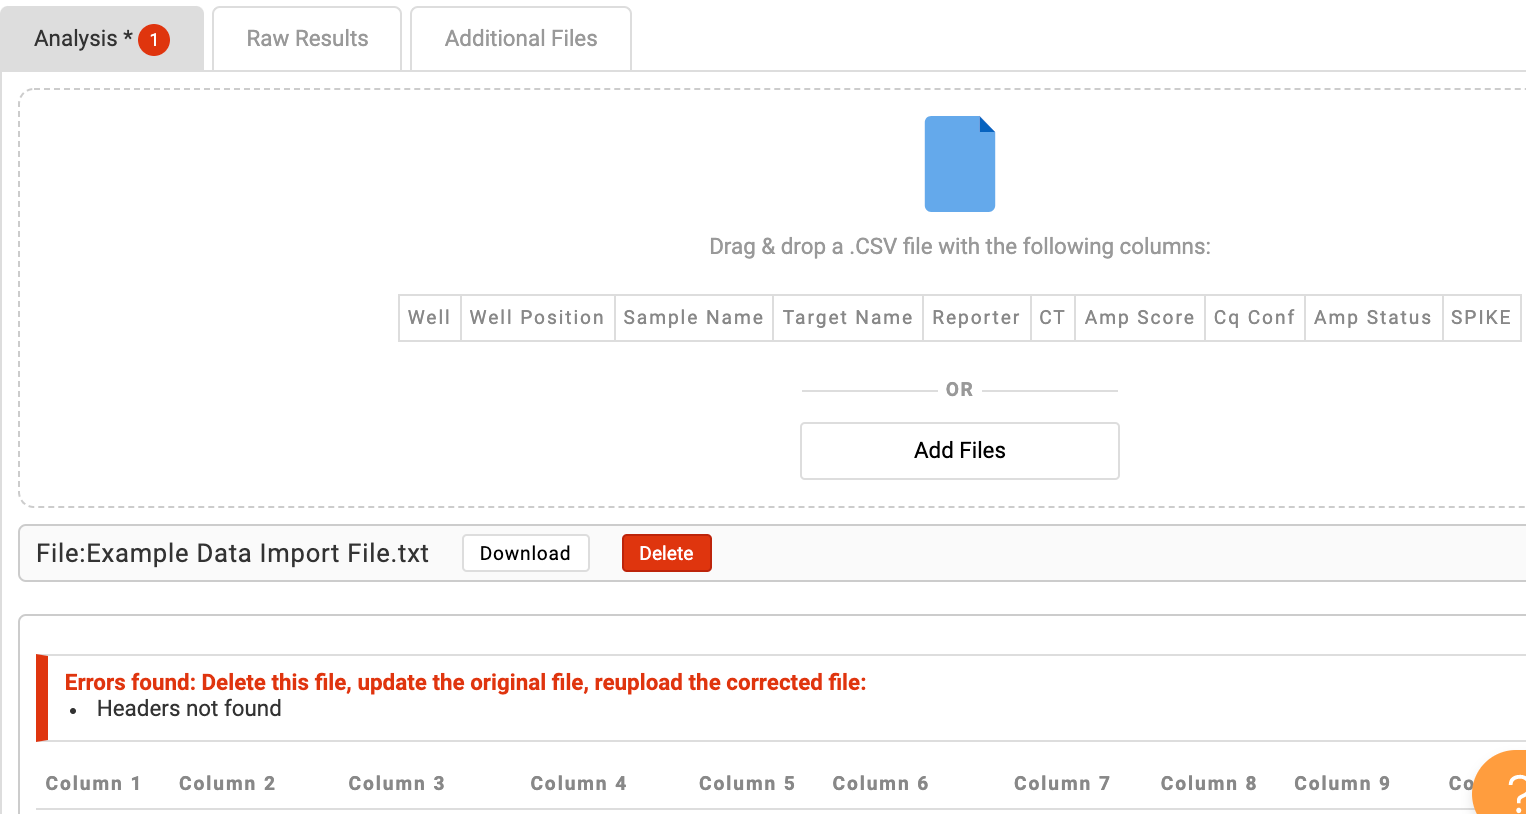
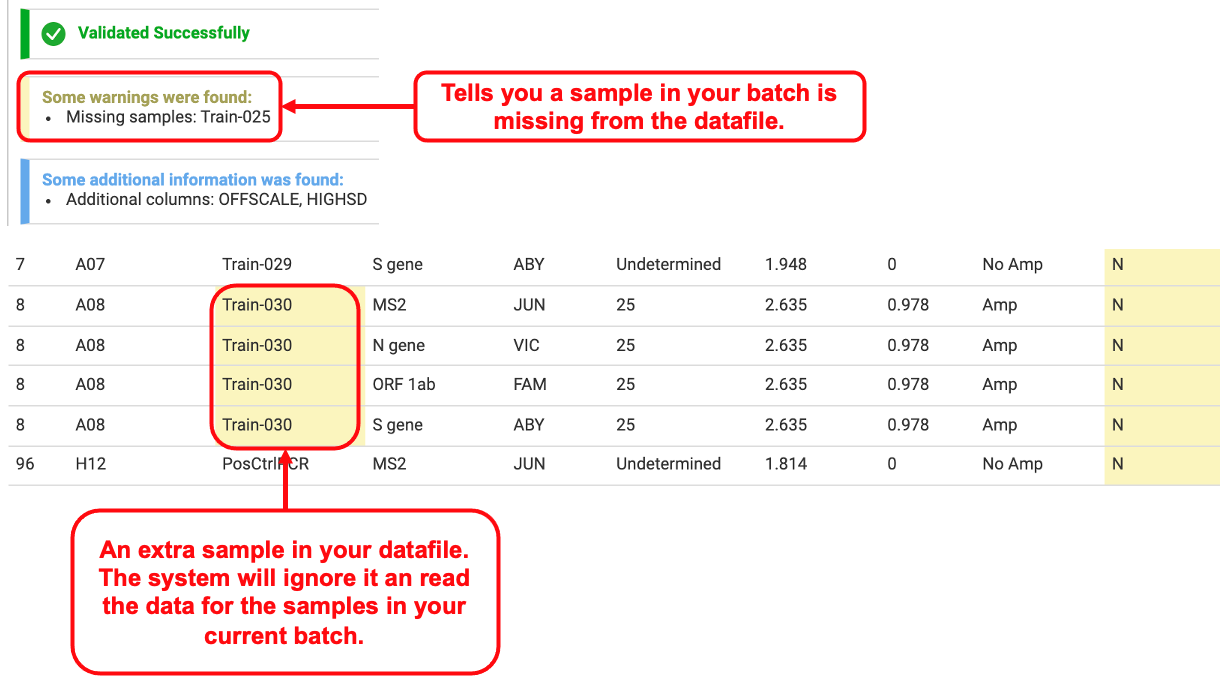
Note: If you try to upload a file without the displayed column headers OR with a different column format, then you may get a red error box. If you get a red error box, click the red delete button to remove the file. Amend the errors in your file, then upload the corrected datafile. Yellow or blue boxes indicate discrepancies, but do not prevent upload.
6. Optional: Raw Results or Additional files can be uploaded by clicking into those respective tabs
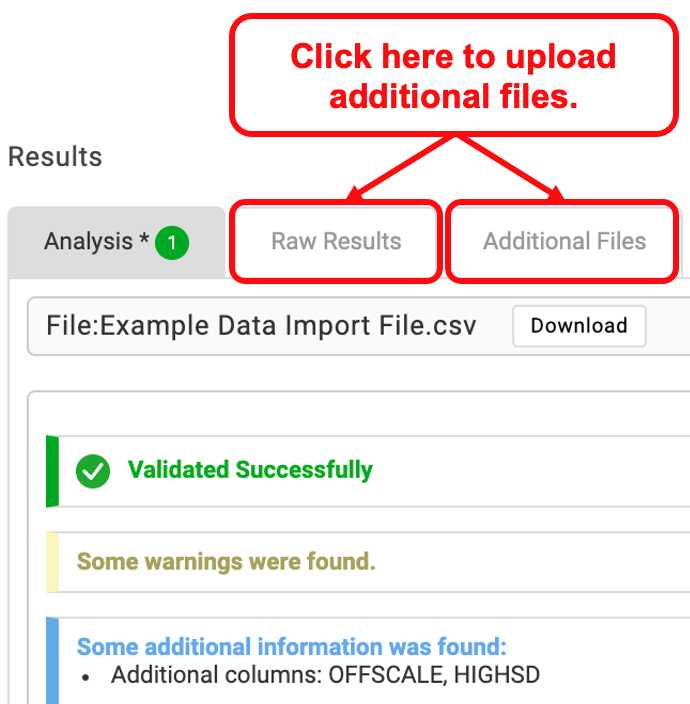
Note: No results will be generated for files uploaded to Raw Results or Additional Files as these tabs are not parsed through Ovation Lambda. Only the Analysis tab will contain data file(s) that will be parsed and generate results.
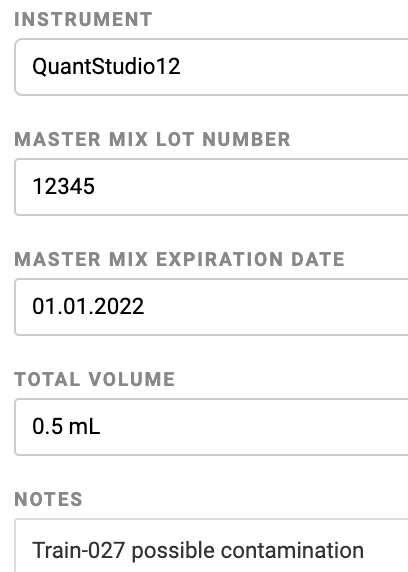
7. Optional: Scroll down beneath the results window and enter any relevant metadata you would like to capture or Notes in the provided boxes
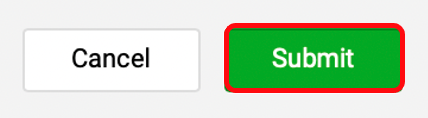
8. Scroll up and click the green “Submit” button, then click “Return to Workflow”