Online Ordering Full Guide
This guide describes how to place online orders from the Provider Portal. For a condensed version of these instructions, please read our Online Ordering Instructions - Quick Guide. Please read our other knowledge base article to learn how to Access Patient Reports.
Note: To place orders online following the steps below, we need to set-up your account first. If you are not able to log in please contact us. We will send you an email with a link to set up your login and password. See the Portal Account Login article to set up your credentials and you’ll be all set to place an order as described below.
If you have trouble placing an order, please contact us using the “Contact Support” email button at the top of the Portal screen.
The following sections are contained in this guide. Read the entire guide or skip to your section of interest using the links below.
- Provider Information
- Requisition Information
- Save Draft Order
- Secondary Provider
- Supplemental Documents
- Samples
- Test(s) to be performed
- Patient Information
- Billing Information
- Medication
- Diagnosis/ICD-10 Codes
- Edit a Draft Order
- Submit the Draft Order
- Electronic Signature and Order Submission
Login to the Provider Portal at portal.ovation.io
From the Orders page, click the “Add Order” button

Completing the Order Form
Note: Fields marked with an asterisk (*) are required to save the order.
Provider Information
1. Select the Provider Account name
2. Select the Provider (Physician)
3. Select the test Order Form

Note: If you are a Provider Contact for multiple providers, make sure to select the correct Provider Account from the first drop-down menu.
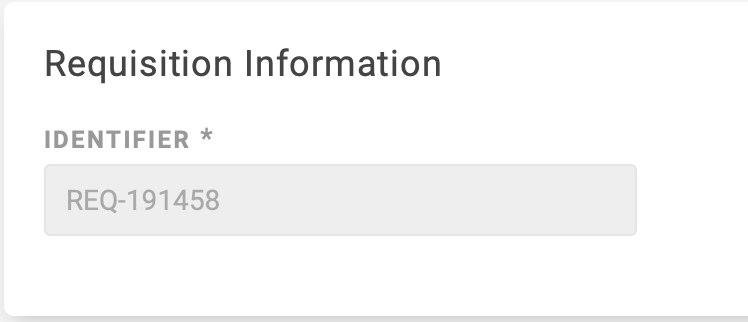
Requisition Information
The Identifier field of the Requisition Information section might be pre-populated in the gray box as shown below. Alternatively, type in or scan the Identifier.
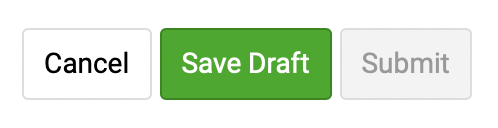
Save Draft Order
If the “Save Draft” button is green, you may save your order as a draft and come back later to complete the order and submit it for processing. The minimum required fields for Save Draft are as follows:
- Provider Account
- Provider
- Order Form
- Container Type (this may default to tube)
- Container ID (If the order form contains a “Samples” section)
To locate your draft orders, filter by “Draft” status on the Orders page.
Secondary Provider (this section may not be present in your order form)
1. Select the Secondary Provider Account (i.e., Pathology Lab)
2. Select the Secondary Provider
3. If not in the drop-down list, create a new Secondary Provider account with the green button

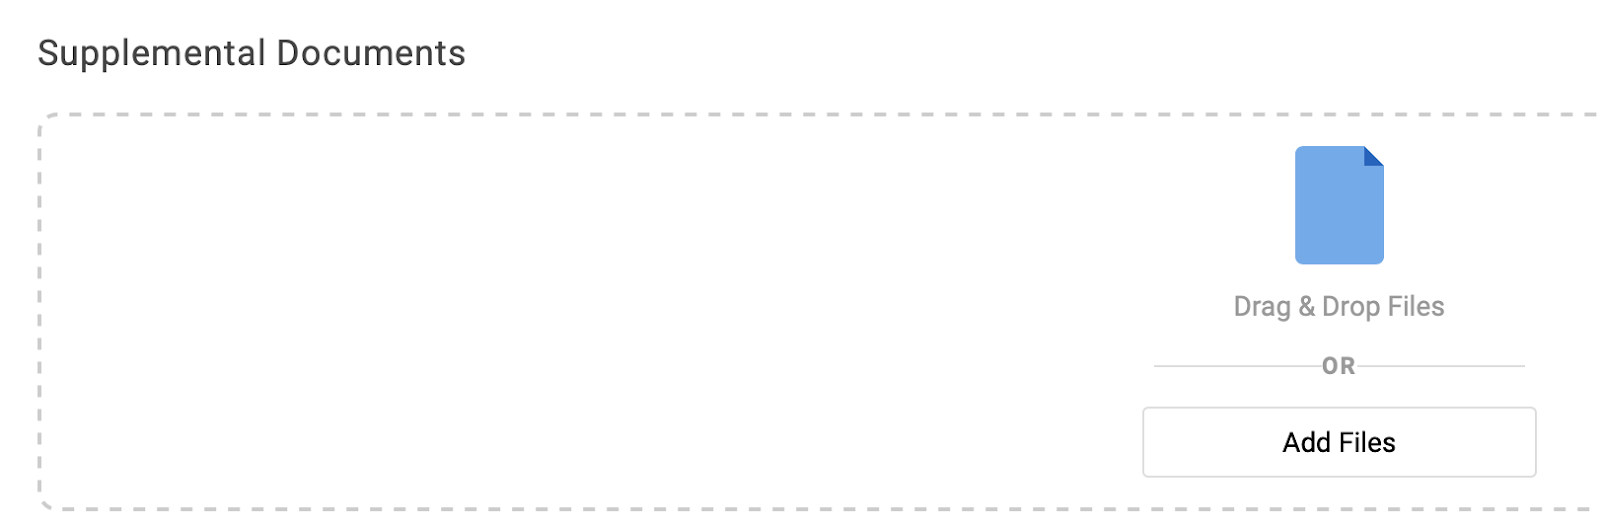
Supplemental Documents
- Attach any additional documents, such as insurance forms, to the order.
- Drag and drop the document into the space provided, or click the “Add Files” button to browse and select files from your computer.
Samples (this section may not be present in your order form)
1. Add the Sample Identifier (or this will auto-populate)
2. Select the Sample Type (will default if only one sample type is permitted)
3. Add the Collection Date and Time (you may need to add ‘am’ or ‘pm’ in the time field and caps lock must be turned off)
4. Add the Collected By name (optional)
5. Select the Container Type (defaults to tube in most cases)

6. Assign the Container ID
Do you want to scan a barcode or special ID for your sample? (i.e., a container ID could be a collection kit barcode you want to scan)
No: Leave the green “Container ID” toggle on,
7. Fill in an optional sample location, and
8. Click the “Assign Container” button

Note: To save your order as a draft you will need to complete the Sample section (but it can be modified at a later time prior to submitting your order).
Yes: Click the green “Container ID” toggle to turn it off, scan or type in your container ID,
7. Fill in an optional sample location, and
8. Click the “Assign Container” button

9. To change the Container Identifier for your sample click the green “Remove Container” button

10. To add a second sample to the order, click “Add Sample”
Test(s) to be performed
Select the applicable test(s) or test panel(s) for the sample(s) being submitted.
Note: Some order forms are configured to show the individual tests, as well as the test panels.

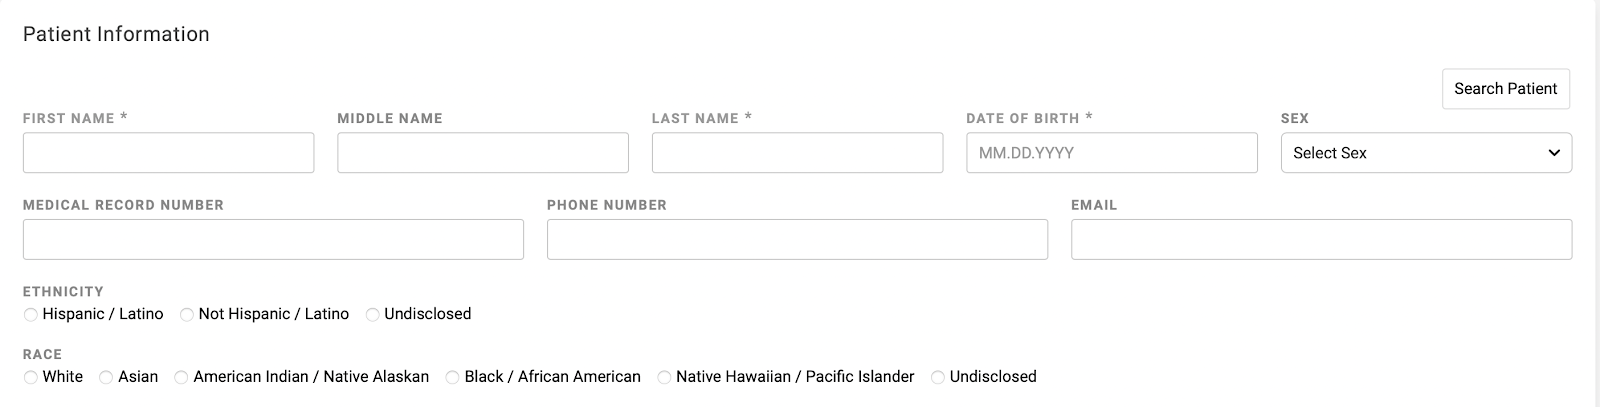
Patient Information
Note: If your browser uses an autofill feature, it could incorrectly populate name and address information to this section. Be sure to check name and address information carefully. To disable the autofill feature in Chrome, see this guide.
To create a new patient
Fill in the required patient fields (fields that are required will be marked with an asterisk)
To search for an existing patient
1. Click the white “Search Patient” button located on the top right of this section
2. Fill in any data field to search for the patient
3. Click the green “Search” button
4. Select the patient from the list provided
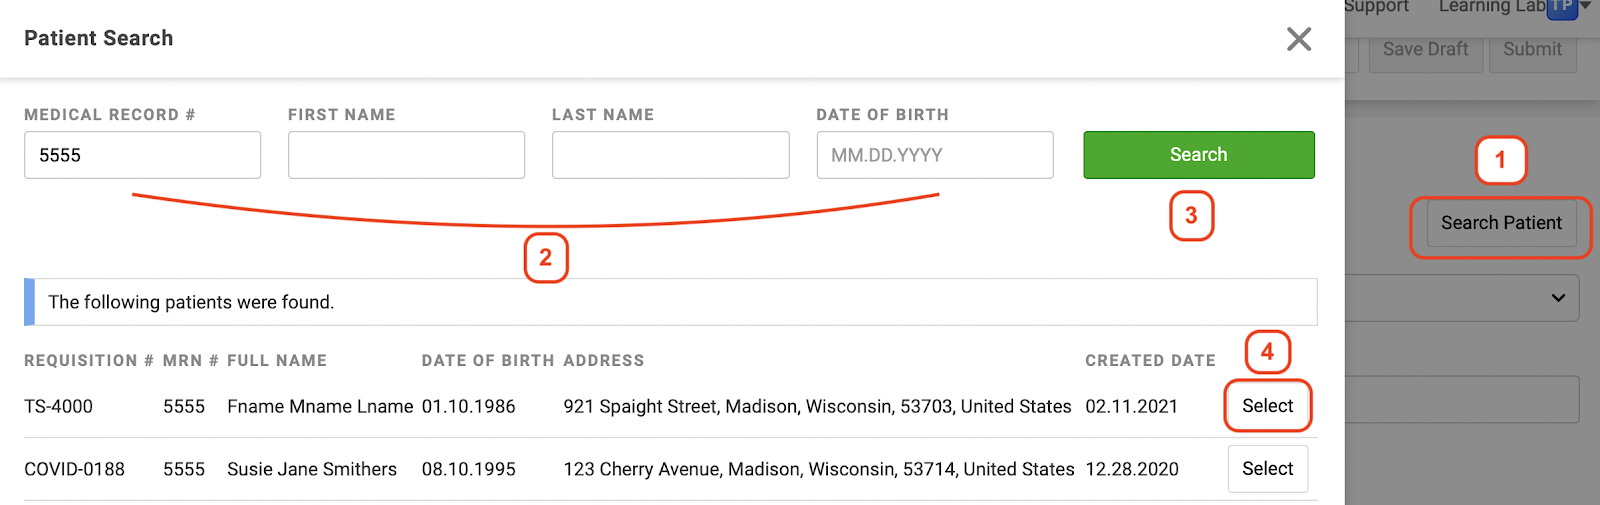
Tip: Selecting an existing patient fills the Patient Information and Billing Information fields with the information already on file for that patient.
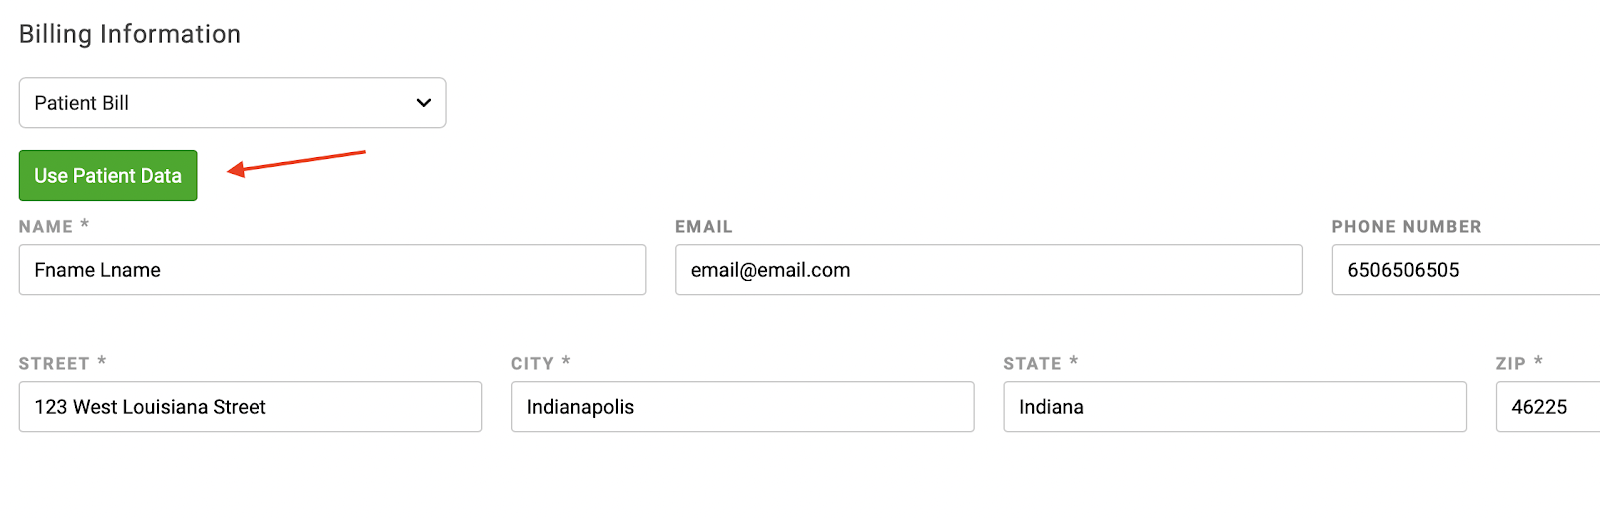
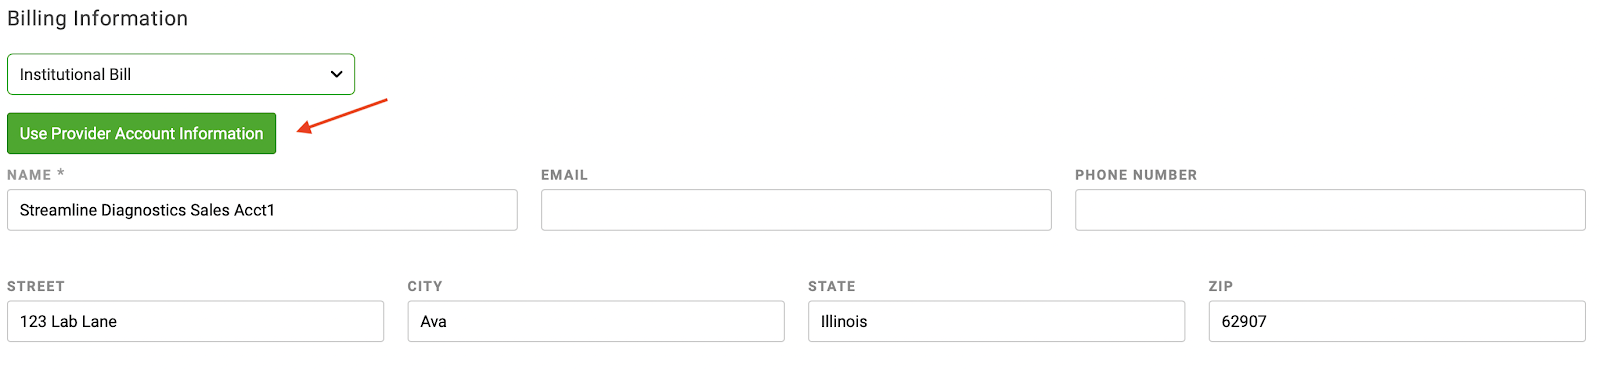
Billing Information
- Select the billing type from the drop down menu
- Click the “Use Patient Data” button to populate fields for Patient Bills
- Click “Use Provider Account Information” to populate fields for Institutional Bill

Medication
- Click the “Search Medications” drop down menu and begin typing the medication name
- Choose the applicable medication from the list provided in the search
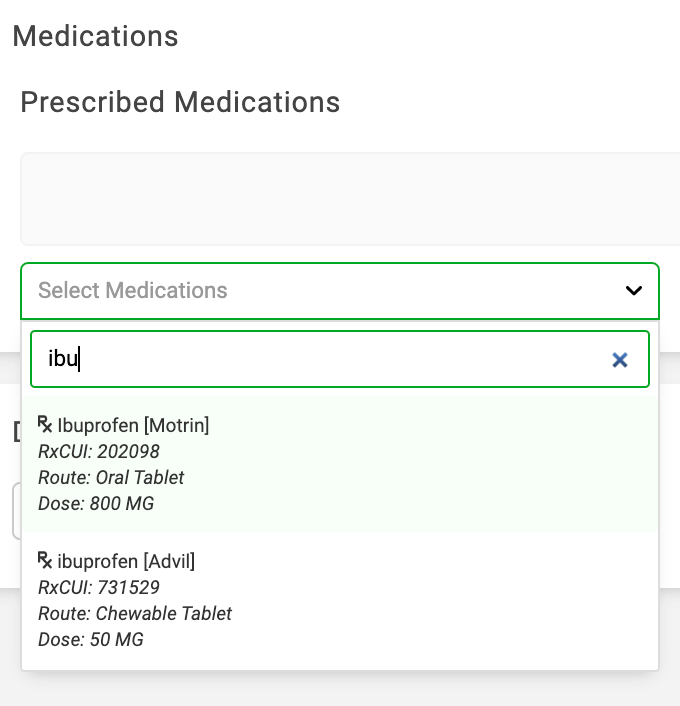
Tip: This field may not be required for all orders. The symbols stand for different medication classes, shown below.

Diagnosis/ICD-10 Codes
1. Click the “Select Diseases” drop down menu and begin typing the disease name or ICD-10 code
2. Choose the applicable diagnosis from the list provided in the search

Tip: This field may not be required for all orders
Note: Billable ICD-10 codes are updated quarterly from the CMS database
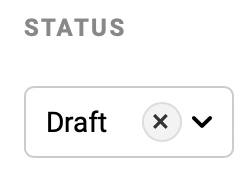
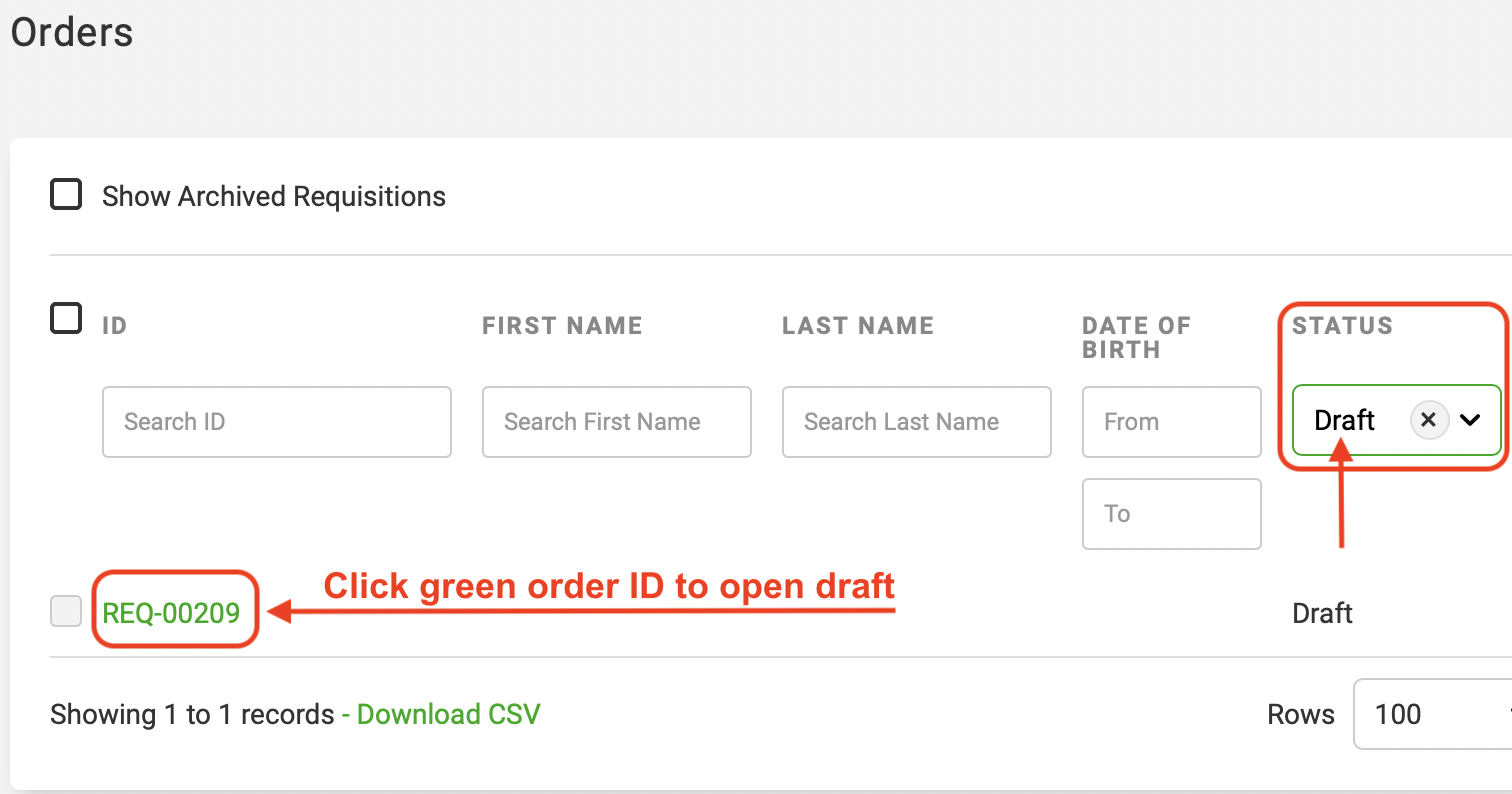
Edit a Draft Order
You can find, edit and complete your draft order by filtering the “Status” field on the Orders page to “Draft.” Select “Draft” from the drop-down, then open your draft by clicking the green Order ID.
Submit the Order
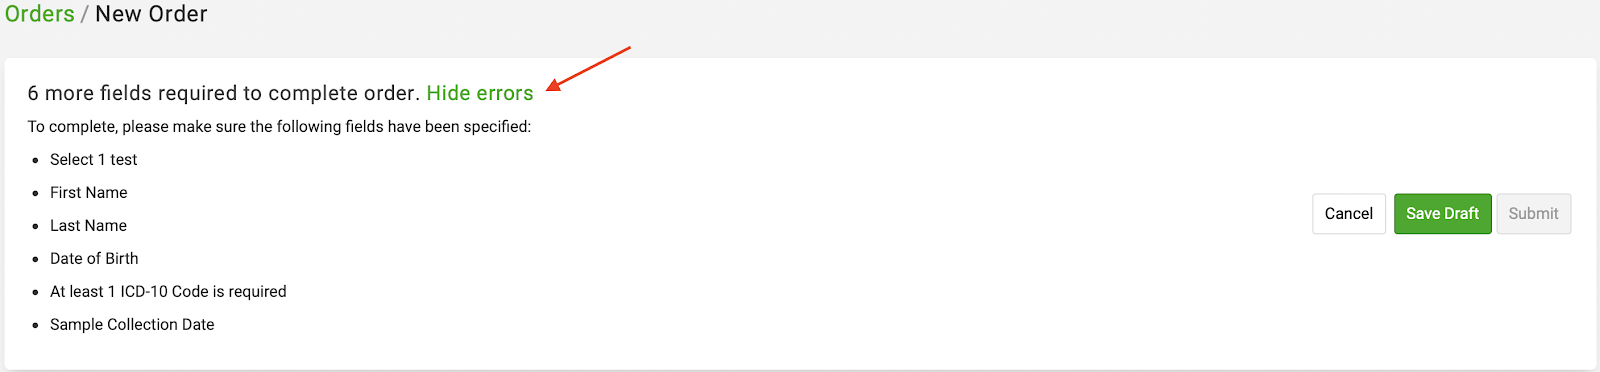
When all required fields have been completed, the “Submit” button will be solid green at the top of the screen.

Tip: If you cannot select the “Submit” button at the top of your screen, click on the green “What’s missing?” link to view missing fields, then click on “Hide Errors” to minimize the screen.

Tip: In some cases, you may select “Save Draft” without completing all required information to submit the order and this will be indicated by the solid color of the “Save Draft” button and the text language at the top of the screen.
After you “Submit” the order, our laboratory will automatically see it in the system.
Note: If your order form is configured to require an electronic signature, you will be required to Sign and Submit.

If needed, you can:
- Click the printer icon to print a PDF of the completed order and send it with your sample or kit.
- Click the “Cancel Order” button in the upper right corner of the screen to cancel the order.

Note: Orders cannot be canceled from the Portal once the laboratory has received the sample. Your order will be in “Held” status until we receive your sample. Please contact the laboratory directly if an order needs to be canceled after it has been received. The laboratory support email is listed on the top right of the Portal.
Electronic Signature and Order Submission
Your order may require an electronic signature (E-signature). If an E-signature is required, authorized users will be prompted to sign the order once all required fields have been completed.
Note: If you are unable to sign your order, you may not be authorized as a Provider or Provider Delegate in our system.
Individual Order
If you are authorized to sign Order Forms, you will see the Sign And Submit button after completing all required fields on the Order Form and saving.
1. Click the green Sign And Submit button on your Order form screen

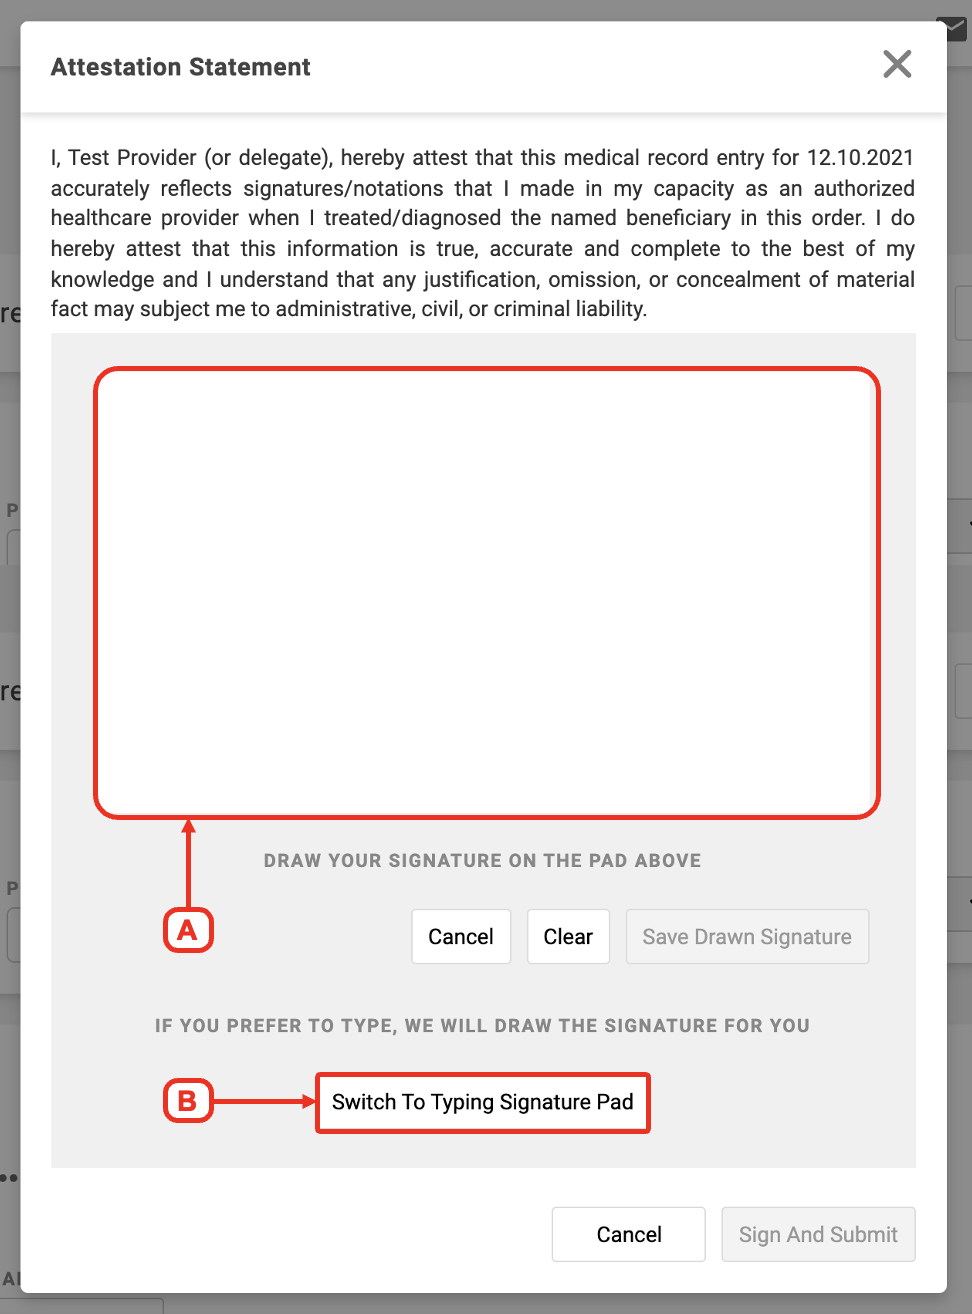
2. Choose your e-signature method
A. Add a manual signature on the Signature Pad
B. Click Switch to Typing Signature Pad
3. Enter your signature in the style of your choice
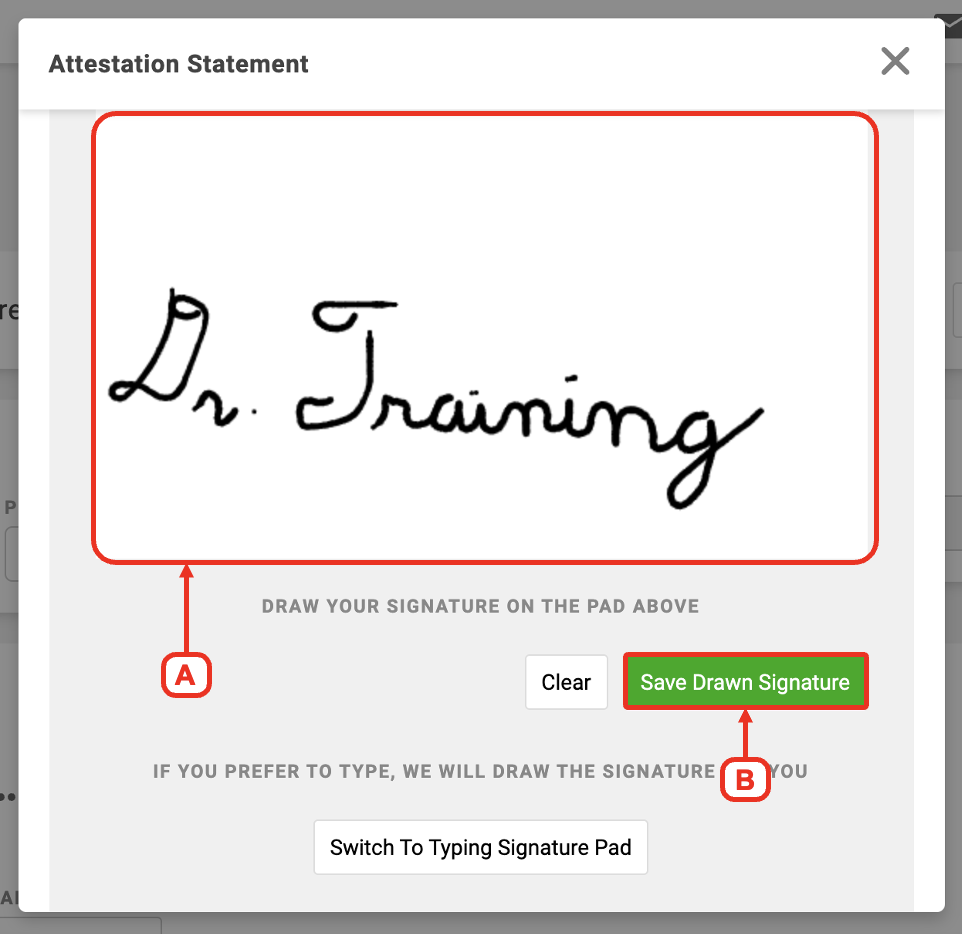
For manual signature:
A. Click and hold down your mouse on the Signature Pad, then drag your mouse to form your signature
B. Click the Save Drawn Signature button
For typed signature:
A. Type the signature that you wish to render into the type box
B. Click your preferred font from the 3 available options
C. Click the green Save Typed Signature box

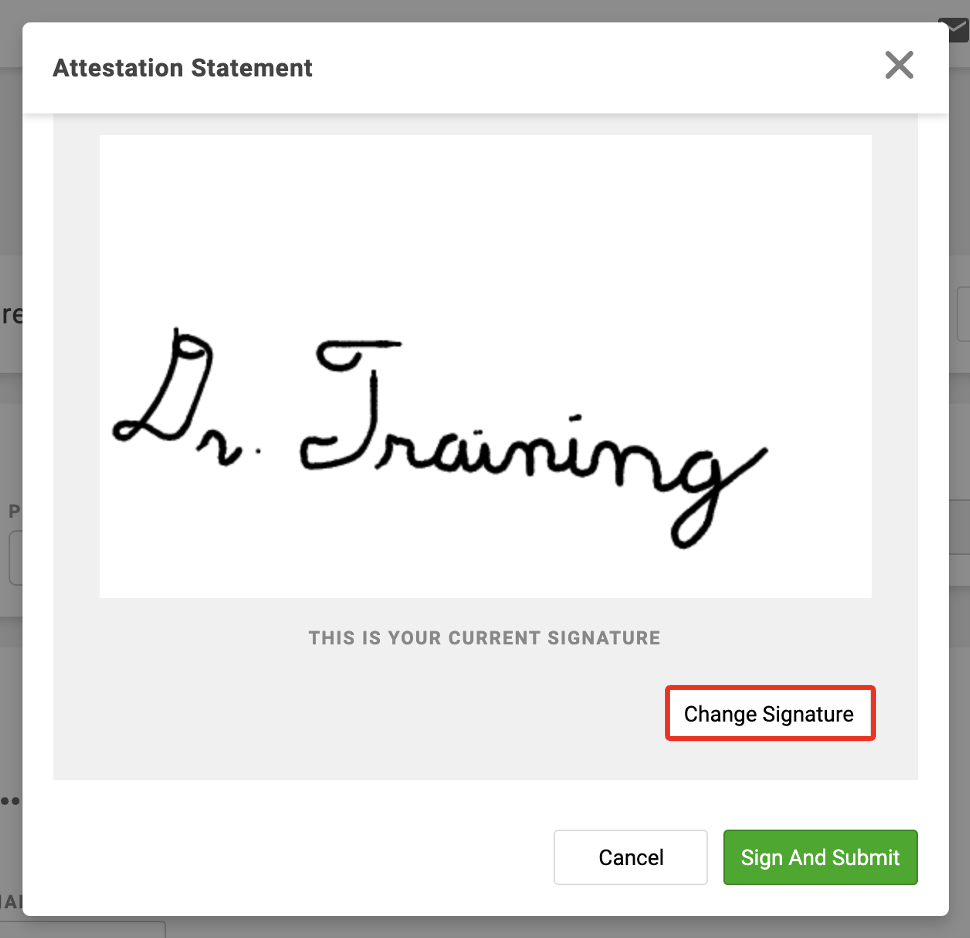
Tip: The most recent signature is saved in the system, whether manually entered or typed. The saved signature will render in new orders. To change the saved signature, click the Change Signature button, enter your new signature, then save the signature. You will then be able to Sign and Submit the order with the new signature.
Note: Users with a Provider or Provider Delegate role may sign their own signature.
4. Scroll down and hit the green Sign and Submit button

Batch Orders
E-Signatures can also be added to draft orders in bulk from the main Orders Page within the OvDx Portal. If you are authorized to sign Order Forms, you will be able to filter for drafts awaiting signature and sign them all at once.
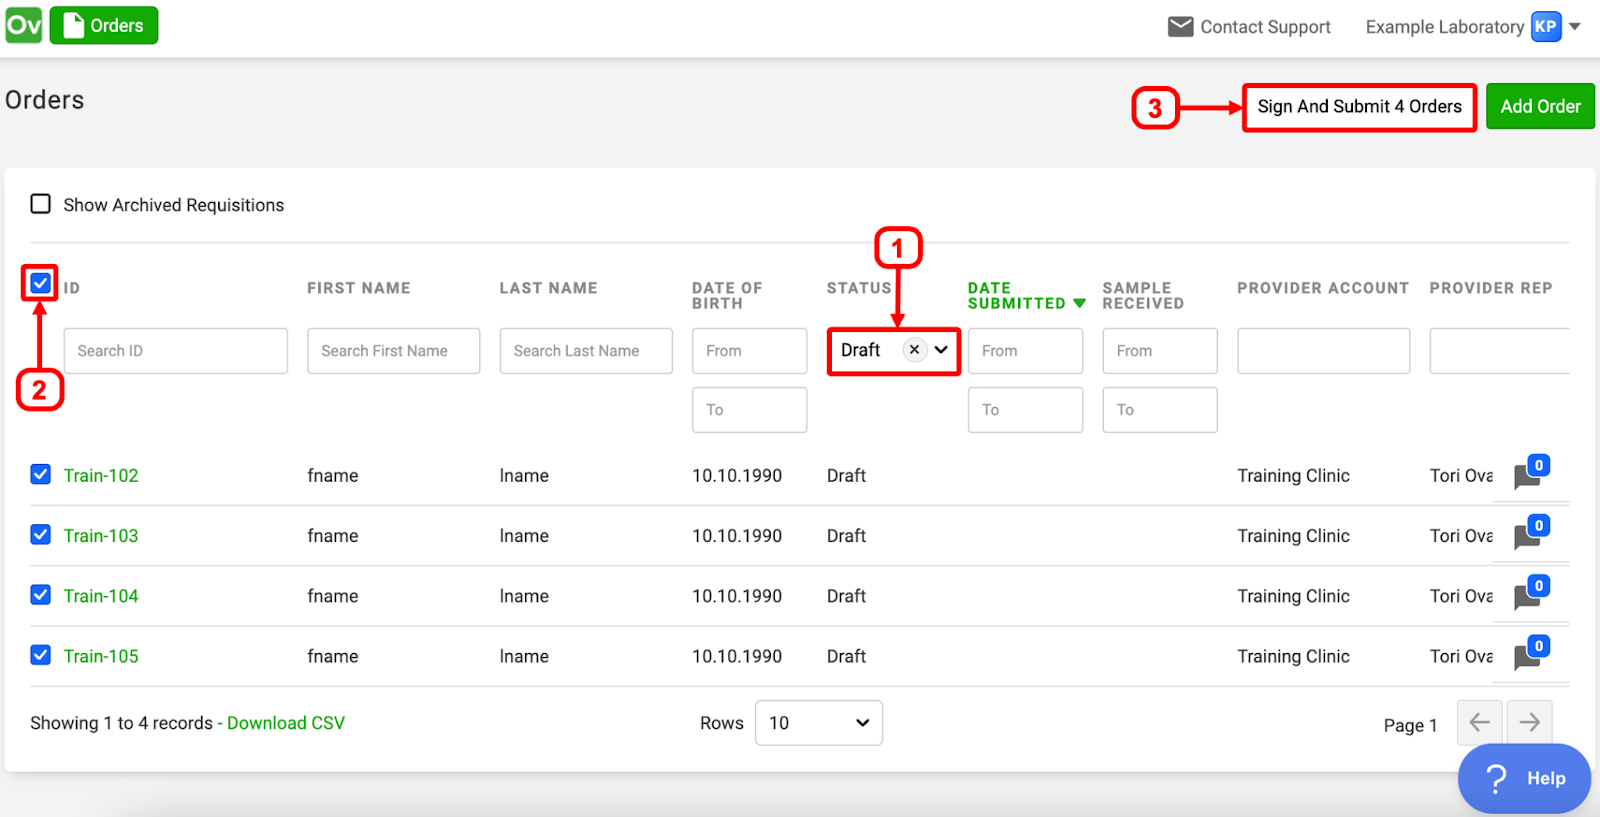
1. Select the Status filter of “Draft” from the available filters on the Orders Page
Tip: The status of “Draft” specifically refers to all Orders that require a signature to be submitted when a signature is required.
2. Click the checkbox next to ID to select all available Drafts
3. Click the Sign and Submit X Orders button
4. Choose your method of e-signature
A. Add a manual signature on the Signature Pad
B. Click Switch to Typing Signature Pad

5. Enter your signature in the style of your choice
For manual signature:
A. Click and hold down your mouse on the Signature Pad, then drag your mouse to form your signature
B. Click the Save Drawn Signature button
For typed signature:
A. Type the signature that you wish to render into the type box
B. Click your preferred font from the 3 available options
C. Click the green Save Typed Signature box
Tip: The most recent signature is saved in the system, whether manually entered or typed. The saved signature will render in new orders. To change the saved signature, click the Change Signature button, enter your signature, then save the signature. You will then be able to Sign and Submit the order with the new signature.
6. Scroll down and hit the green Sign and Submit button
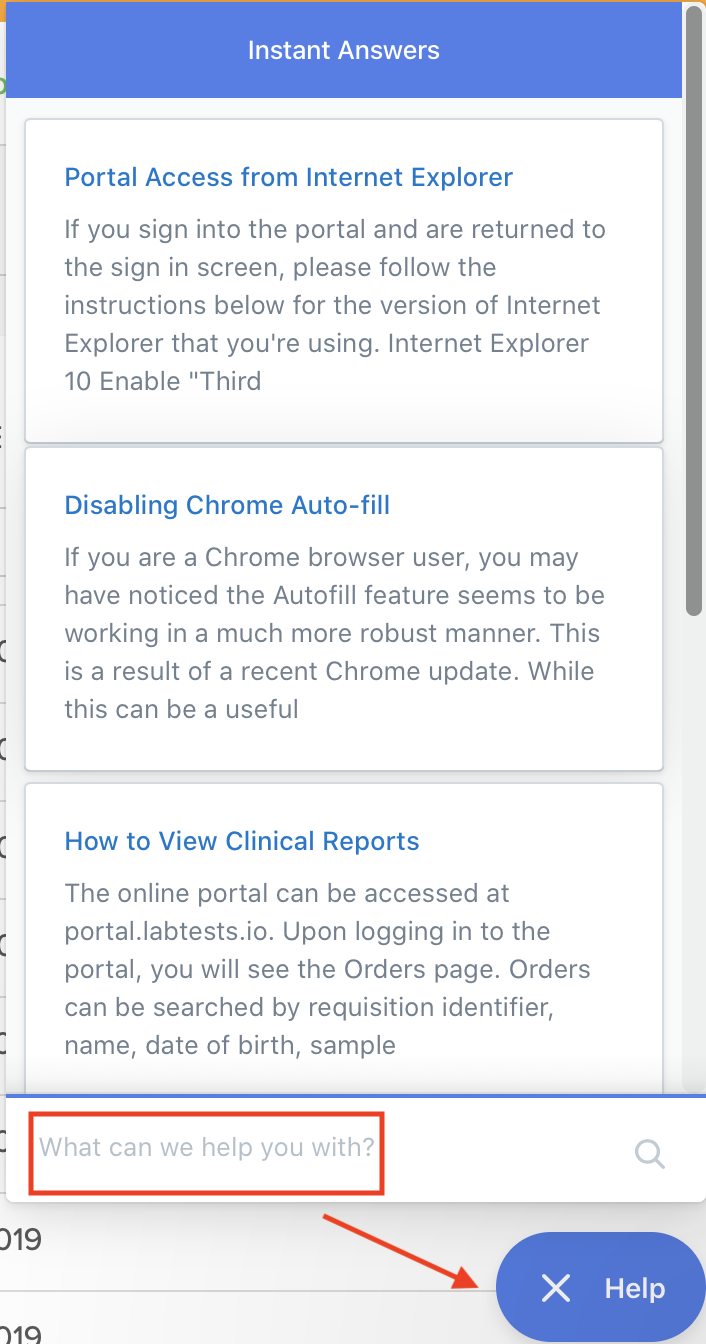
Need Help?
Contact our support team at the email address in the upper right corner of the portal screen or use the blue “Help” beacon at the bottom right to search for answers yourself.