
Batch Report Release
This article describes how to use the Batch Report Release widget on the Ovation LIMS Dashboard. Batch Report Release allows a Report Signer to approve and sign or reject multiple reports at once. This article covers User Permission Settings, Signing Reports in Bulk, Rejecting Reports in Bulk, and Adding Comments to Reports.
- User Permission Settings
- Signing Reports in Bulk (without commenting)
- Adding Comments to Reports
- Rejecting Reports
User Permission Settings
To grant batch release ability to an individual, set their user role to “Write” for the “Report Release” permission.
For more details on how to set user permissions, see the article on Roles & Permissions.
Signing Reports in Bulk (without commenting)
1. Click your logo in the top left corner to navigate to the Ovation Dashboard
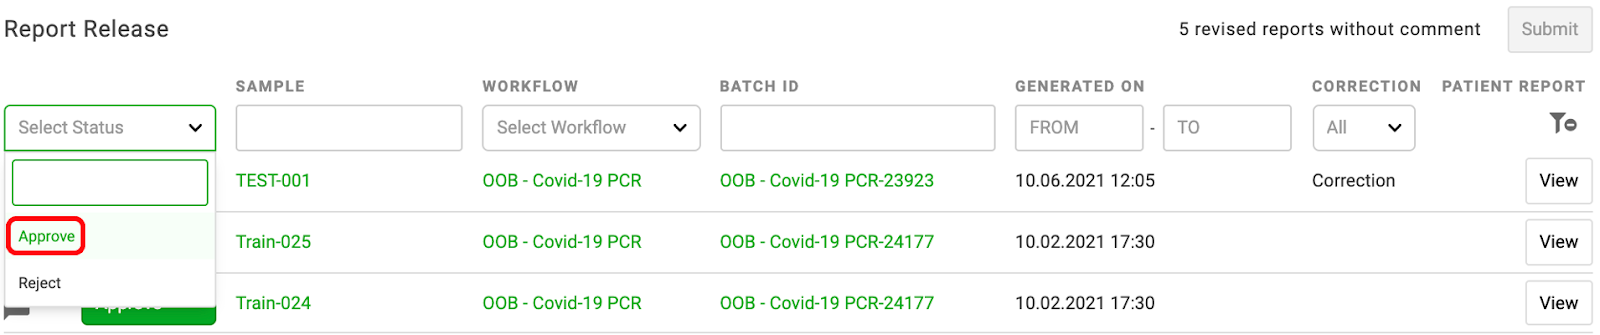
2. In the Report Release section, choose ‘Approve’ from the Select Status drop-down
Note: You may see a blank Report Release window if you do not have the appropriate user permission. Ask your lab administrator to assign you the appropriate user role and/or permission to use Batch Report Release.
3. Filter the available reports so that only the reports you wish to sign and release remain

Note: The Submit button to release reports will remain gray and unavailable if you have corrected reports in your list that do not have a comment. Corrected reports must have an amendment reason submitted as a comment before they can be released.

4. Once you’ve refined your list of reports for release, click the green submit button in the top right of the Report Release window

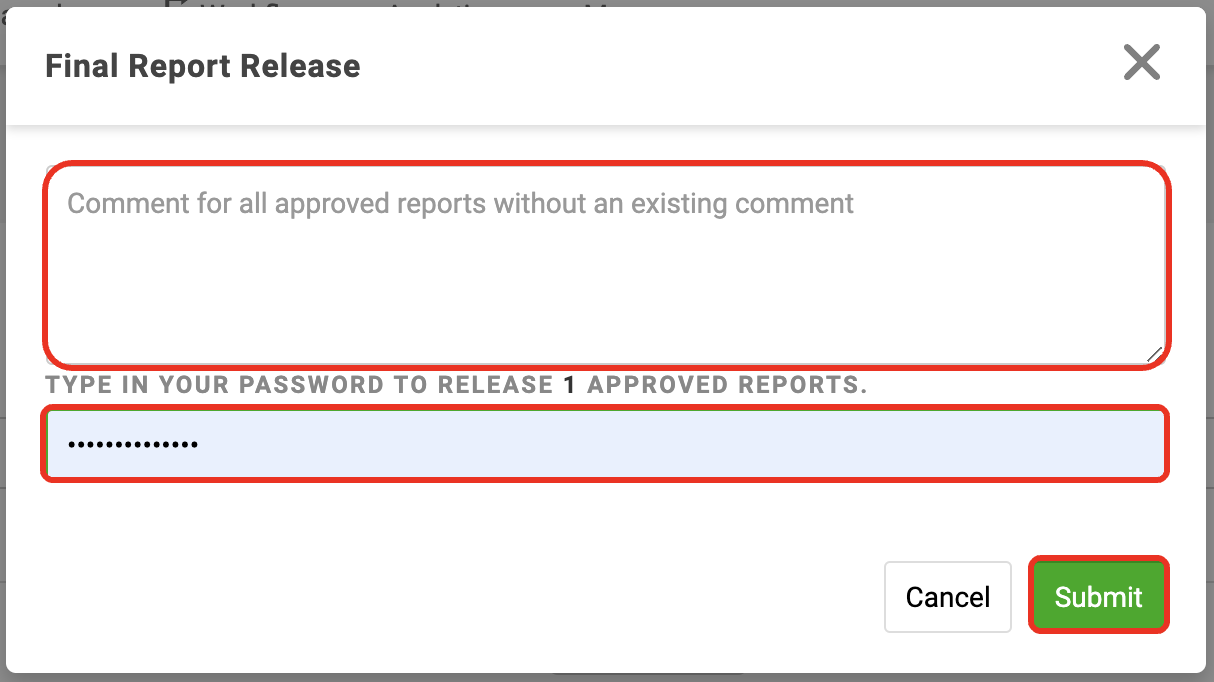
5. Enter your Ovation Password and click the green submit button

Adding Comments to Reports
Comments can also be added to individual or multiple reports using the Report Release widget on the Dashboard. Use the chart below to determine your next step.
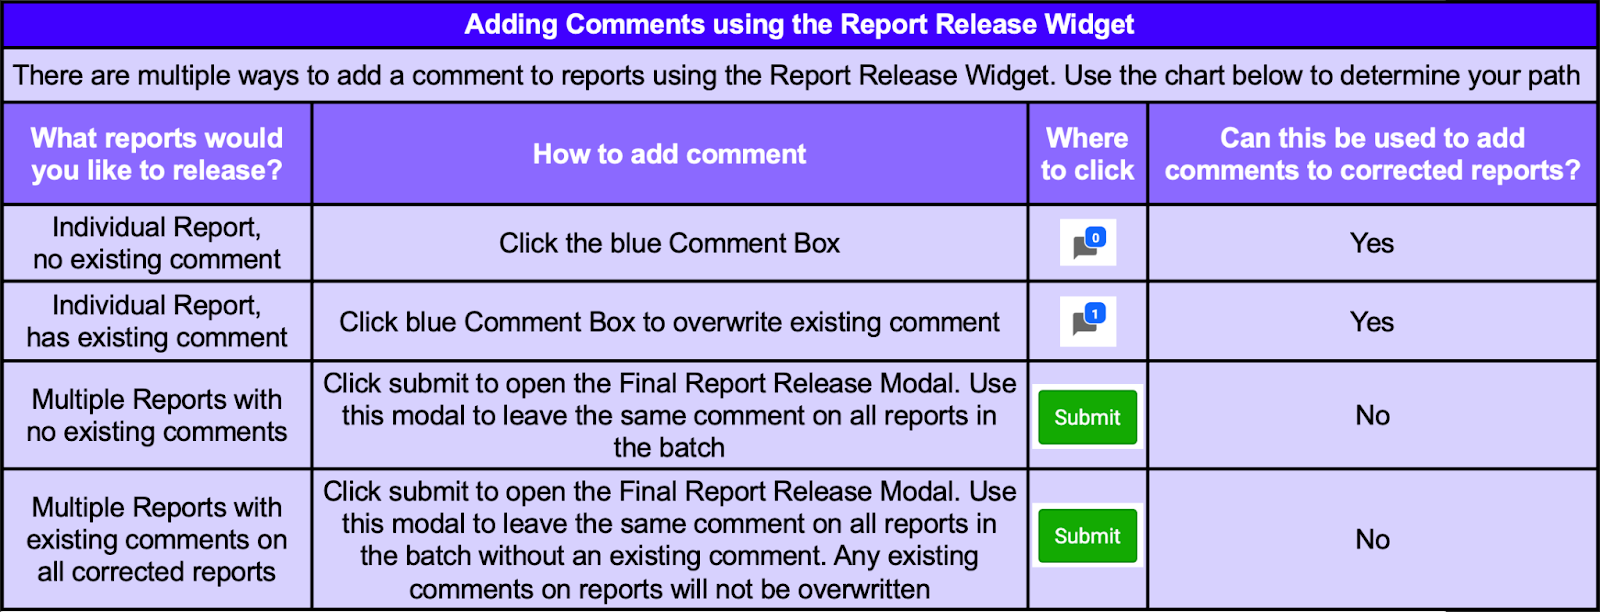
Note: Any existing comment that was entered using the blue Comment Box will override a comment made using the Final Report Release Modal.
Tip: Corrected Reports must have an individual comment in order to be released using the Report Release Widget. If your corrected report needs a comment, add a comment using the blue Comment box to enable report release.
Proceed to Adding Comments to Individual Reports below, or skip to Adding Comments to Multiple Reports
Adding Comments to Individual Reports
WARNING: IF YOU ARE ADDING COMMENTS DO NOT NAVIGATE AWAY FROM THE DASHBOARD. COMMENTS ARE ONLY SAVED AFTER THE SUBMIT BUTTON IS CLICKED AND YOUR PASSWORD IS ENTERED.
1. Use the filters to find your Report of interest
2. Click the Comment box of your Report of interest

3. Enter your comment in the Comment box, then hit the green Add Comment button

Adding Comments to Multiple Reports
1. Filter the available reports so that only the reports you wish to comment, sign, and release remain
2. Click the green Submit button in the top right of the Report Release window
3. Add the comment you want displayed on all reports in the batch into the Final Report Release Modal. Then, enter your Ovation Password and click the green submit button
Rejecting Reports
Reports can be Rejected individually or in bulk by using the Report Release widget. This tool should only be used to remove reports generated in error.
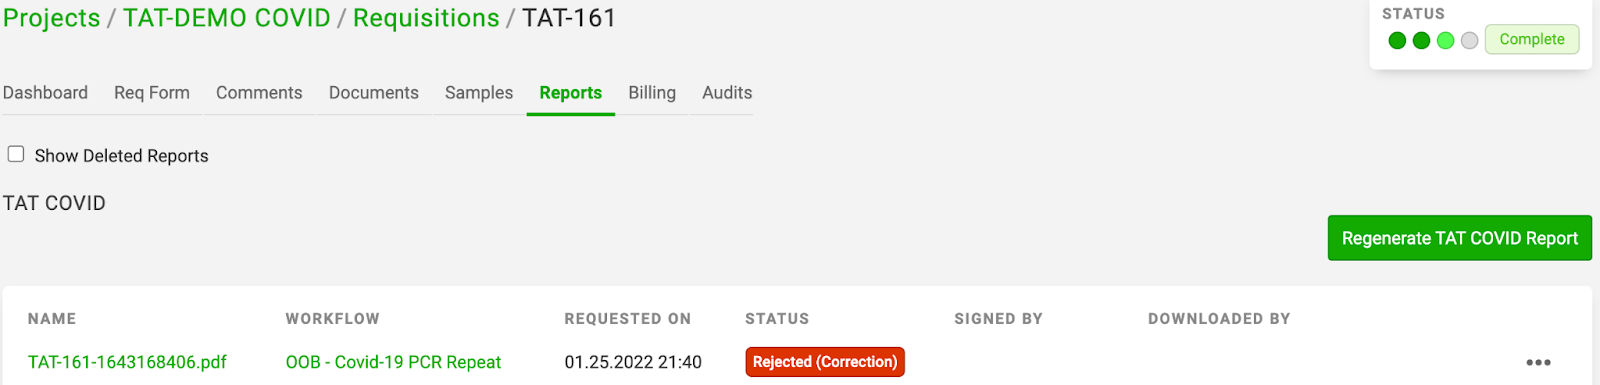
WARNING: Only comments added from blue Comment Boxes will be saved to a rejected report. Comments entered from the Final Report Release Modal box will not be saved on a rejected report. After submission from the widget, rejected reports will be listed under your sample’s report page. The report can be deleted from this page, if deemed appropriate.
1. Optional: Use the filters to narrow your list

2. Click the green “Approve” status of your report of interest

3. Select “Reject” from the drop down menu

4. Repeat steps 2 and 3 for all reports that you want to reject
5. Narrow the list to all reports with a reject status by selecting 'Reject' from the Select Status drop-down

6. Click the green Submit button
