Using Documents
Ovation LIMS offers a feature for storing, organizing, and exporting documents required by the laboratory. Required documents may be SOPs, supplemental information, or other training documents. Ovation also automatically saves your documents to a set of default document folders that can be sorted, searched, filtered, and downloaded. Automatically saved documents include complete reports and raw data files.
This article introduces how to use the Documents feature within Ovation LIMS. Sections include:
- Document Permissions
- Viewing Documents
- Sorting and Filtering Documents
- Downloading Documents in Bulk
- Create a Document
- Adding/Removing a Signature Requirement to a Document
Document Permissions
You can organize your documents by creating new “Document Folders” in Ovation. These act and appear as Folders where documents can be grouped. Document Folders are created through the Roles and Permissions table, which means that a laboratory member’s role(s) determine their access to documents. Please visit the Roles and Permissions article to learn how to add, rename, or delete a Folder.
Tip: If you don’t see the Documents tab in the Dashboard, ask your LIMS Administrator to change your Role’s Permission Level from “None” to the appropriate Permission Level
Viewing Documents
The Documents Hierarchy allows you to view Documents organized at the Global, Project, and Requisition levels depending on where you access “Documents”. Please visit the Roles and Permissions article to learn how to add, rename, or delete a Folder.
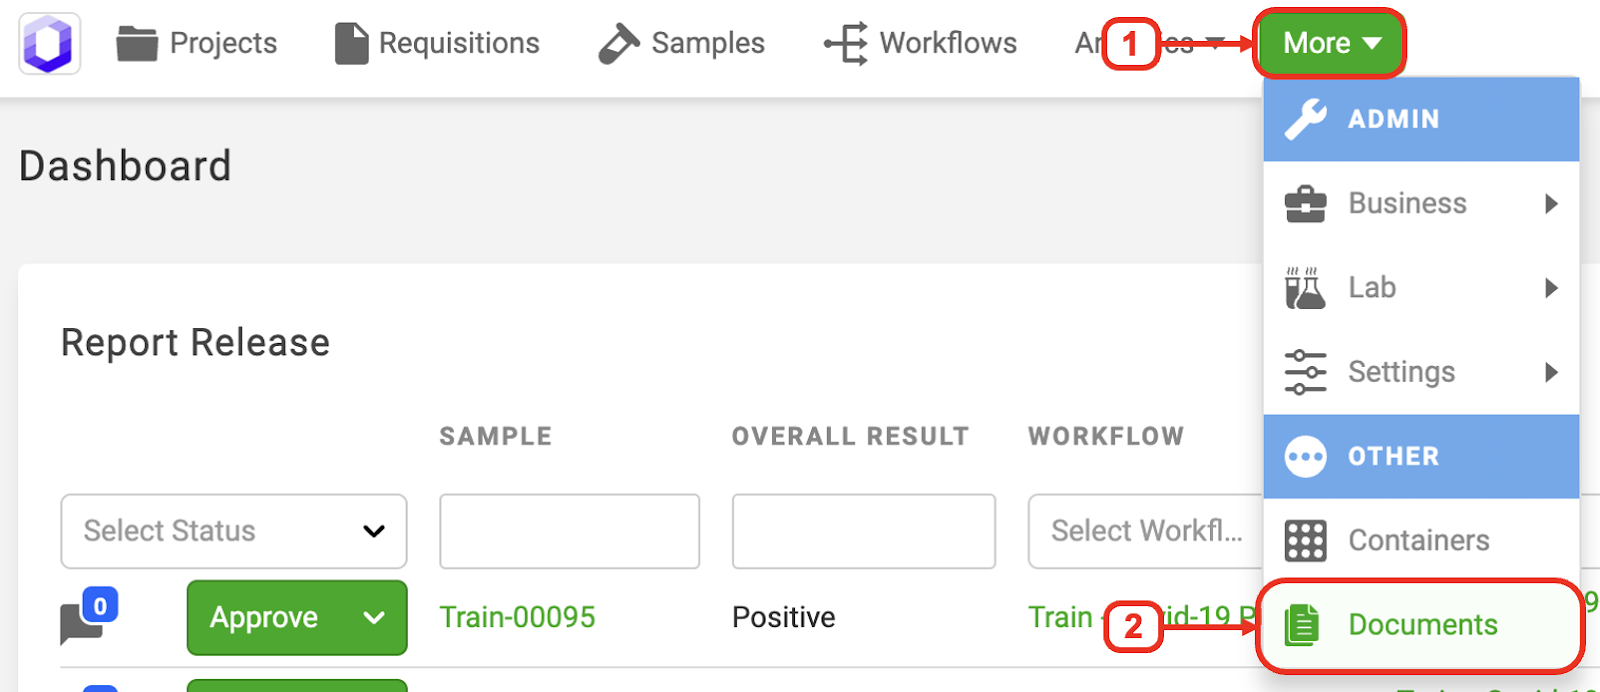
Global View - Click More > Documents to navigate to the Documents Page
Project View -
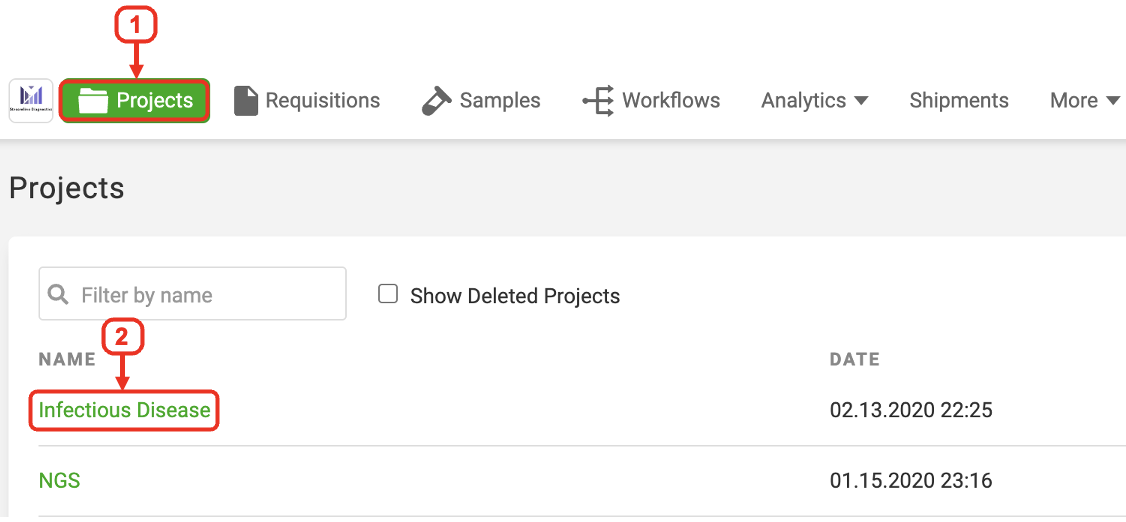
- Click Projects
- Click Project of interest (i.e., Infectious Disease)
- Click Documents to view all documents associated with the project
Requisition View - (Navigate to your requisition of interest and Click Documents - see example below)
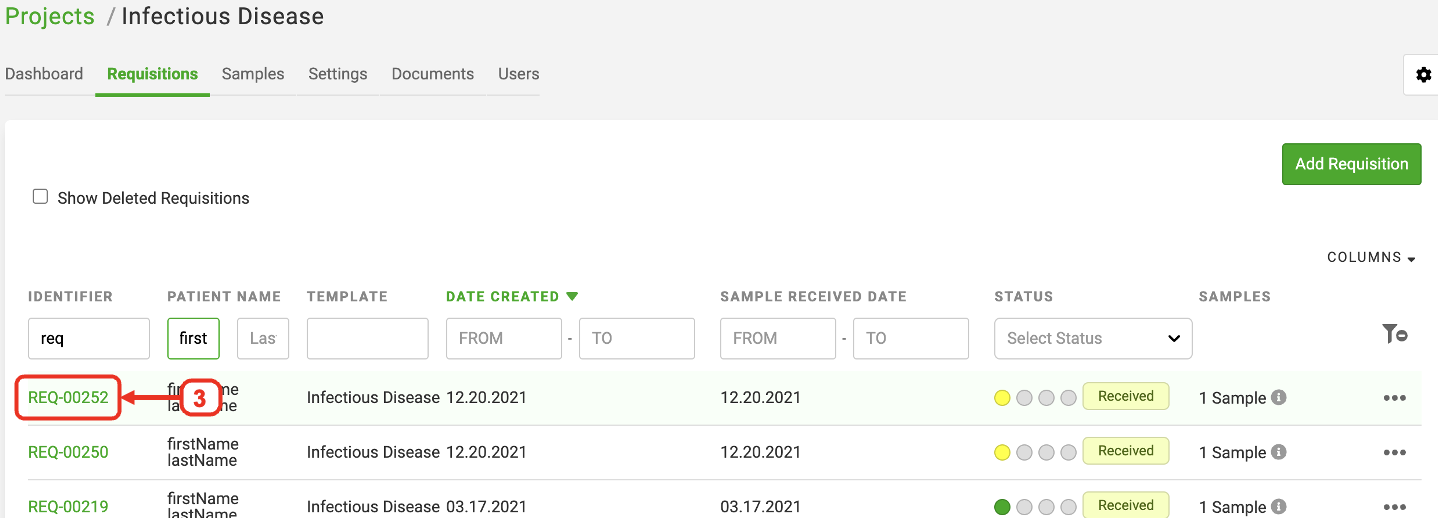
- Click Projects
- Click project of interest (i.e., Infectious Disease)
- Click Requisition Identifier of interest
- Click Documents to view all documents associated with the requisition
Sorting and Filtering Documents
Within a Documents Folder, you can sort by clicking the arrow directly to the right of a column header’s name. You can also filter and search documents using the Search Filters under the appropriate heading:
- NAME = Document/File name
- CREATED BY = Login Name of user that created or generated the document
- LOCATION = Area of LIMS where the document was uploaded
- PROJECT = Project-Specific documents
- REQ ID = Requisition Identifier number of document
- LAST UPDATED = Date Range of document creation or update
Click the ‘Clear Filters’ icon to reset your Search Filters

Downloading Documents in Bulk
Documents can be downloaded in bulk from any Documents Page.
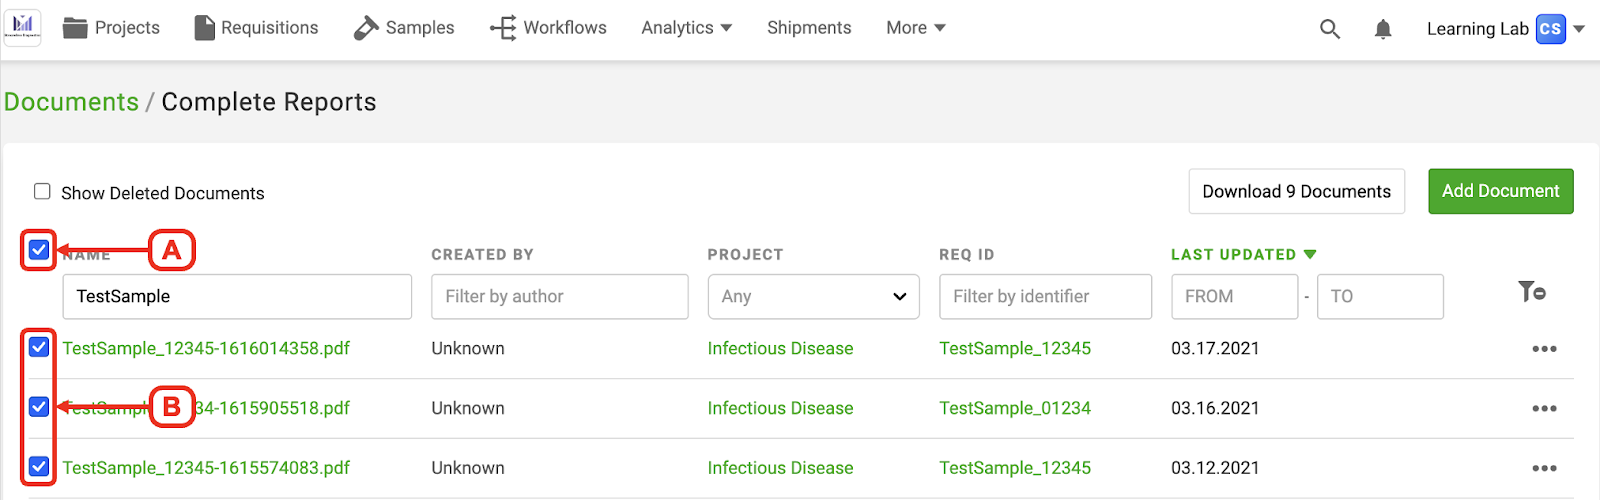
1. Select your documents of interest
A. Click the top check box to ‘Select All’
B. Or click the checkboxes next to the individual documents of interest
2. Click the “Download X Documents” button to generate a .zip file of all documents displayed
Tip: Adjust the number of rows displayed to generate a .zip file of up to 100 documents
Create a Document
1. Navigate to the Documents tab
A. Click “More” in the top bar
B. Click “Documents” in the dropdown menu
2. Choose a Folder to upload your document into
Note: Please visit the Roles and Permissions article to learn how to add, rename, or delete a Folder
3. Click the “Add Document” button
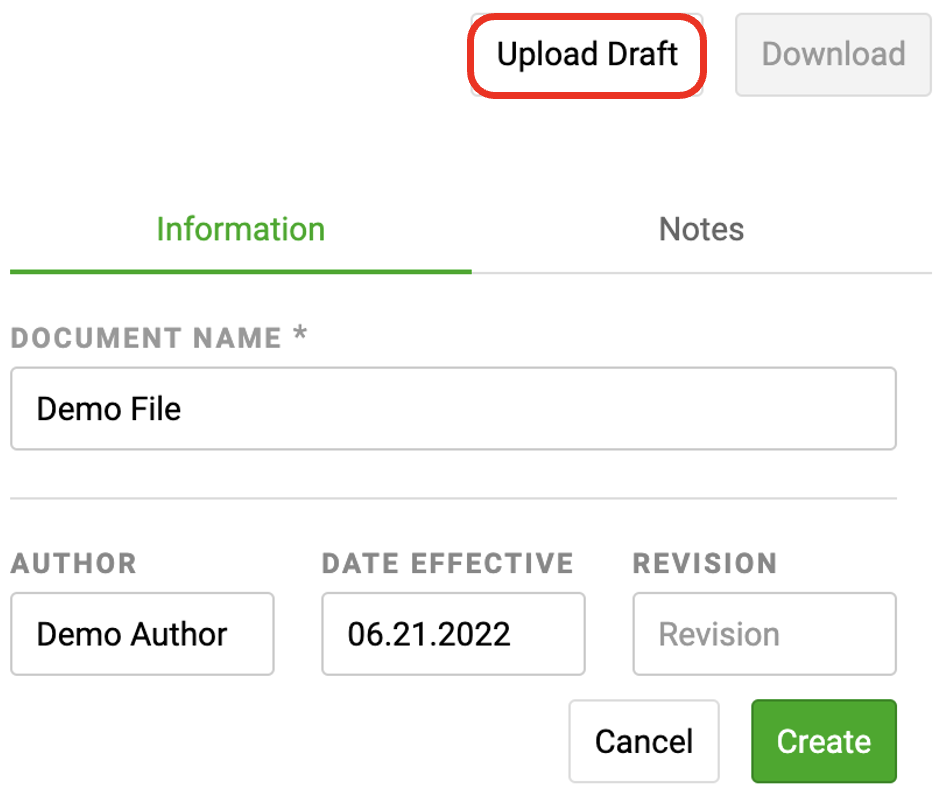
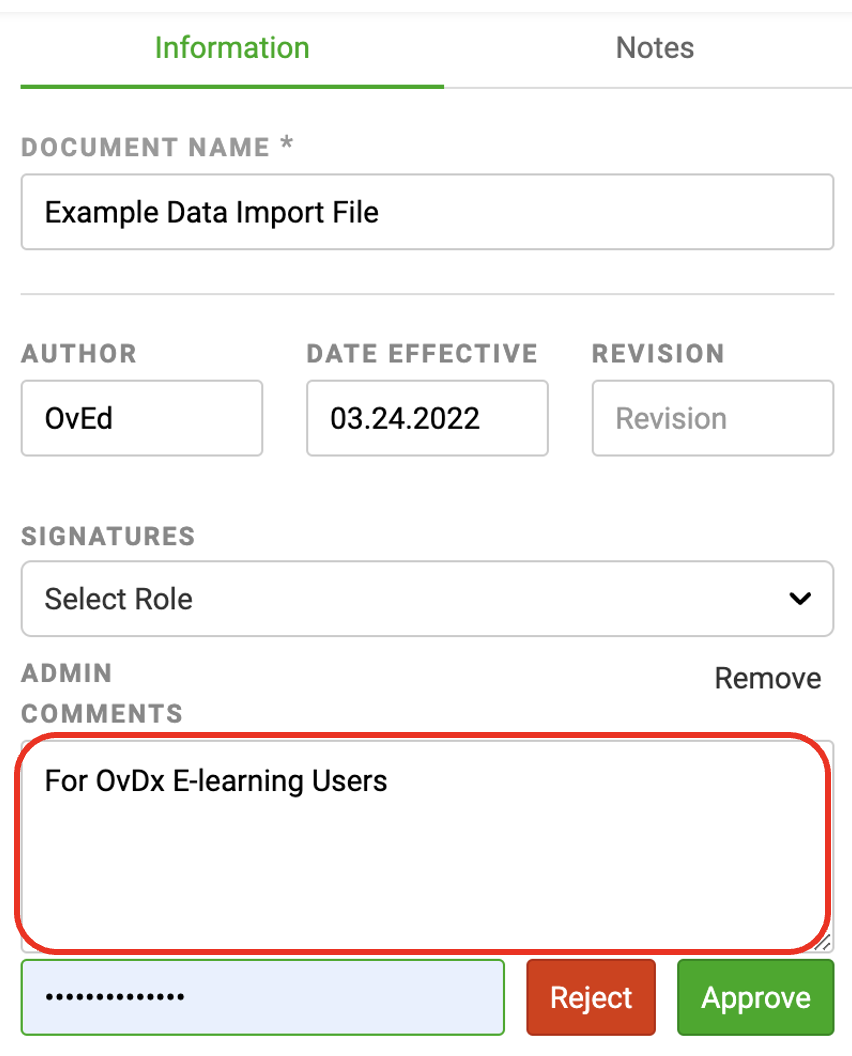
4. Under the Information tab:
A. Add the Document Name
B. Optional: Enter the Author, Date Effective, and Revision status
5. Click Upload Draft
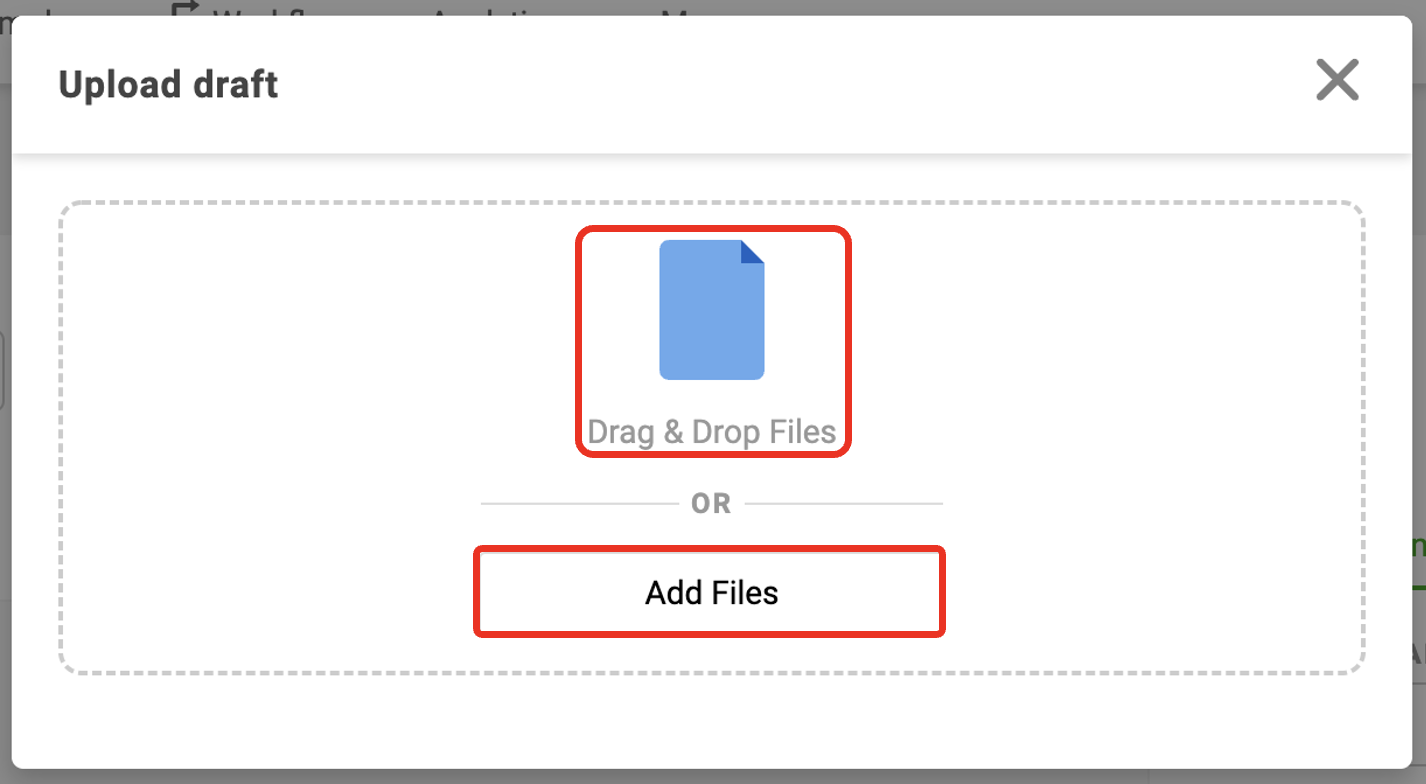
6. Drag and drop, or click “Add Files” to upload your document. The document will display on the page upon upload.
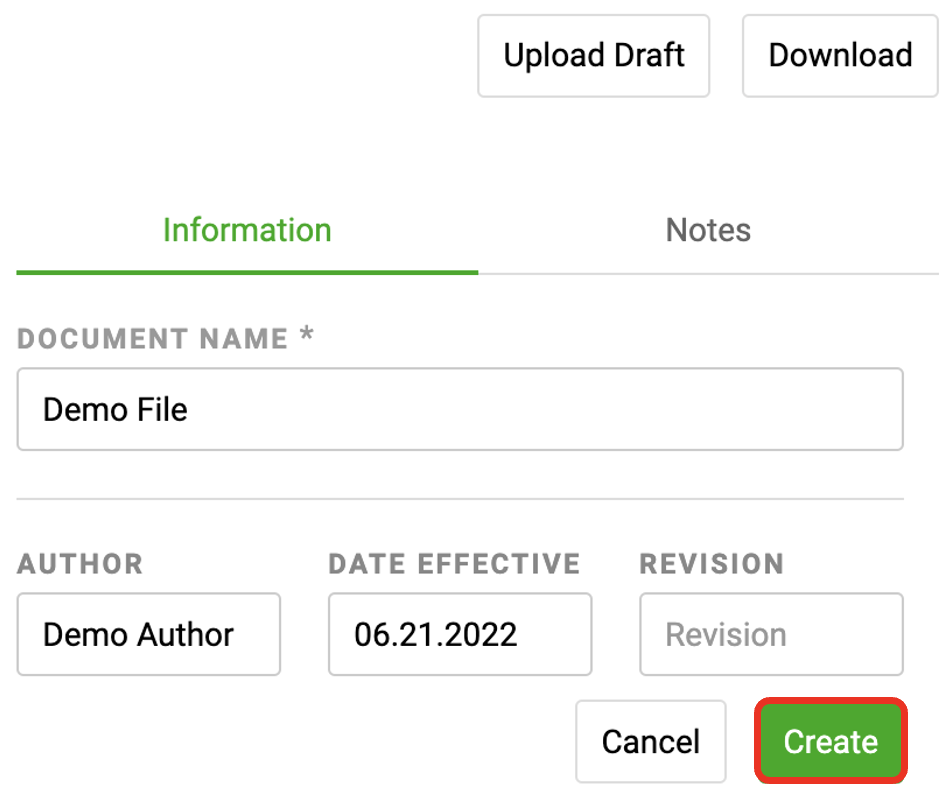
6. Click the green “Create” button
Adding/Removing a Document Signature Requirement
Signature Requirements can be added during, or after, Document creation. Navigate to the document of interest to add/remove a signature requirement
Adding a Signature Requirement
1. Click Add Signature
2. Assign the signature requirement to a role within your organization
3. Click the green Add Signature
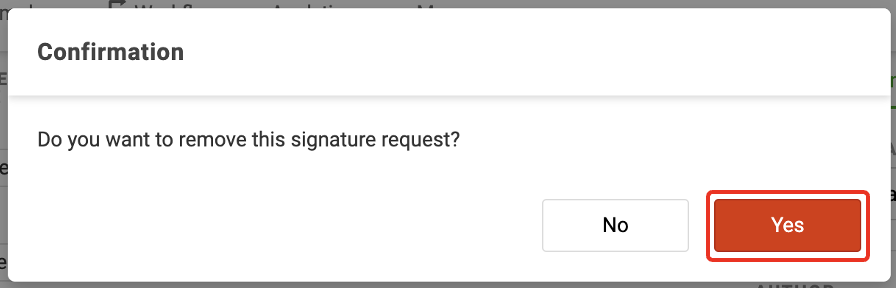
Removing a Signature Requirement
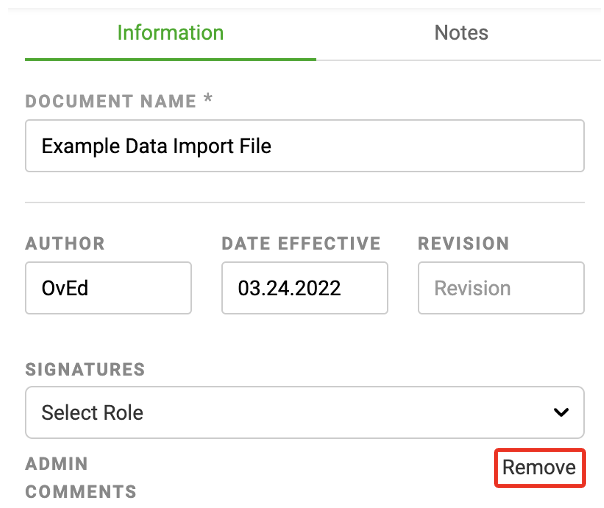
1. Click Remove next to the Signature Requirement
2. Click Yes to confirm removal
Document Signature Approval/Rejection
Users with an appropriate role can approve, reject, and sign Documents that require a Signature. Draft documents awaiting signature will be shown on the Dashboard of the assigned reviewers in the Documents Requiring Signature section.
Tip: Users can see more files in the Documents Requiring Signature Dashboard by increasing the number of displayed rows on the page, or clicking through the pages of results
Navigate to your Document of interest by going to the Documents folder (see Viewing Documents above) or by scrolling down on the Dashboard Page
1. Select your Document of interest
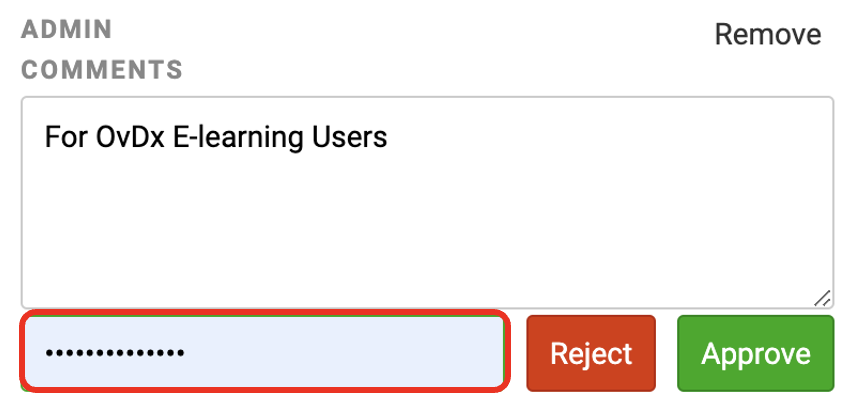
2. Optional: Click the Comments box to associate comments to the document
3. Enter your Ovation LIMS password
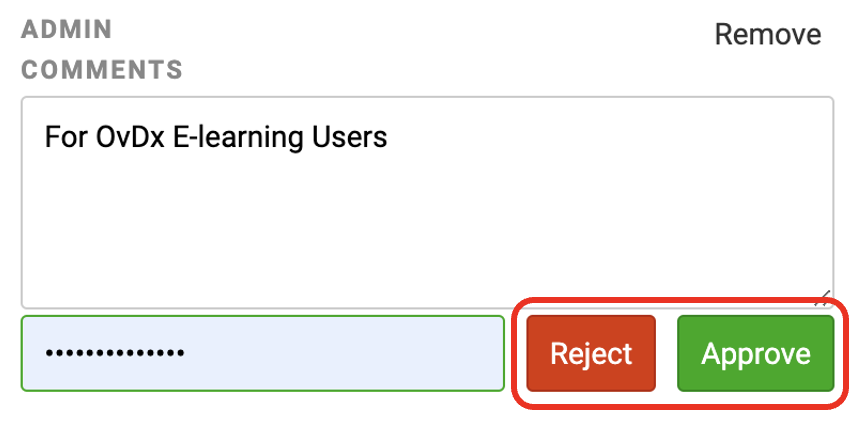
4. Select Approve or Reject to sign the Document
Deleting/Undeleting Documents
Documents can be deleted. Users can also recover documents that were deleted in error by undeleting. Navigate to the Document Folder of the document that you want to delete/undelete (see Viewing Documents above)
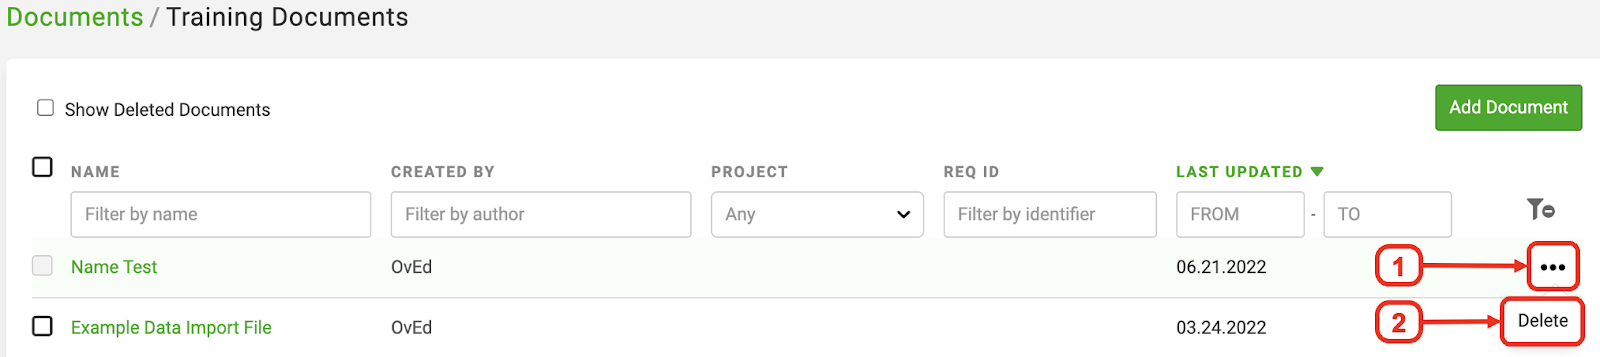
Delete a Document
1. Click the ellipses at the end of the row for the document you want to delete
2. Click Delete
Undelete a Document
1. Click the “Show Deleted Documents” checkbox
2. Click the ellipses at the end of the row for the document you want to undelete
3. Click Undelete