
Printing Barcode Labels in Ovation LIMS
This article explains where, and how, to print Barcode Labels. Barcode Labels are configured as Print Templates by your Ovation Implementation Team. Print Templates specify printer model (Dymo or Zebra), label size, and label contents. Print Templates are added to your Ovation LIMS organization during Implementation, or, by submitting a Project Request Form. The following locations in Ovation LIMS can be used for Barcode Label printing, if configured:
Dymo and Zebra Printers must be setup before you can print in Ovation LIMS. See our Dymo and Zebra Printer setup articles for more information.
Note: The contents of your label are determined by their configuration (Requisition ID, Sample ID, Patient Name, etc.). If you wish to change the contents of your label, contact support@ovation.io
Tip: The Print Templates in the dropdown menus may state the size (in inches) and resolution (203 or 300 dpi) of the label. To change the description of a Print Template(s) within a dropdown menu, contact support@ovation.io
Printing from the Global Requisitions Page
Users can quickly print labels individually, or in bulk from the Global Requisitions Page. Click “Requisitions” in the top dashboard to navigate to the Global Requisitions Page
Note: The Global Requisitions Page contains all requisitions across all Projects. Printing is not enabled on a Project’s Requisitions Page
Individual Printing
1. Use the search filters to find your requisition of interest

2. Click the printer icon at the end of the row of the requisition of interest

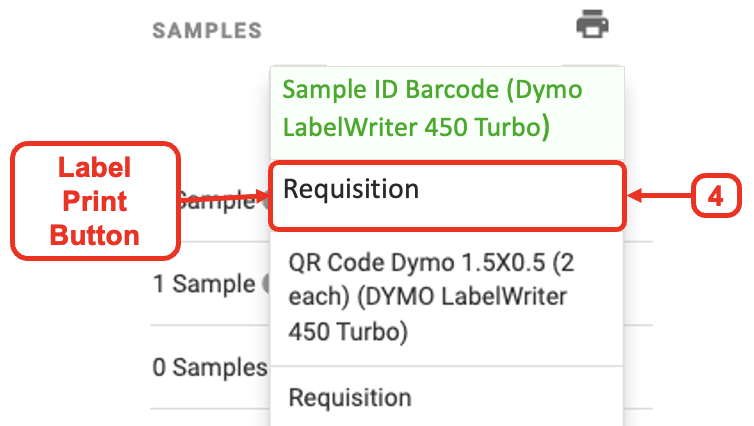
3. Choose the Print Template (label measurements and resolution) that you wish to print

Note: The selected Print Template will highlight green in the printer dropdown menu, but clicking this will not trigger printing. Only clicking on Requisition or Sample label print button under the Print Template will trigger printing.
4. Under the Green Print Template, click a black Label Print Button (Requisition or Sample) to print

Note: Requisition only, or Sample and Requisition label print buttons can be listed under each Print Templates. The display will vary based on the configured printing section(s) of the individual requisition forms (Requisition Information section or Samples section). If both sections are configured for printing, clicking either option will print the same label.
Bulk Printing
Bulk Printing can only be performed on the Requisitions Page for a maximum of 100 records per batch.
1. Scroll down to the bottom of the page and click the Rows box to select the maximum number of labels to bulk print

Tip: Bulk printing will only print labels for records displayed on the page (maximum 100 records at a time)
2. Optional: Scroll back to the top and use the search filters to narrow the displayed list of records. Remember, all records on the page will print when using Bulk Printing

3. Click the Bulk Printer icon underneath COLUMNS

3. Choose the Print Template (label measurements, and resolution)

Note: The selected Print Template will highlight green in the printer dropdown menu, but clicking this will not trigger printing. Only clicking on the Requisition label print button under the Print Template will trigger printing.
4. Click the black label print button (Requisition) under the desired Print Template
Printing from the Individual Requisition Form
There is a high-level (Global) Requisitions tab and a Project-level Requisitions tab. Both of these tabs are called ‘Requisitions’ but they have slightly different functions. The Global Requisitions page contains all requisitions across all projects. Use the Global Requisitions page to find and print labels for multiple, individual requisitions that exist across several projects. Use the Project Requisitions tab to find multiple requisitions that are in the same project.
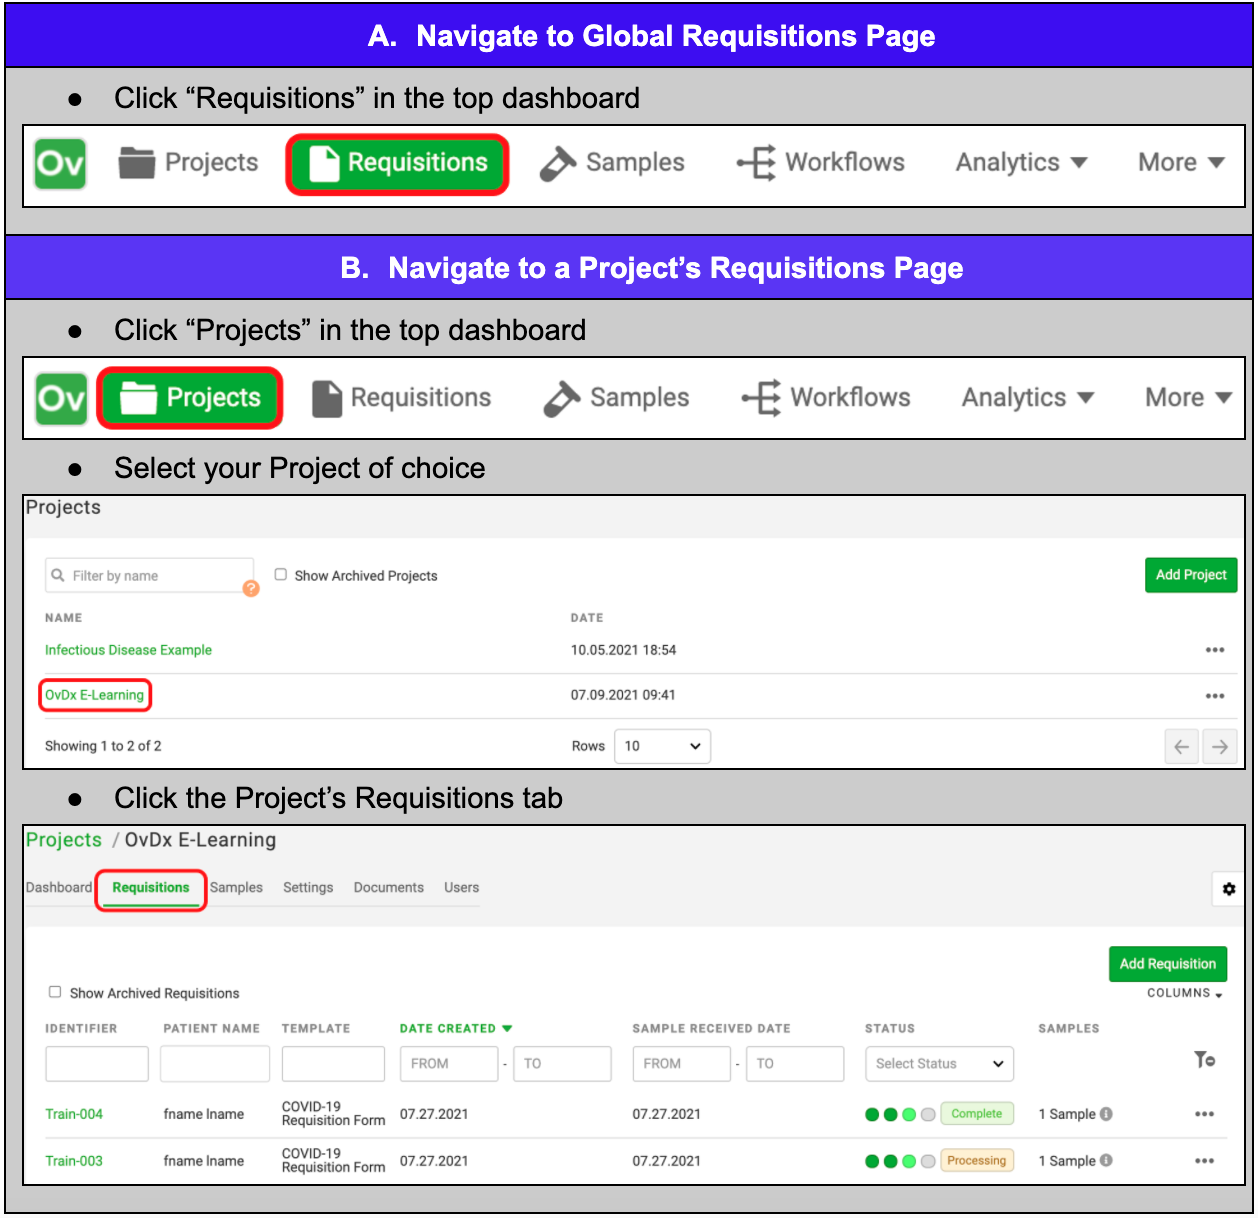
1. Navigate to a Requisitions Page using the table below
A. Global Requisitions to see all requisitions
B. Project Requisitions to see only requisitions filed under the selected project
2. Use the search filters to narrow the displayed list of records
3. Click the Requisition ID of your record of interest

4. Click the “Req Form” tab
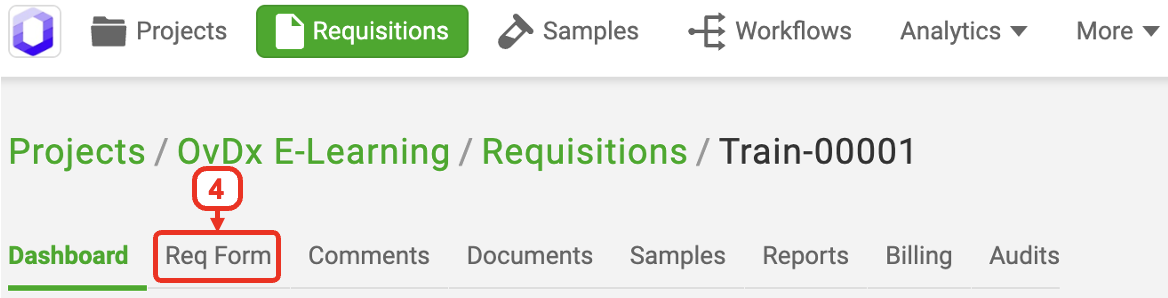
This will bring you to the Individual Requisition form. From the Individual Requisition form, users can Print Requisition IDs, or sample Container IDs
Print From Requisition Information Section
Enabled Labels can be printed from the Requisitions Section of a Requisition Form by clicking the ellipses to open the Print Template dropdown menu. If no Print Templates are enabled, then the ellipses will not display a dropdown menu. Contact support@ovation.io to enable.
1. Scroll to the “Requisition Information” section of the Requisition Form
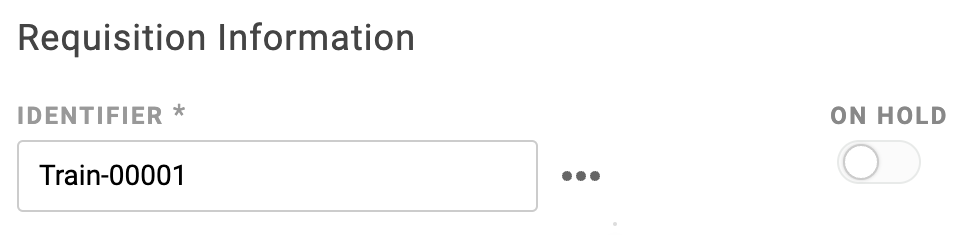
2. Click the ellipses next to the Requisition ID

3. Select the Print Template in the dropdown menu that you wish to print

Print from Samples Section
Enabled Labels can be printed from the Samples Section of a Requisition Form by clicking the ellipses to open the Print Template dropdown menu. If no Print Templates are enabled, then the ellipses will not display a dropdown menu. Contact support@ovation.io to enable.
1. Scroll to the “Samples” section of the Requisition Form

2. Click the ellipses next to the Container ID

3. Select a Sample Print Template in the dropdown menu to print

Printing within a Workflow
If your workflows contain an activity step where samples are transferred from a source container to a destination container (Batch Plating or Extraction, for example), you may print labels for that Destination Container.
Tip: You can also print the Sample IDs while performing these Workflow Activity Steps. If you are in the Workflow as you are completing it and would like to print, skip to step 6 below
1. Click Workflows in the top dashboard to navigate to the Workflows Page
2. Scroll down to the bottom of the page to the Workflow Summary Table

3. Use the search filters to find your Workflow of interest

4. Click the Workflow Batch ID for your Workflow of interest

5. Click the Workflow Activity Step where the sample’s container changes (For example, Batch Plating or Extraction)

6. Scroll down the page to “Destination Container” (if on the Batch Plating step) or “Results” (if on the Extraction step)
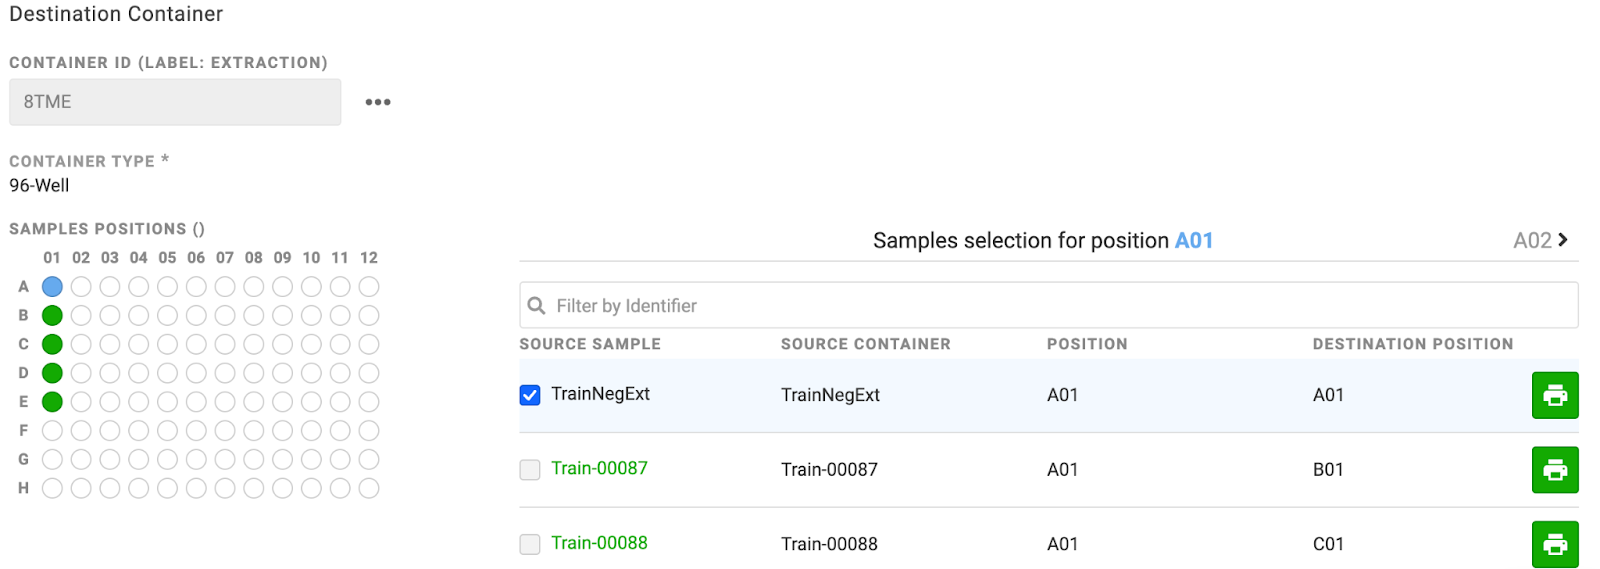

7. Click the green printer icon at the end of the row for the Sample ID you wish you print
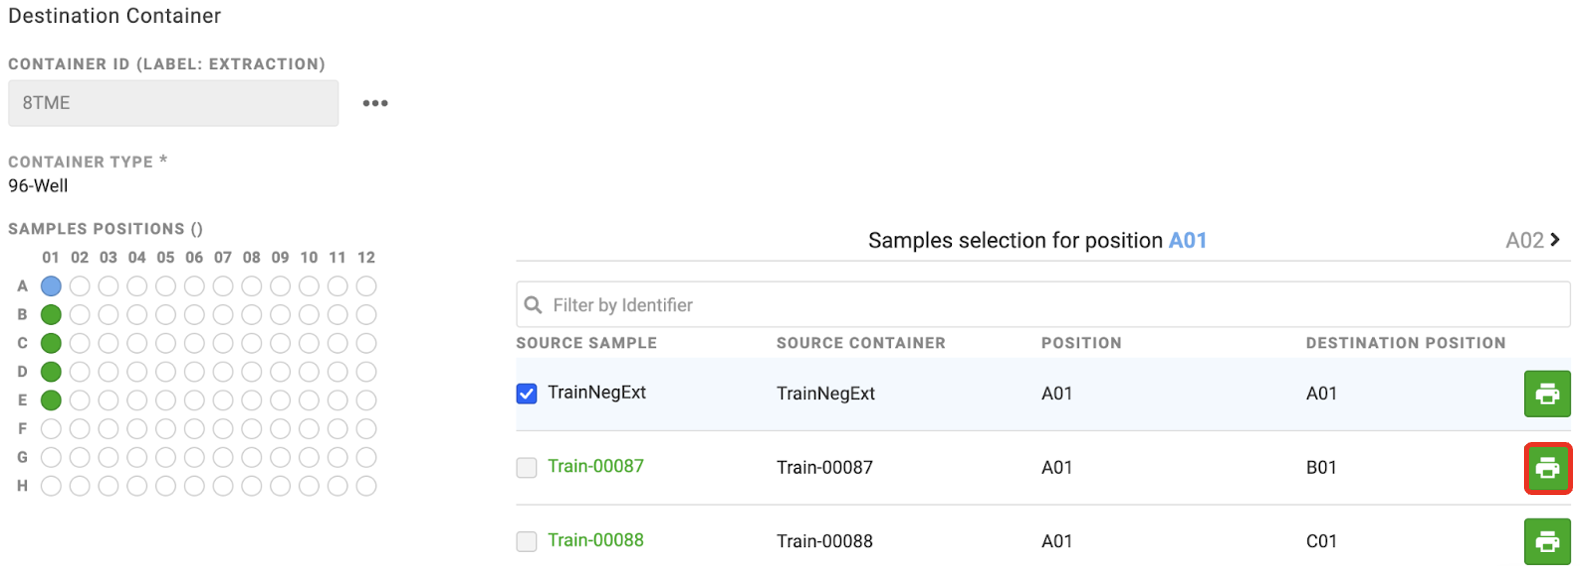
8. Select a Sample Print Template in the dropdown menu to print

Printing from the Adapters Page
Labels can be printed from the Adapters Page, if enabled.
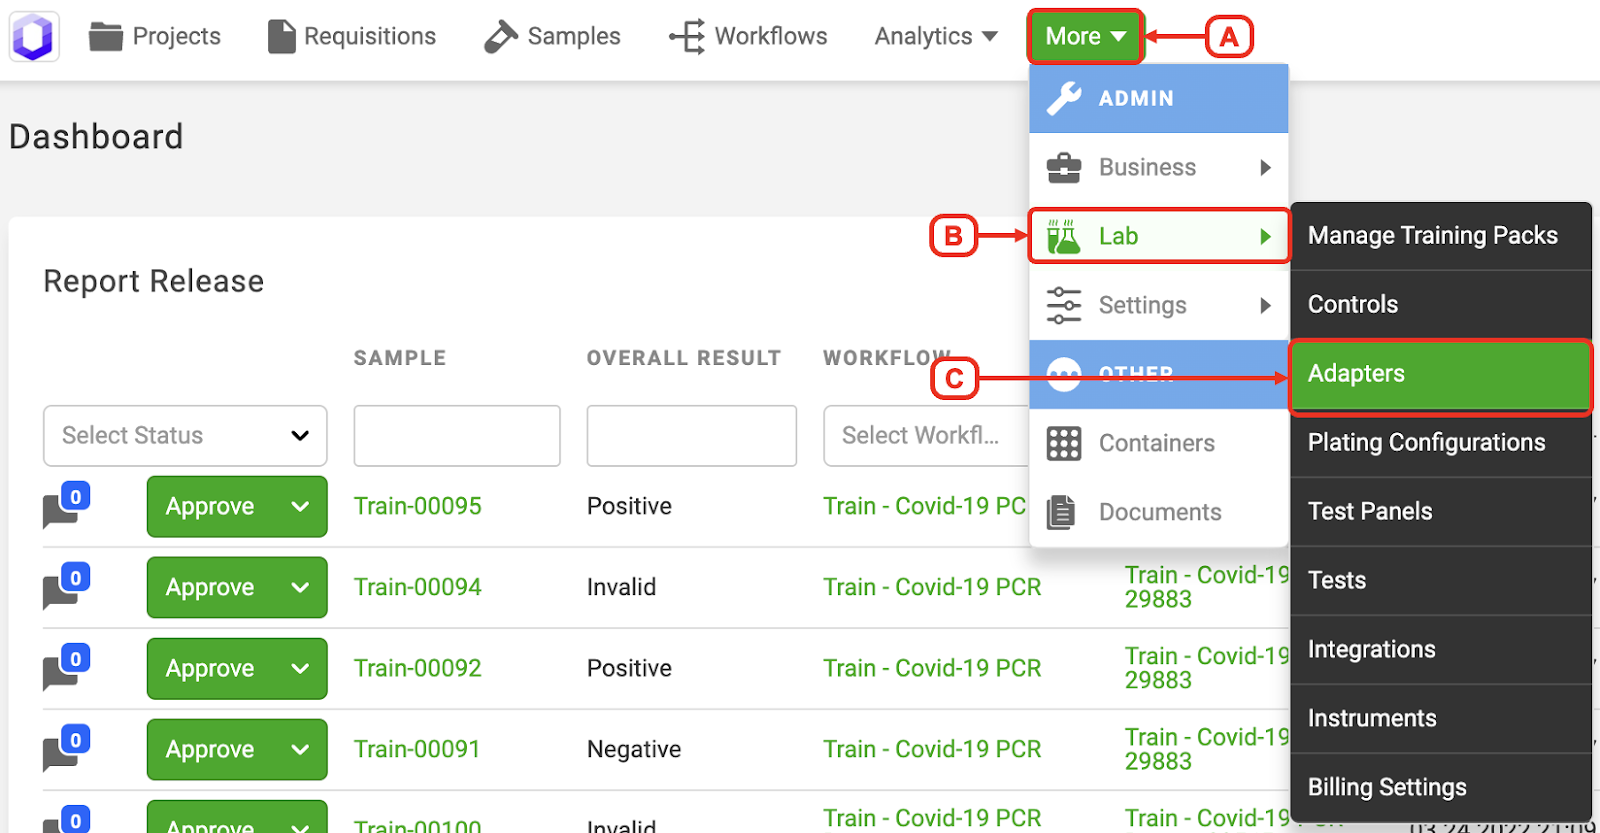
1. Navigate to a Adapters Page
A. Click More in the top Dashboard
B. Click Lab
C. Click Adapters
2. Click the Adapter Name that you wish to print
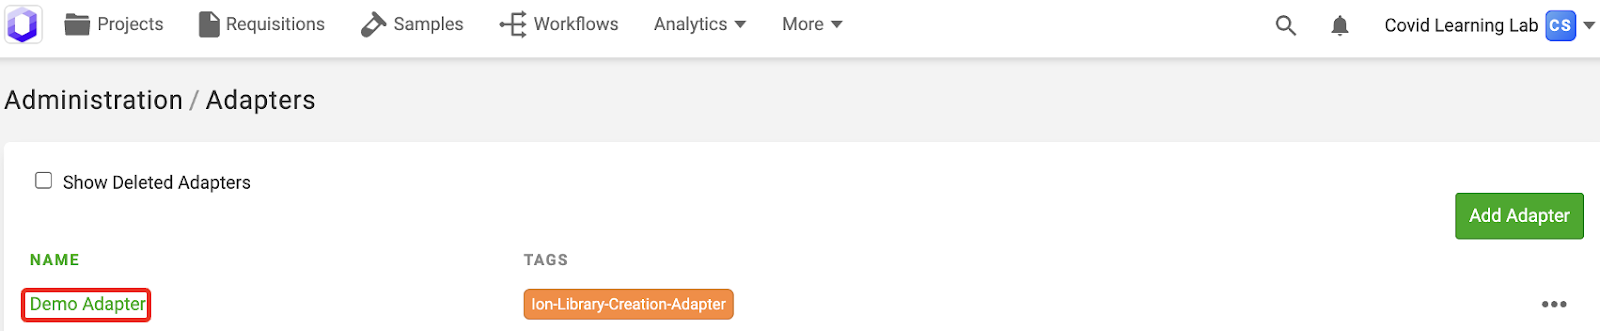
3. Scroll down to the bottom of the page and click the printer icon

4. Select a Sample Print Template in the dropdown menu to print