System Settings
The System Settings page controls organization-wide settings in the Ovation LIMS and Ovation Portal.
This article contains the following sections…
Note: System Settings are not the same as Individual User Settings. System Settings are the default settings for the entire organization. See our Individual User Settings article for more information on user specific settings.
Read the entire article or skip to your section of interest.
System Settings Page
The System Settings page contains organization wide settings. These organization wide settings are split into the tabs of: Info, Display, Reports, Other, Security, and Early Access.
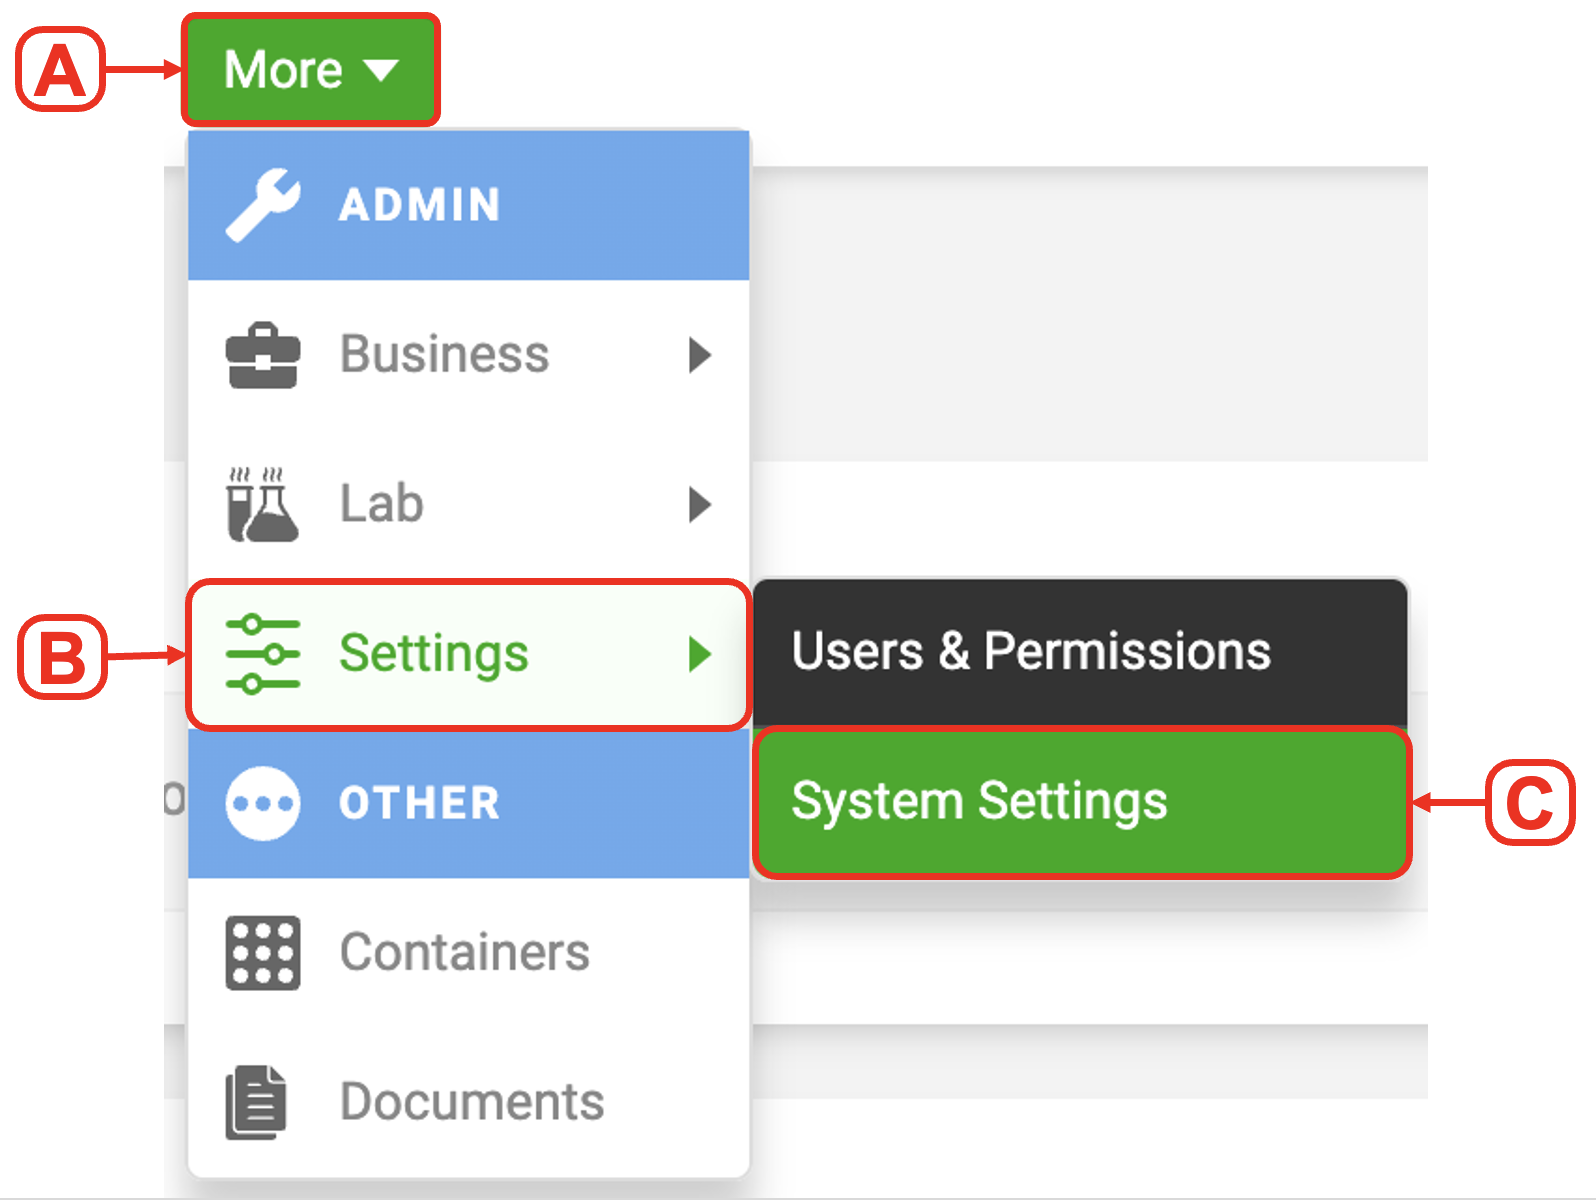
- To navigate to the System Settings page…
A. Click the “More” button in the Dashboard bar
B. Hover over “Settings”
C. Select “System Settings”
Tip: After changing any system settings, click the Save button at the bottom of each tab’s page before navigating away.

Info
The Info tab sets CLIA and CAP numbers for the organization.
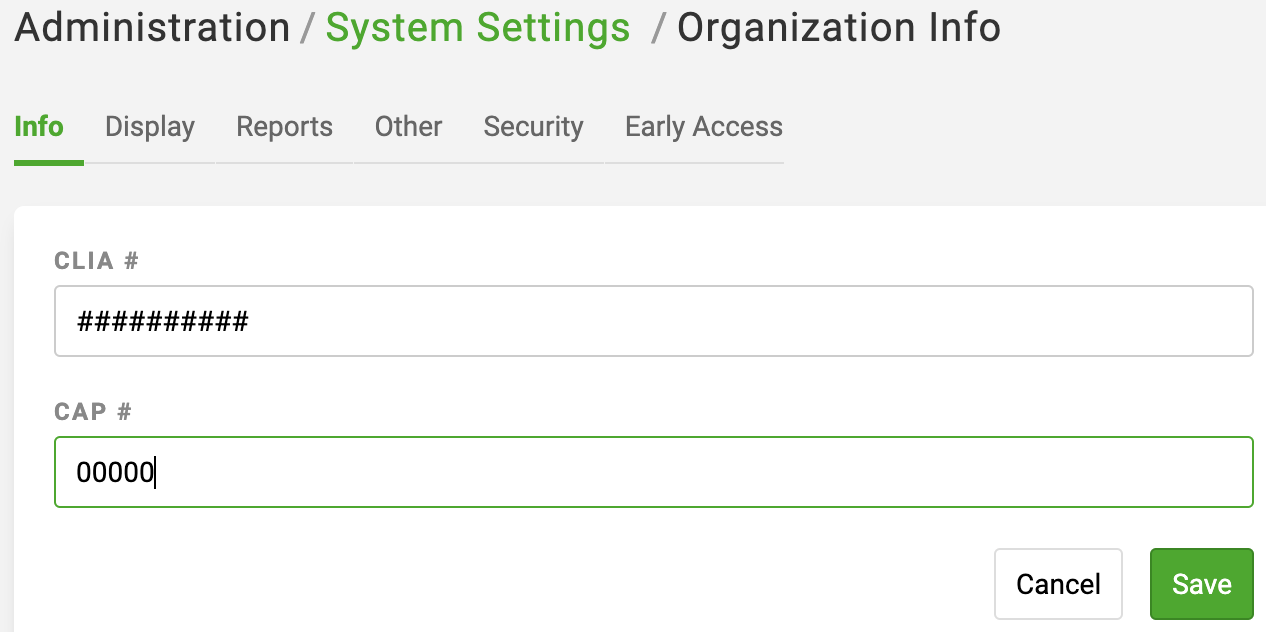
Note: CLIA and CAP numbers will appear on your Ovation Reports if they are configured to display. If you do not see your CLIA or CAP numbers on your Ovation Reports and would like to, contact support@ovation.io to configure.
Display
The Display tab sets Date/Time output and input format, the organization Time Zone, and your Organization Logo.
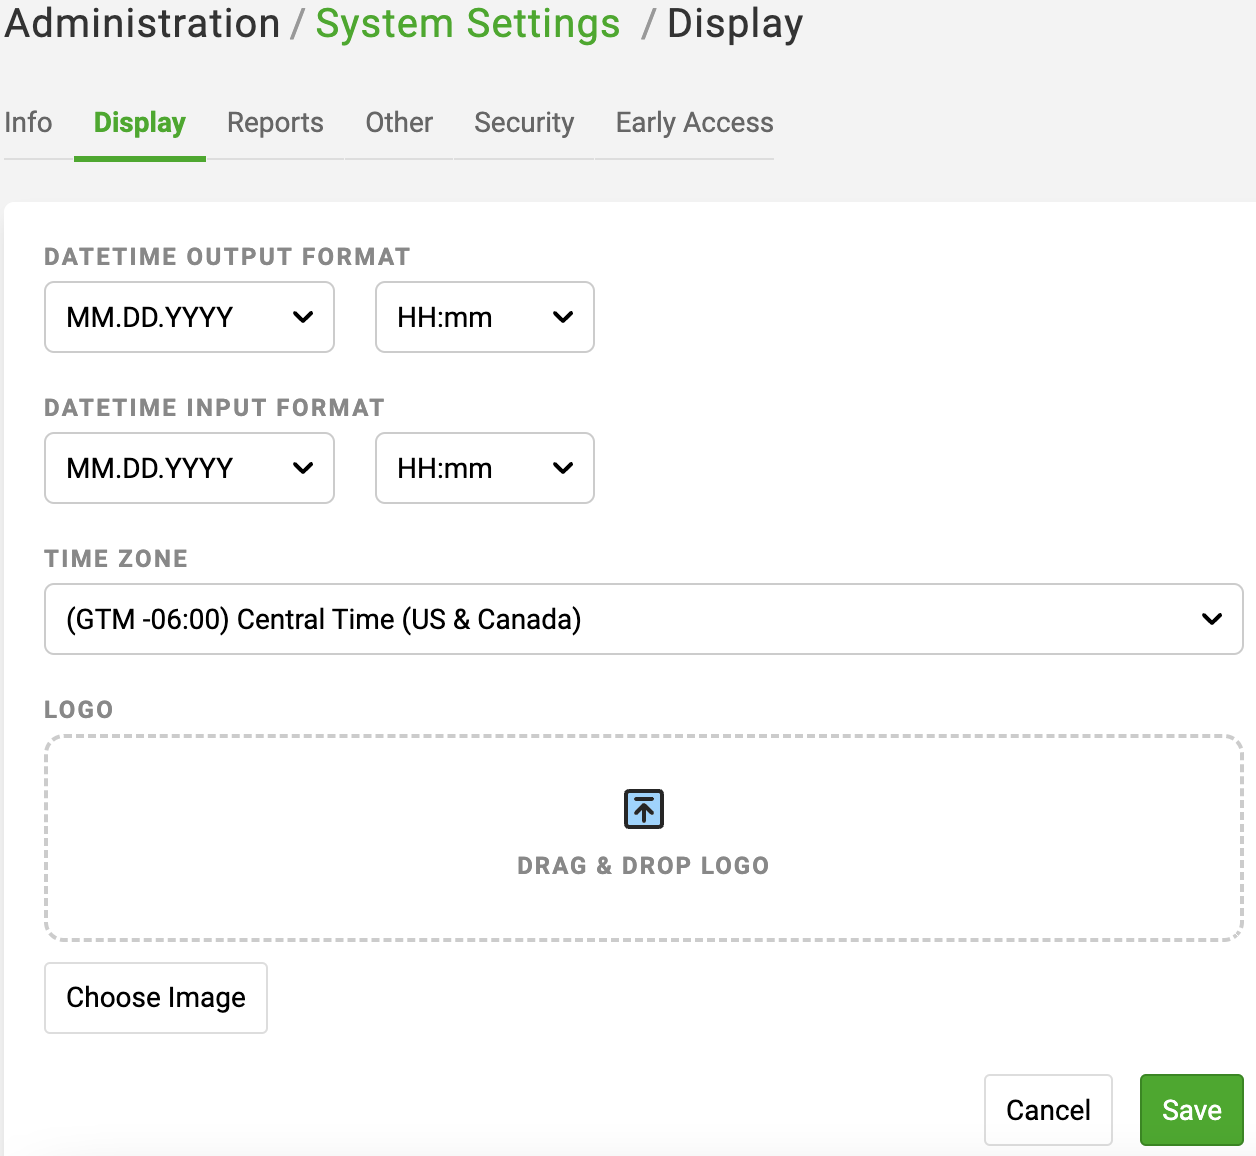
- DATETIME OUTPUT FORMAT: Controls the format of the dates and times displayed in Analytics Reports, Patient Reports, and Audit Logs
- DATETIME INPUT FORMAT: Controls the required input format of dates and times entered on Requisition Forms in Ovation LIMS and Order Forms in the Ovation Portal
Note: Dates or times entered with the wrong input format in an Import CSV file for Requisition Forms or will cause errors
- TIME ZONE: Controls which time zone is used in the platform and on Patient Reports, regardless of individual user time zone
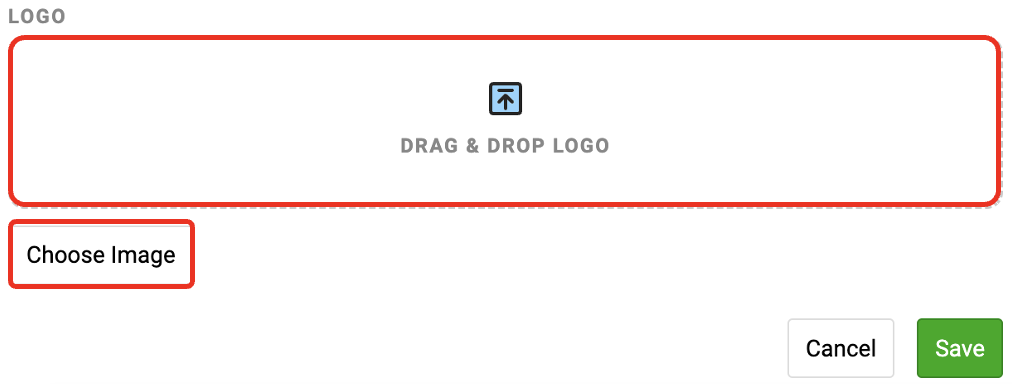
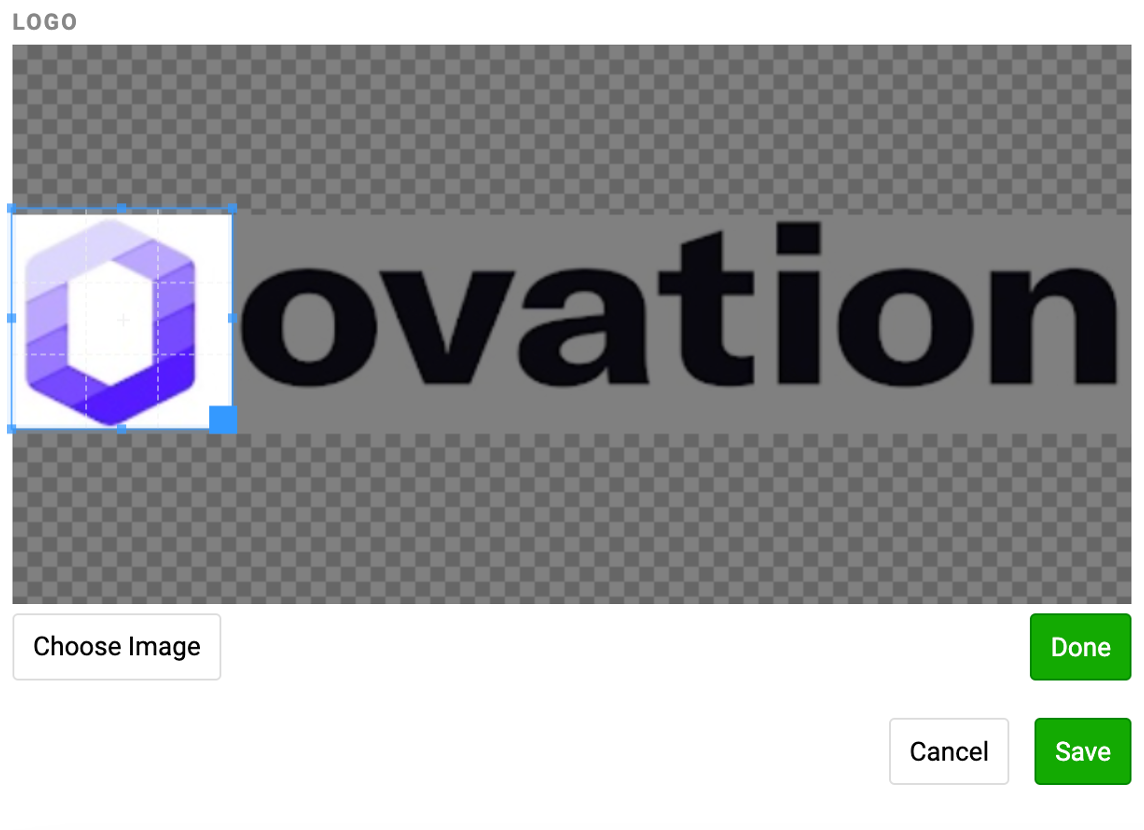
- LOGO: This image will be displayed at the top of your Ovation LIMS and Ovation Portal. PNG, PDF, or TIFF files can be uploaded into the LOGO field. Drag and drop or click “Choose Image” to select your logo file.
Note: Adding the logo image file opens a window that allows you to crop the logo. Click done, then save when finished.
Reports
The Reports tab sets the display of overall COVID test results in Ovation tables, Portal Report Ready Email Notifications, Automatic Report Delivery Status, and if COVID 19 Reports include Patient Employer details.
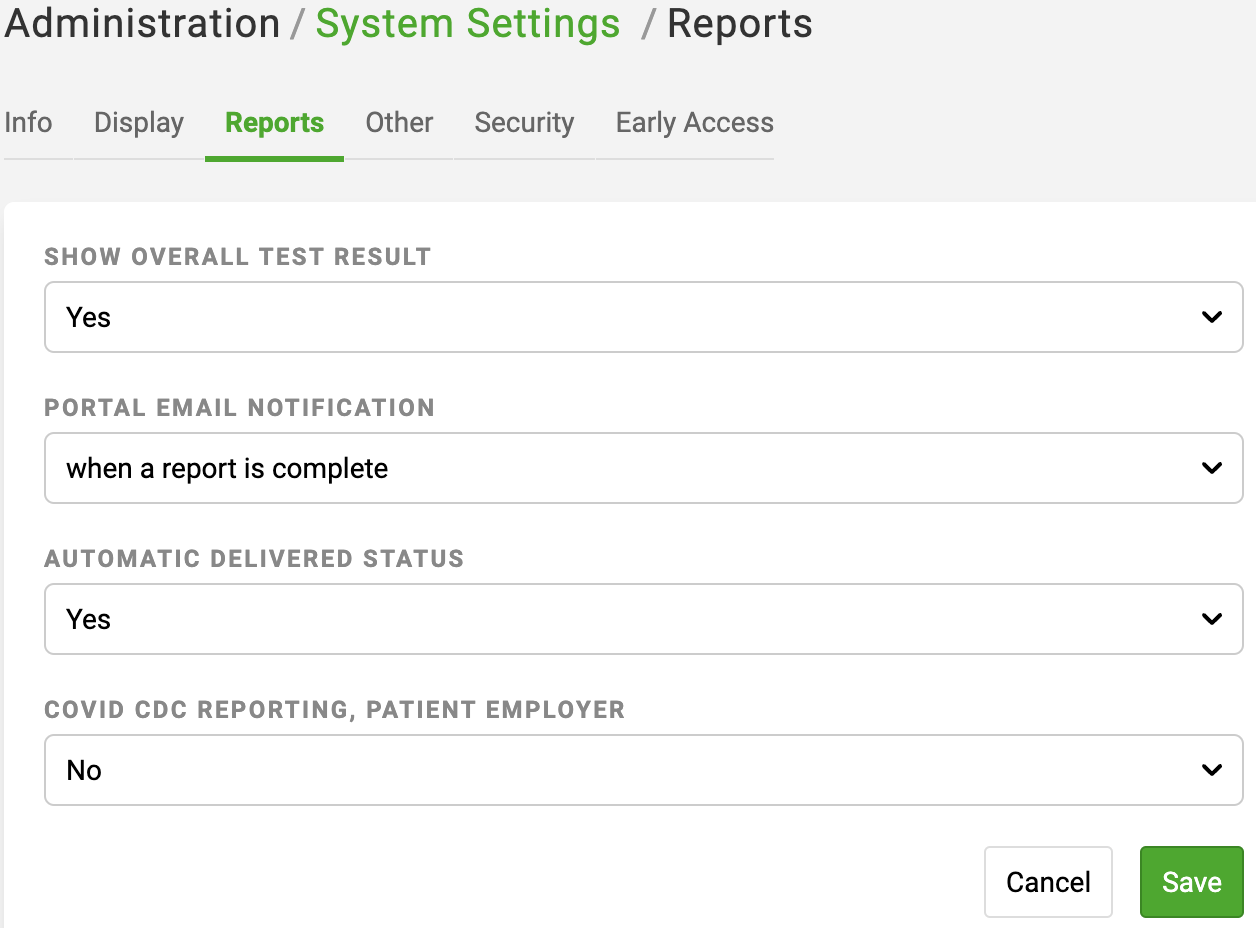
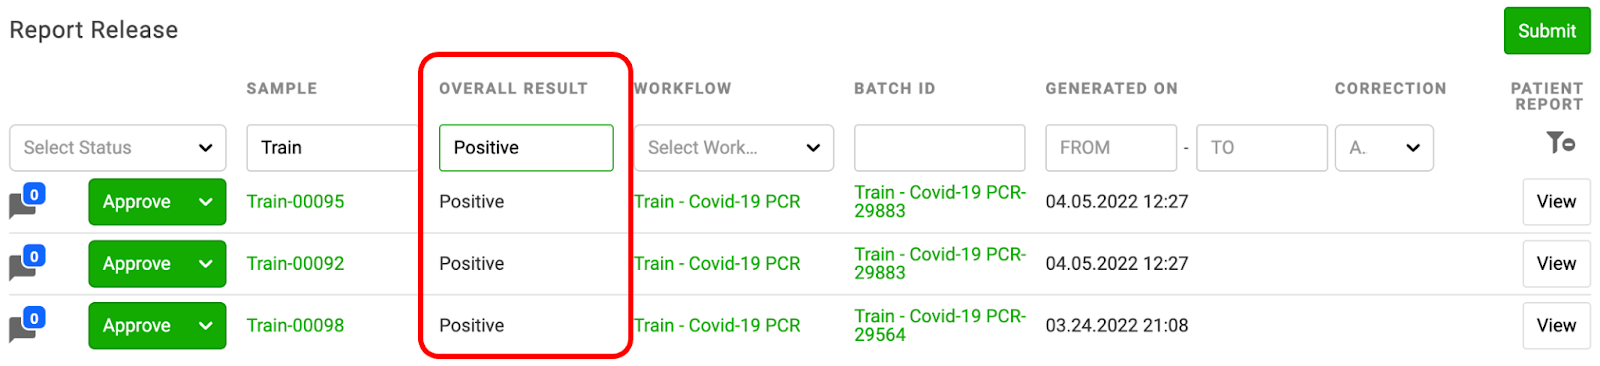
- SHOW OVERALL TEST RESULTS: If set to Yes, overall COVID-19 test results will display in report-related tables of the Ovation LIMS and Ovation Portal. Test results can be sorted and filtered.
- PORTAL EMAIL NOTIFICATION: Controls when “Report Ready” email notifications are sent to Ovation Portal users. Choose “when requisition is complete” to send the notifications when all tests on the requisition are complete. Choose “when a report is complete” to send the notifications when reports are generated or signed (depending on your Ovation LIMS configurations).
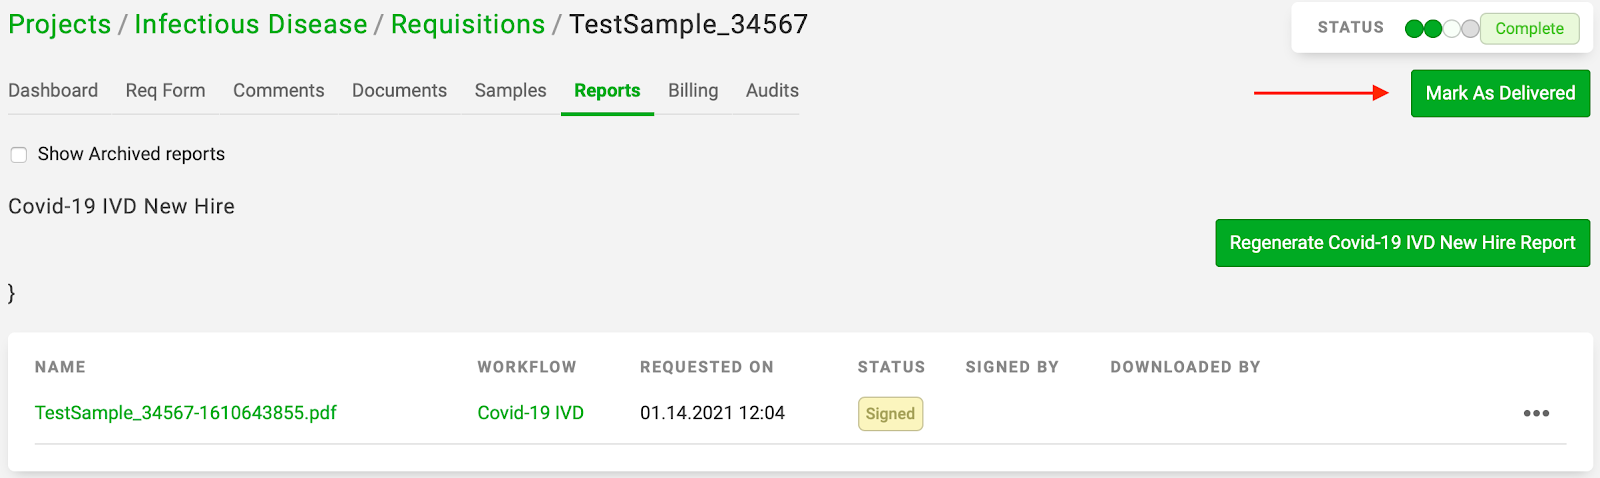
- AUTOMATIC DELIVERED STATUS: If set to Yes, Reports will automatically be given the status of “Delivered” once they are downloaded or opened in the Ovation Portal. If set to No, Ovation LIMS users will need to manually change the status of each report to Delivered.
- COVID CDC REPORTING, PATIENT EMPLOYER: If set to Yes, COVID-19 Reports will populate with information about the patient’s employer.
Tip: Patient Employer details may be required for certain states
Note: Questions about a patient’s employer must be configured as custom attributes on Requisition Forms to populate in COVID-19 reports. To enable COVID-19 Report Analytics, or to add these custom attributes, contact support@ovation.io
Other
The Other tab sets the default country, container well order, comments on requisitions, and filter provider accounts by project within requisition forms.

- DEFAULT COUNTRY: Controls default country for address settings in the Ovation LIMS
- CONTAINER WELL ORDER: Controls if samples are ordered by column or row orientation when listed in plating activity step tables
Tip: CONTAINER WELL ORDER does not determine default sample plating orientation. To change the default sample plating orientation when auto-populating plates, contact support@ovation.io
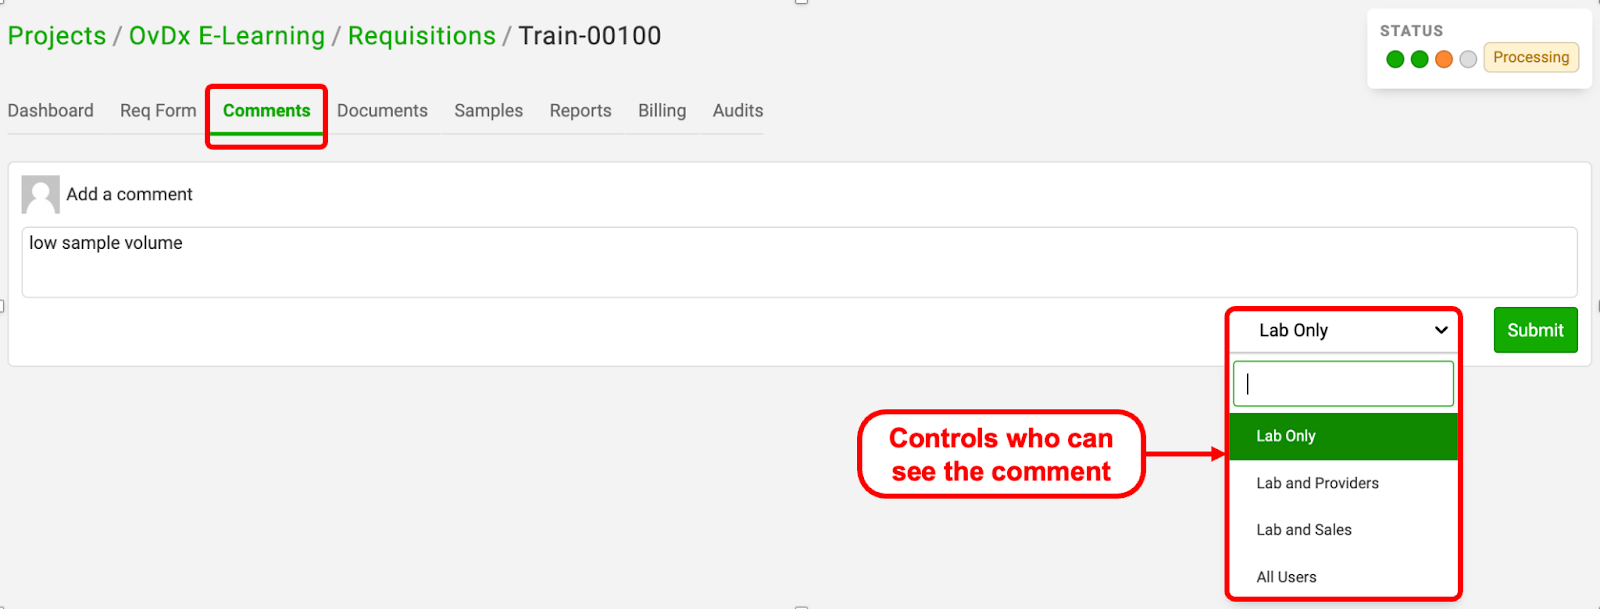
- COMMENTS: If set to Yes, comments can be added and associated to Requisitions. Users can choose with whom the comments are shared (see below).
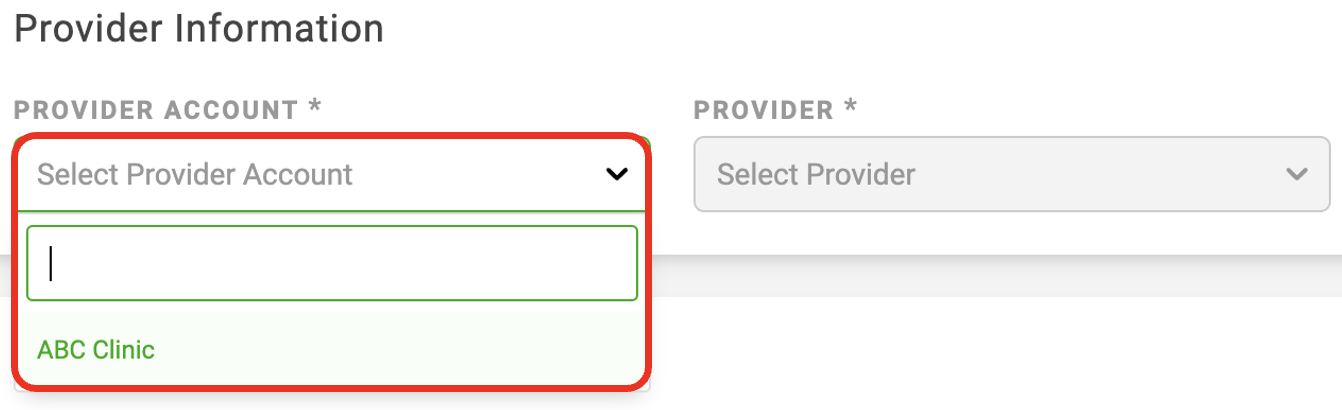
- FILTER PROVIDER ACCOUNTS BY PROJECT: If set to Yes, only Provider Accounts with associated Order Forms will be available for selection in the matching Ovation LIMS Requisition Form Template’s Provider Accounts dropdown menu. This is default behavior in the Ovation Portal.
Note: Provider Accounts will not be displayed in the dropdown menu if this is set to Yes and no Order Forms are associated.
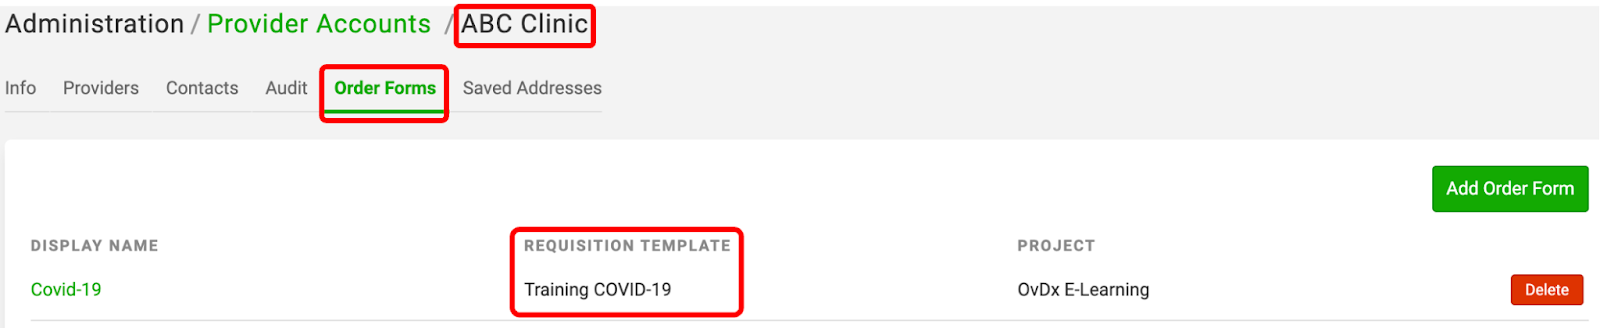
Tip: In the example below, ABC Clinic has an Order Form named “Covid-19” associated to the Requisition Template Form of “Training COVID-19”. Users in the Ovation LIMS and Ovation Portal will see ABC Clinic in the Provider Accounts dropdown menu on Requisition and Order Forms. If no other Provider Accounts have an Order Form associated to the Training COVID-19 Requisition Form Template, then only ABC Clinic will be available for selection on Order and Requisition Forms. See our Setting Up Accounts - Full Guide article for more information.
- PORTAL DISPLAY HELD REASONS: If set to Yes, Requisition Held reasons will be displayed in the Ovation Portal
Security
The Security tab sets if two-step verification is required for your users to login to the Ovation LIMS and Ovation Portal. Shown below, the toggles are set to off and two-step verification is not required.
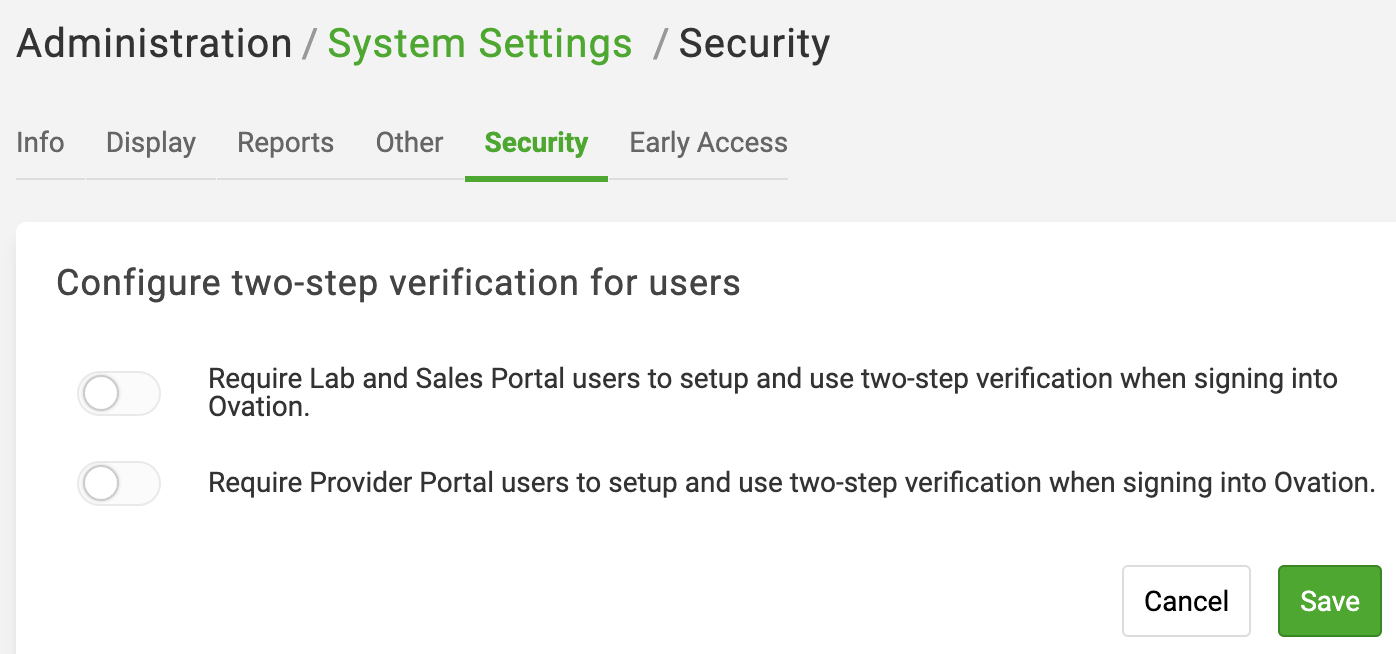
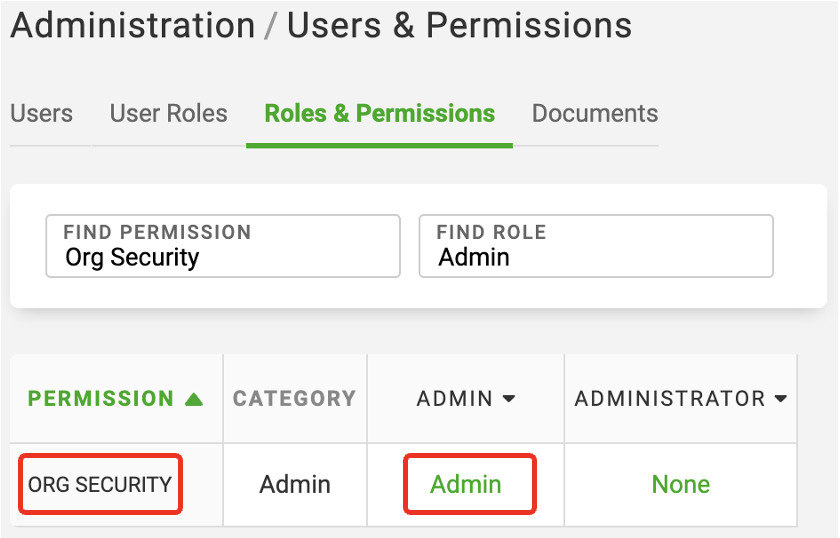
This tab will only be visible if you have the Org Security User Permission set to the Permission Level of “Admin” or “Write” for your Role. See our Roles and Permissions article for more information.
Note: Make sure you have turned on two-step verification for yourself in your Individual User Settings BEFORE making it required, otherwise you may lock yourself out. See our Two-Step Verification article for more information.
Tip: Use this feature with caution. Once activated, only users that have already setup two-step verification will be able to login.
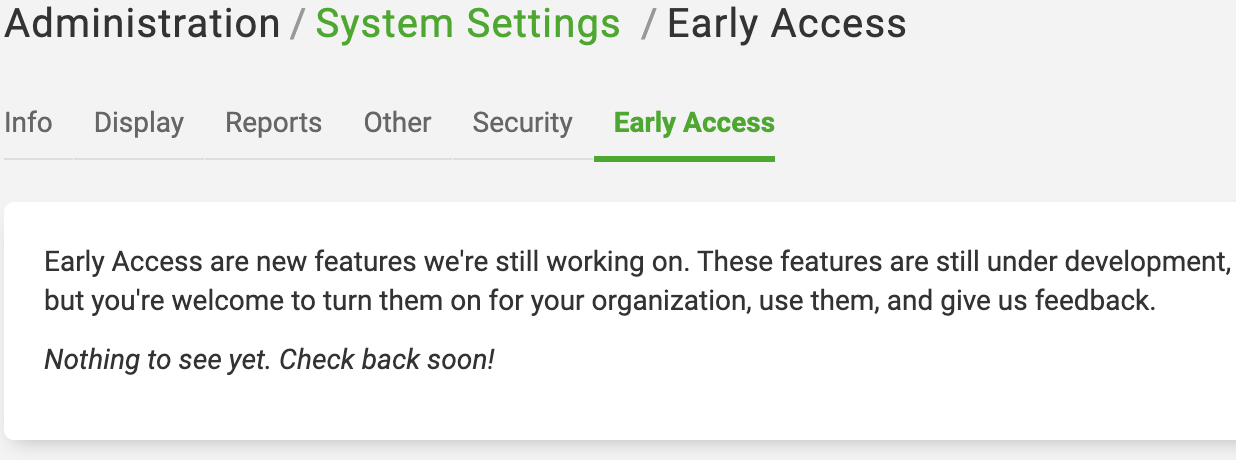
Early Access
The Early Access tab sets the ability to opt in to Early Access features before they are made Generally Available. See the Early Access Features section of our Knowledge Base to learn more about these new features.