Signing/Deleting Individual Reports
This article is for Report Signers in the Ovation LIMS. Report Signers require appropriate permission settings to access the report signing window. If you cannot see the report signing window, see the Roles and Permissions Article for further assistance.
This article reviews how to sign an individual report and how to delete an individual report. If your organization is configured to use an ordering entity (an integrated 3rd party or the Ovation Portal), then signing a report will release the report back to the ordering entity.
Signing Individual Reports
1. From the Reports tab, Click “Sign Now” or the report’s filename in green.
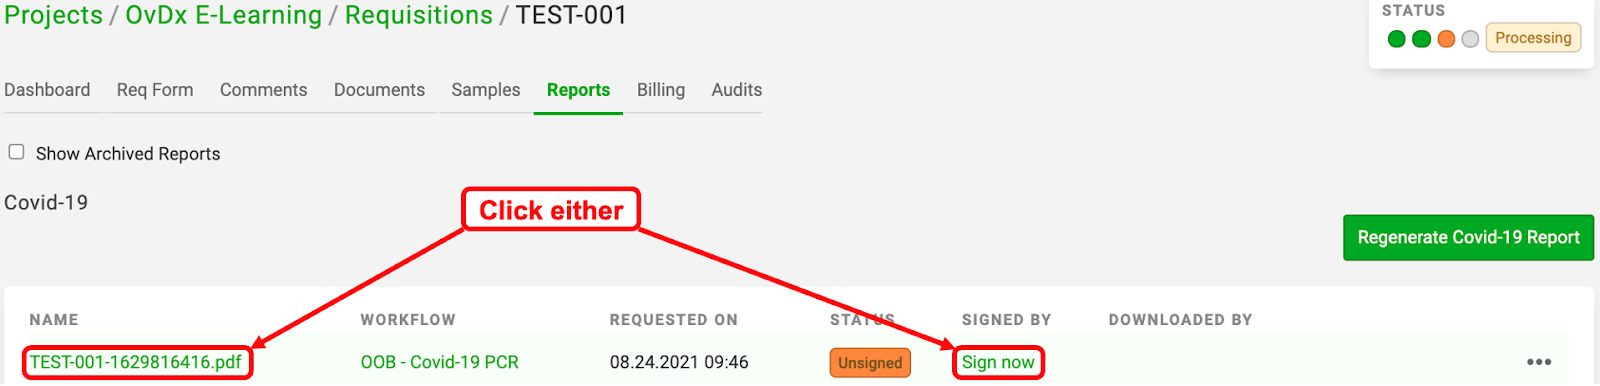
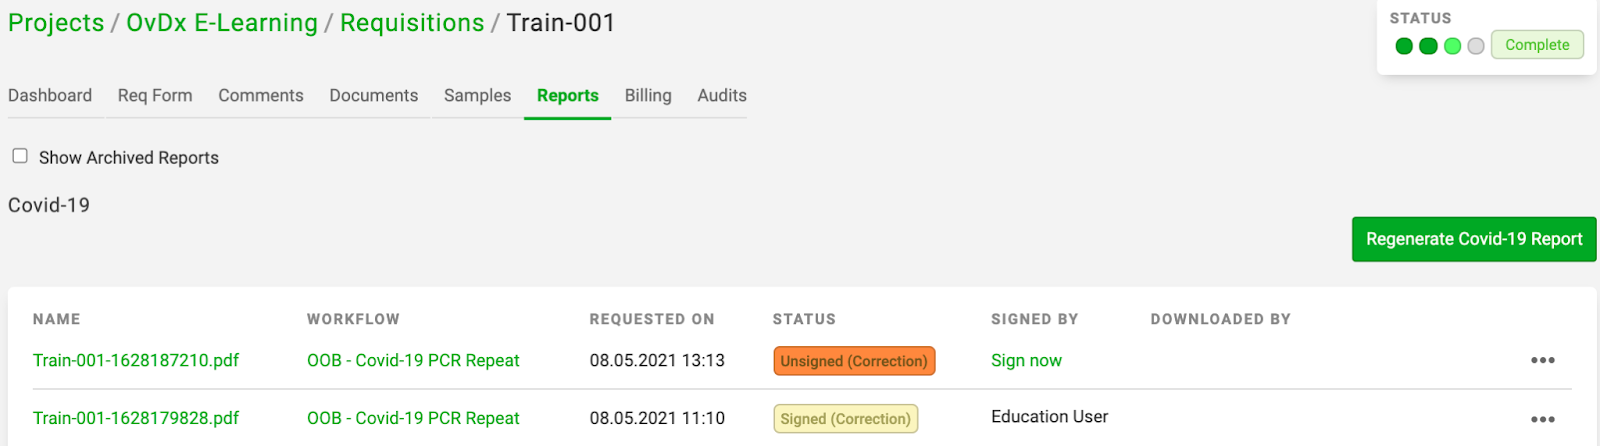
Note: Multiple reports may be displayed on this page. The most recent report will be at the top of the list. Review the status of the report to ensure you are viewing the correct report. Reports available for review and signature have the Orange “Unsigned” Status. Other statuses for reports are shown below.

2. Review the report. If you are satisfied with the report, skip to step 6. Proceed to step 3 if you wish to comment on the report, add an additional signature requirement for release, or make a note.
3. Optional: Add any comments to the Comments box and they will appear on the last page of the report, provided that your report is configured to have an addendum page. The default setting is to have an addendum page.
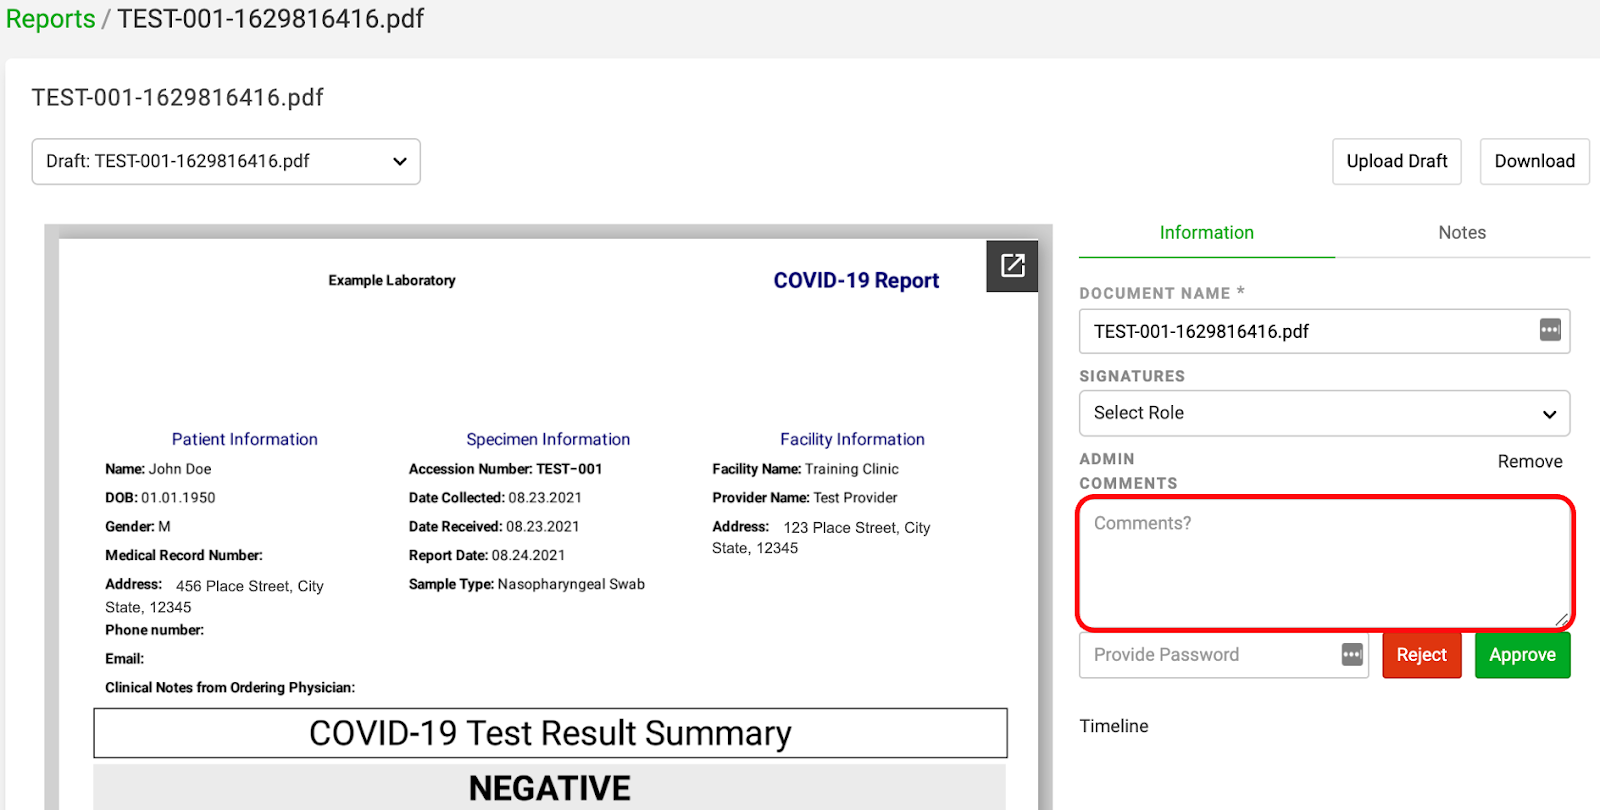
Note: Comments added to the box above show up on the last page of the report next to the digital signature time stamp.
4. Optional: To add an additional signature requirement to this report, select a role under Signatures and click the green Add Signature link.


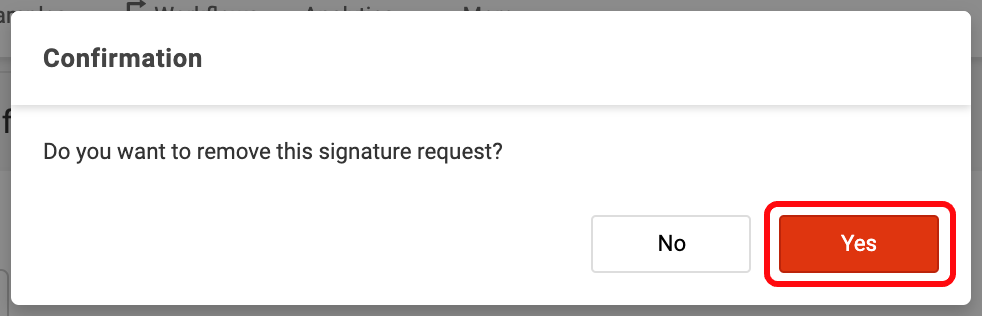
Note: Adding a signature requirement will display the report in the Batch Report Release section of the selected role’s dashboard. To remove additional signature requirements, click Remove next to the signature role and then select the red Yes to confirm.

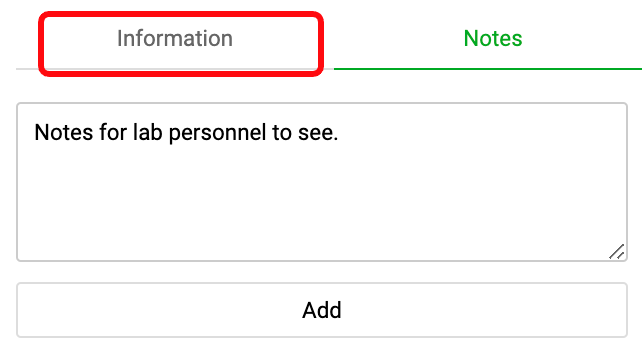
5. Optional: Click the Notes tab to add any notes that should be associated with the report. Enter the note text in the box and click Add. Navigate back to the Report Signature window by clicking the Information tab.
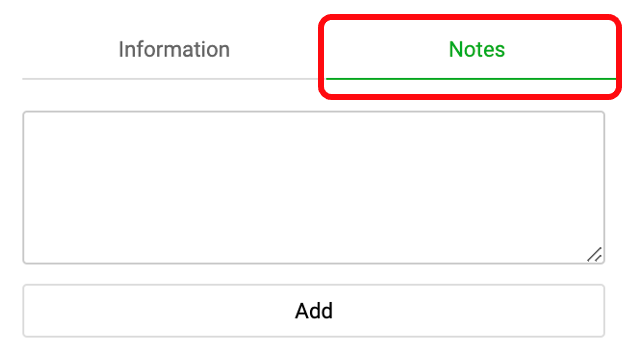

Note: Unlike Comments, Notes are not displayed on the report and are for internal purposes only.
6. Enter your Ovation Password, then click Approve. This will notify any associated ordering entities (providers, provider contacts, etc.) that a report is available for viewing and download from the Ovation Portal.
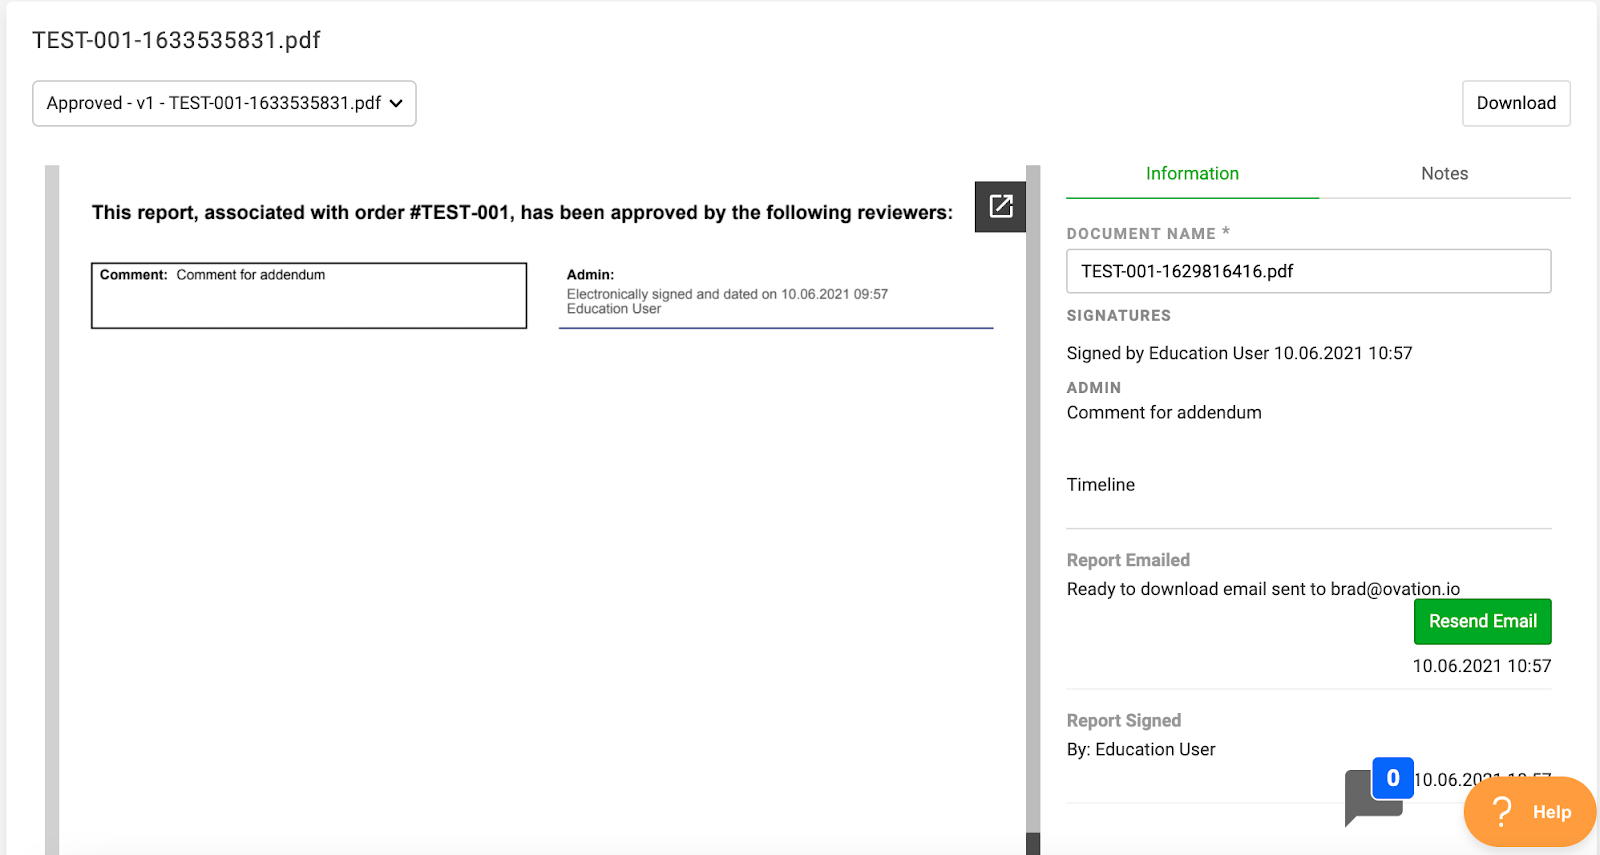
 Tip: After approving, refresh the page to see the final report with additional comments and the digital signature time stamp on the final page of the report (example shown below).
7. Repeat steps 1 through 6 of the Signing Individual Reports section for all other samples or navigate to the home screen for batch signing
Note: To sign all available reports at once, see the section of this article on Batch Report Release.
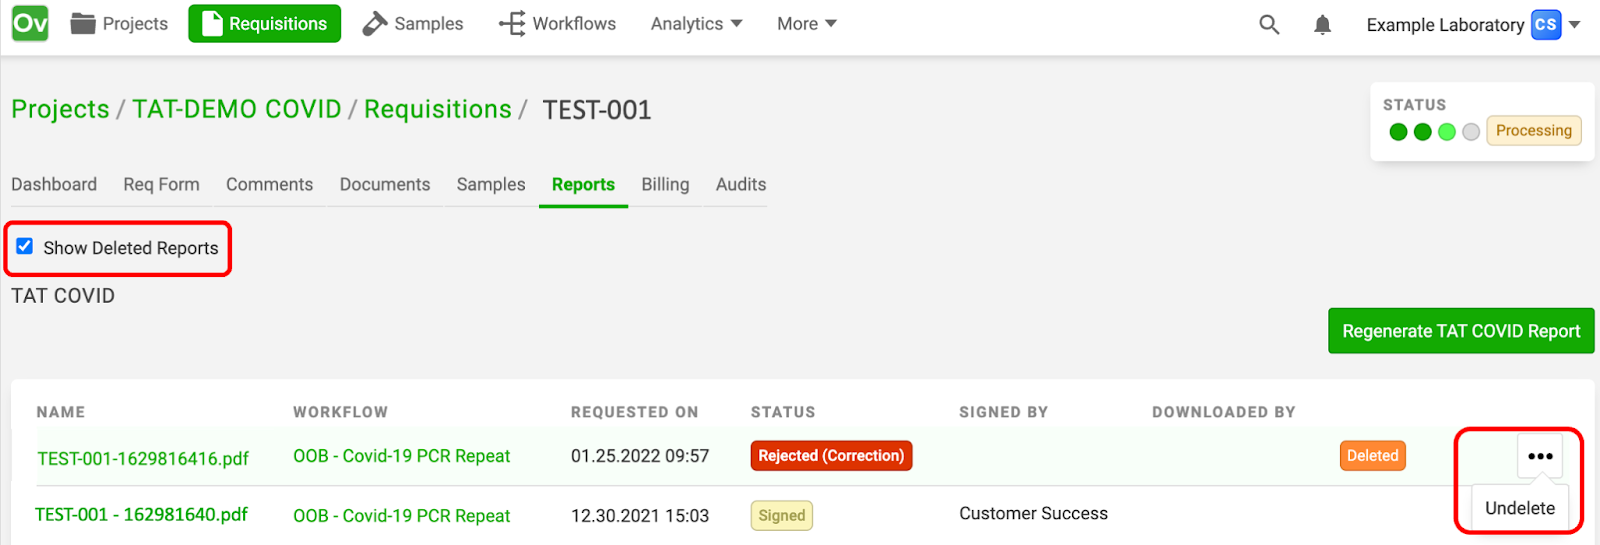
Deleting Individual Reports
1. Click on the ellipses on an individual report’s line
2. Click Delete and the report will no longer be shown on this page