
Navigating to Individual Reports in Ovation LIMS
This article covers how to navigate to individual reports in Ovation LIMS based on your role’s access settings. Reports are auto-generated when workflows with report configurations are completed. If your reports require a signature, they must be signed before they are auto-faxed or e-delivered to your clients via the Ovation Portal or 3rd Party Integrations. Once you have navigated to your reports, they can be signed individually. Alternatively, to sign reports in bulk, please view the Batch Report Release article.
Please use the table below to determine the best report navigation process based on your Access/Permission level in the Ovation LIMS and your lab’s use case.
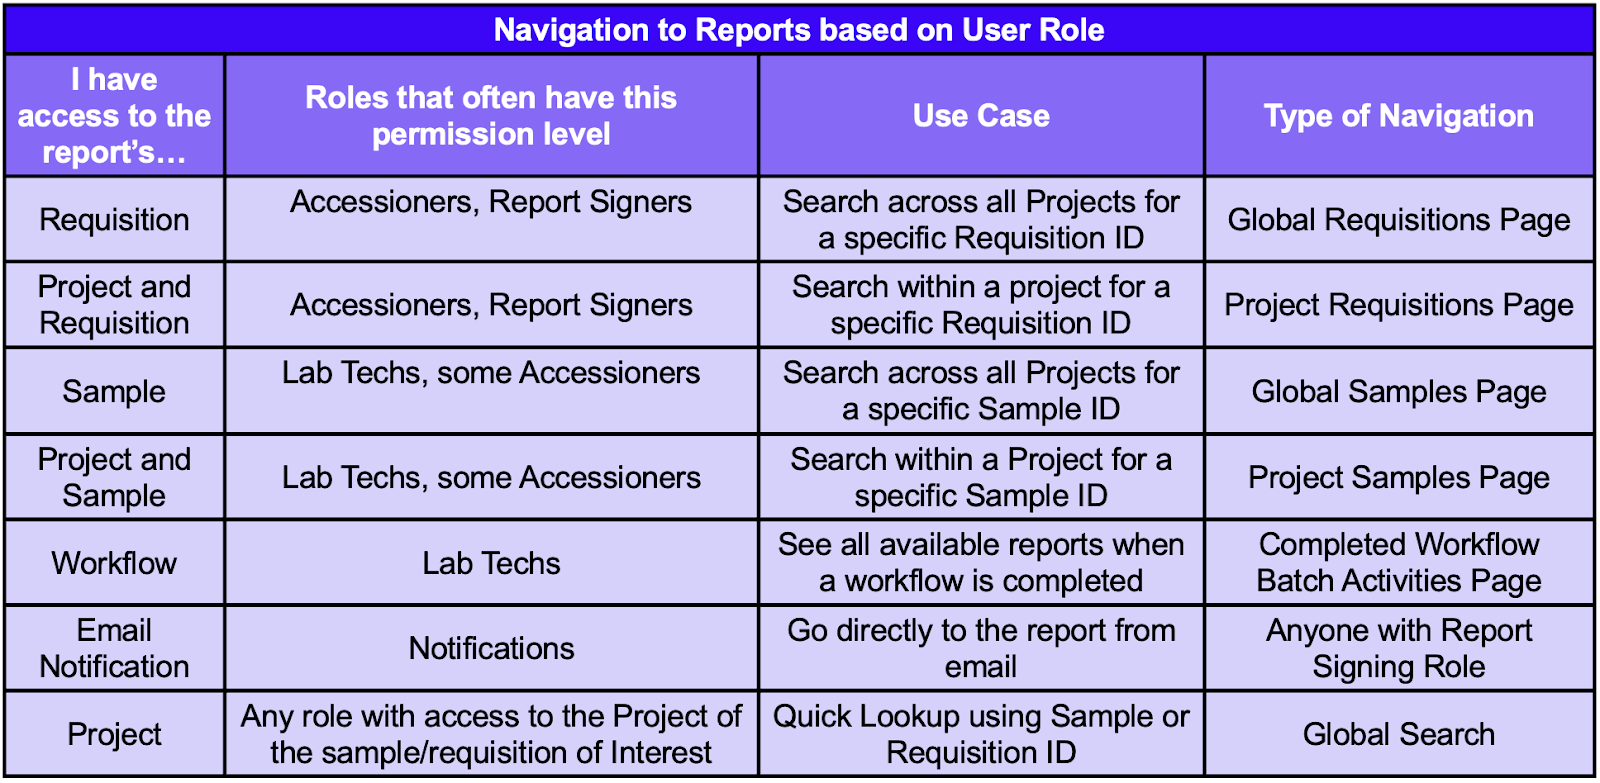
There are 5 ways to navigate to an individual report to sign it. Which navigation you use will depend on your case case and User Role. We recommend getting started with Global Search.
- Global Search
- Requisitions page (global and project)
- Samples page (global and project)
- Completed Workflow Batch Activities Page
- Direct link emailed to approved signer
Note: Reports can be released in bulk from the Ovation Dashboard. See Batch Report Release article for more details.
Navigating to an Individual Report using the Global Search
Note: The Global Search feature will return query results based on your user Role and your permission settings within the Ovation LIMS. For example, you will only see search results of sample identifiers or requisition identifiers contained within projects you have access to, but not for those projects you don’t. See our article on Roles and Permissions and speak to your lab’s LIMS Administrator to alter your Role or permission settings.
2. Enter your Sample ID or Requisition ID of interest into the search bar and click search
3. Click the green ID name of your returned query
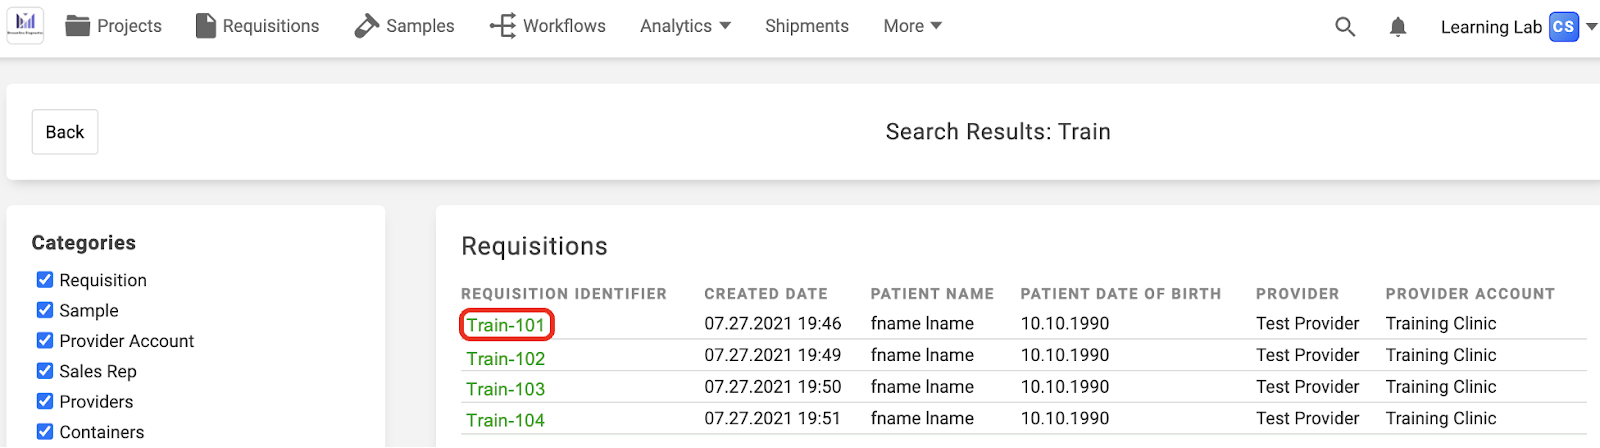
4. Select the “Reports” tab to see all reports associated to your search

See our Global Search Article if you have additional questions about searching within your Ovation LIMS. Alternatively, see our Signing/Deleting Individual Reports Article to finish your process.
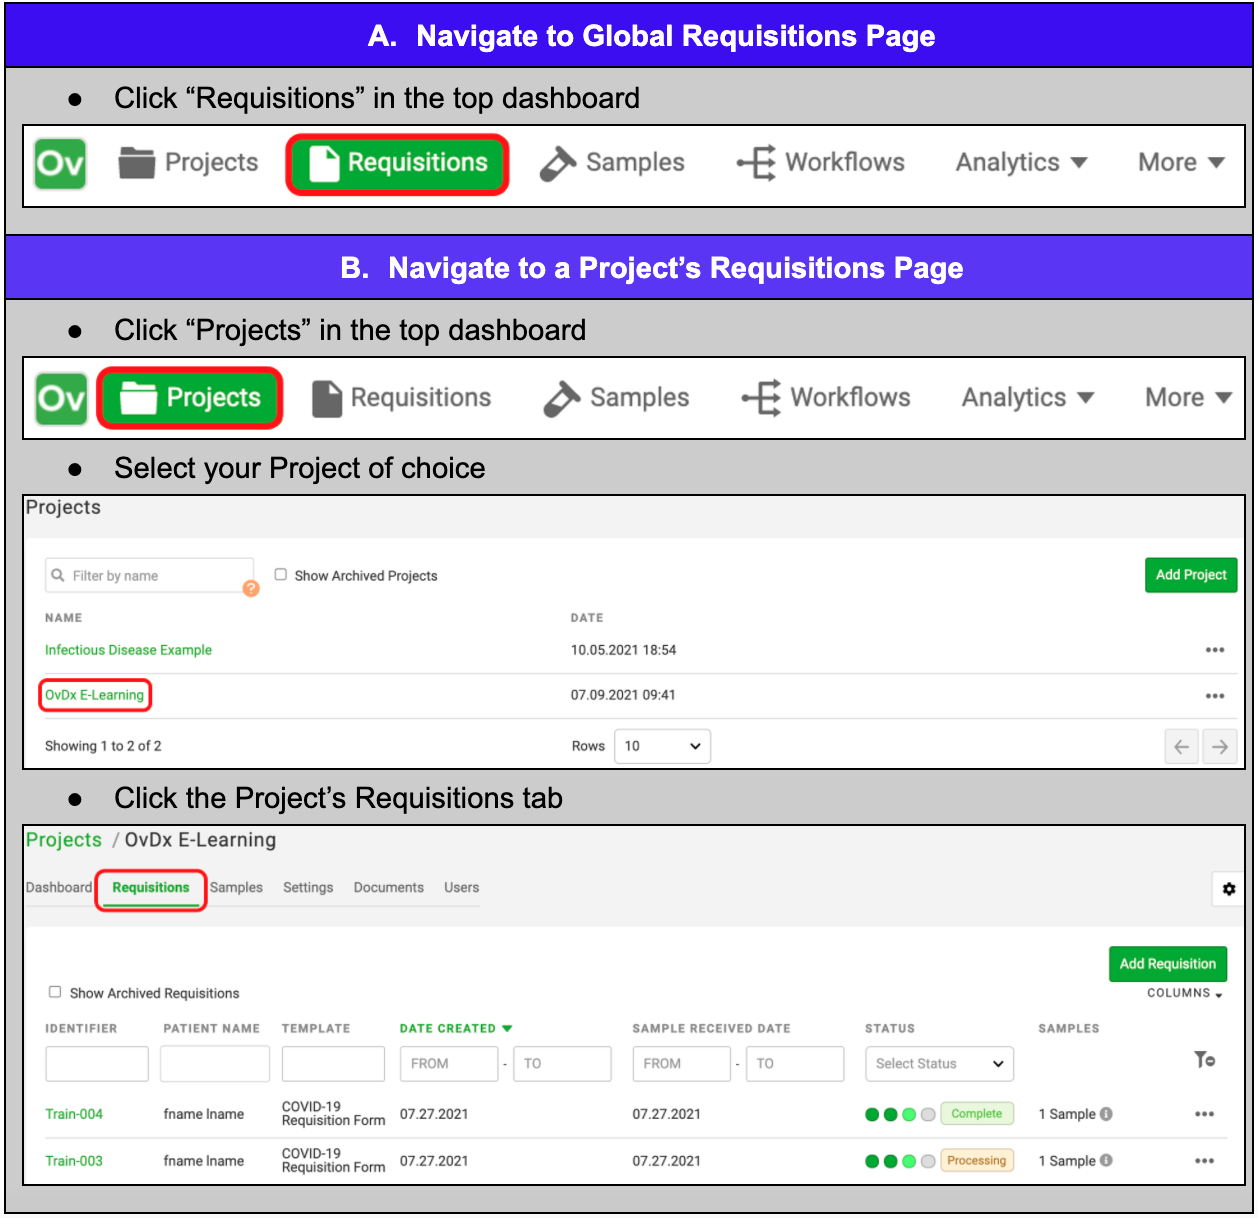
Navigating to Individual Reports from a Requisitions Page (global and project)
There is a high-level (global) Requisitions tab and a project-level Requisitions tab. Both of these tabs are called ‘Requisitions’ but they have slightly different functions. The global Requisitions page contains all requisitions across all projects. If you need to find and sign multiple individual reports that exist across several projects, you can use the Global Requisitions page. If you are looking for reports that are in the same project, use the project Requisitions tab.
1. Navigate to a Requisitions Page using the table below
A. Global Requisitions to see all requisitions
B. Project Requisitions to see only requisitions filed under the selected project
Tip: You can use the Identifier field to enter your sample’s Requisition ID for a quick lookup. You can also click on the columns dropdown menu to select which filterable fields display. Selected fields have a blue checkbox
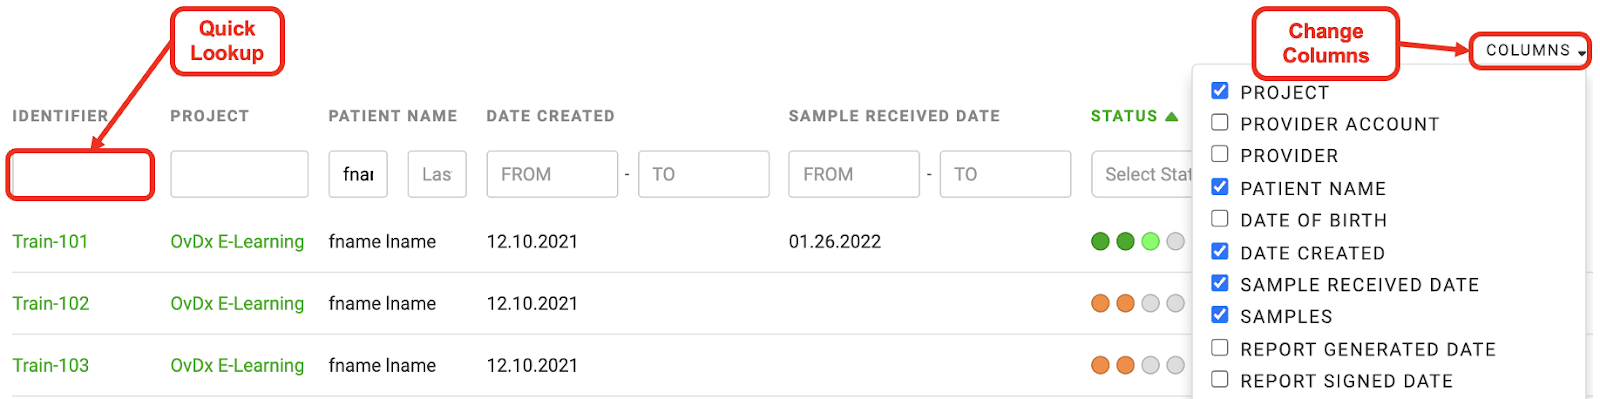
2. Use the appropriate filters to find your sample
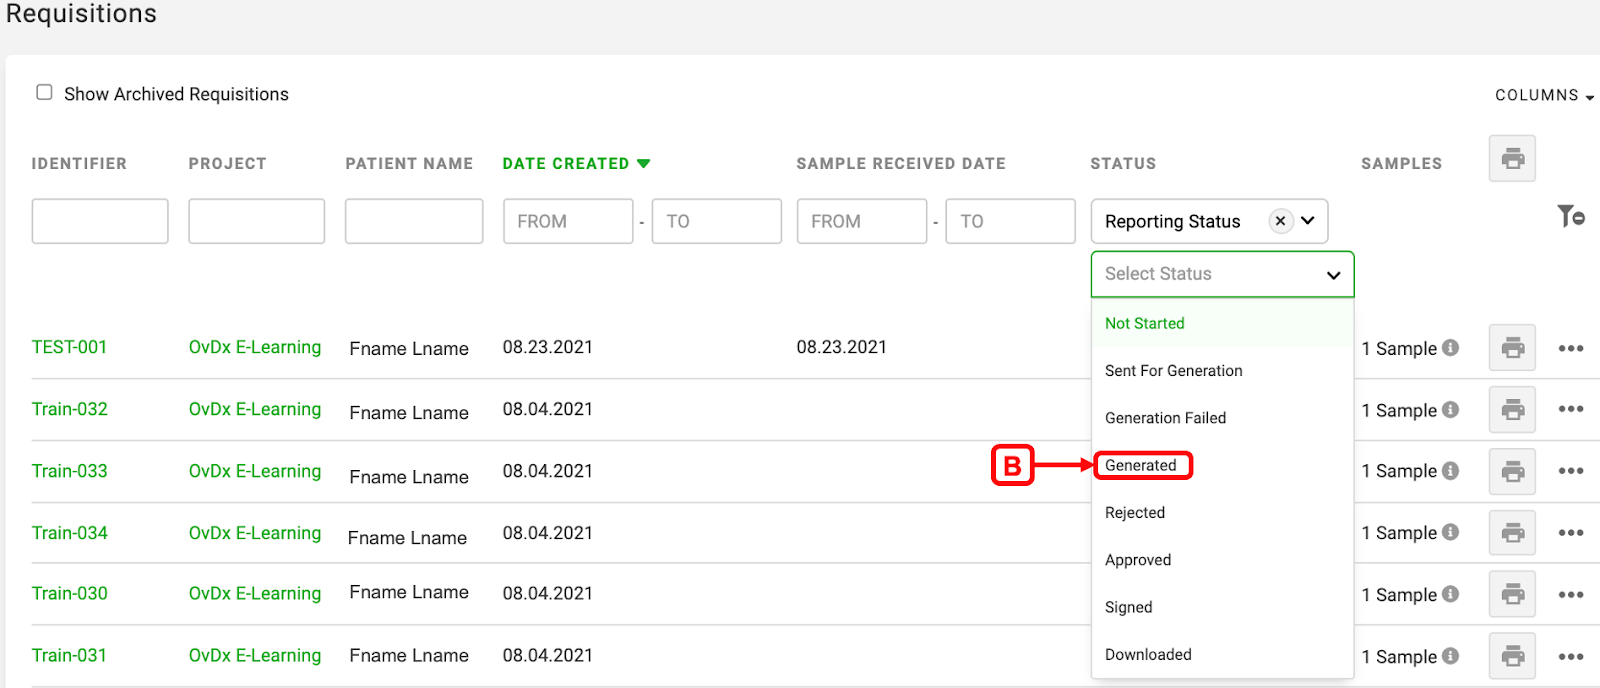
A. Select the Report Status filter
B. Choose the Generated sub filter
C. Click the Requisition ID for the report you wish to sign
Note: We recommend opening the Requisition ID page in a new tab (step 2C above) for easier navigation back to your search if you want to sign multiple individual reports.


3. Select the “Reports” tab to see all reports associated with this requisition
See our Signing/Deleting Individual Reports Article to finish your process.
Navigating to Individual Reports from a Samples Page (global and project)
There is a high-level (global) Samples tab and a project-level Samples tab. Both of these tabs are called ‘Samples’. If you need to find and sign multiple individual reports that exist across several projects, you can use the Samples page. If you are looking for reports that are in the same project, use the project Samples tab.
1. Navigate to a Samples Page using the table below
A. Global Samples to see all samples
B. Project Samples to see only samples filed under the selected project

Tip: You can use the Sample ID field to enter your Sample identifier for a quick lookup. You can also click on the columns dropdown menu to select which filterable fields display. Selected fields have a blue checkbox

2. Use the appropriate filters to find your sample
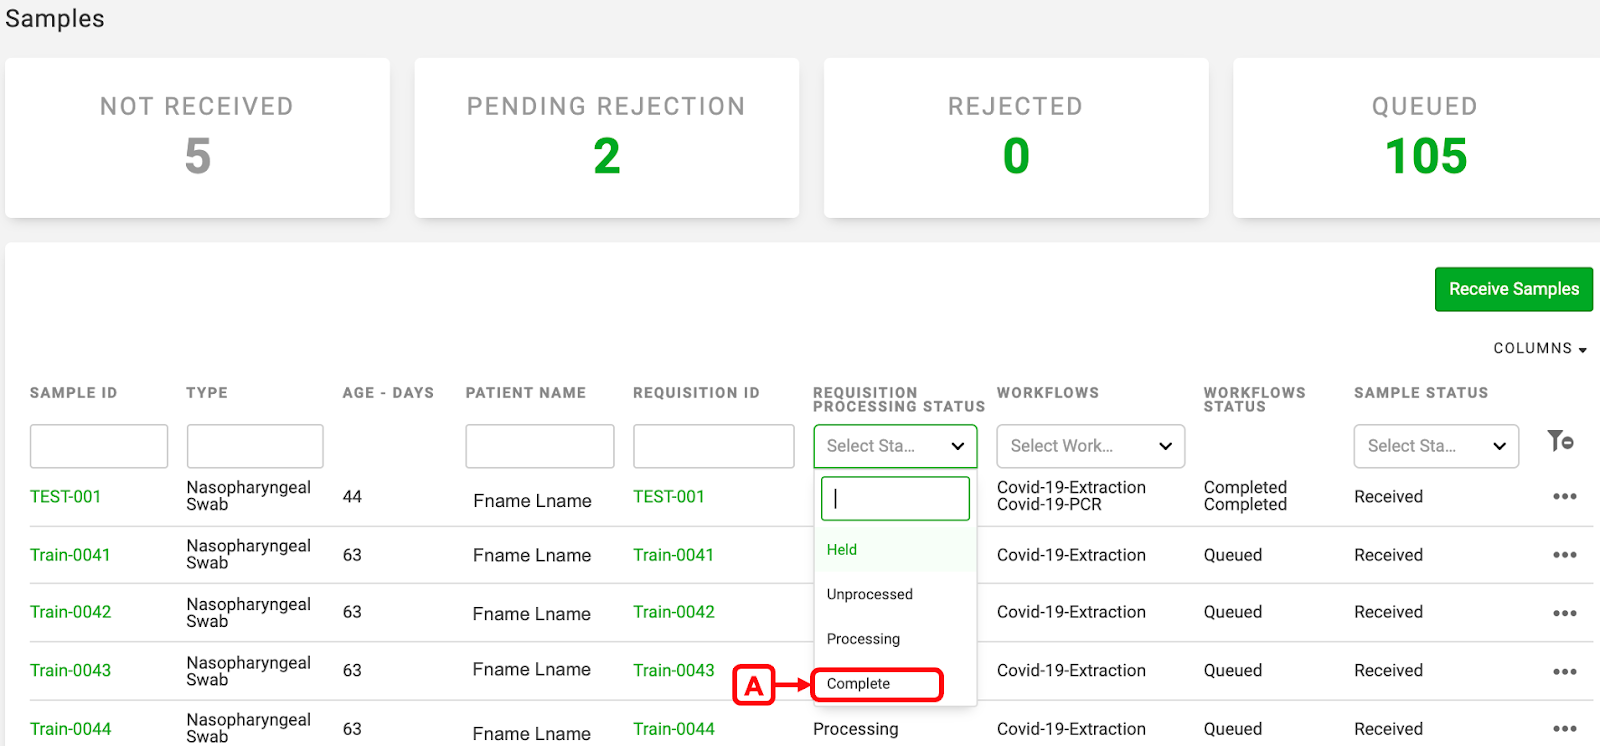
A. Select the Requisition Processing Status of Complete
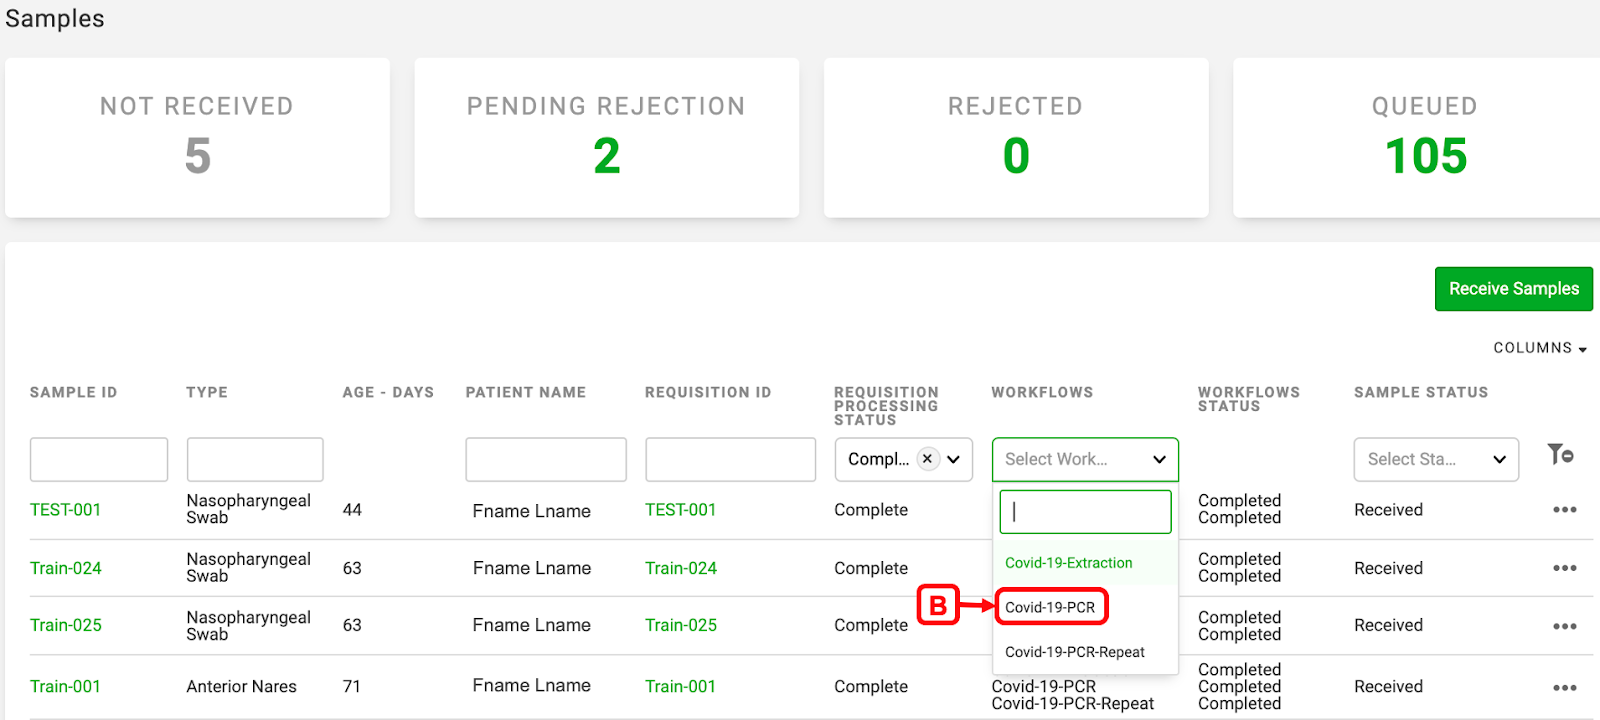
B. Choose the appropriate Workflows
C. Click the Sample ID for the report you wish to sign
Note: We recommend opening the Sample ID page in a new tab (step 2C above) for easier navigation back to your search if you want to sign multiple individual reports.

3. Select the “Reports” tab to see all reports associated with this sample
See our Signing/Deleting Individual Reports Article to finish your process.
Navigating to Individual Reports from the completed Workflows Batch Activities Page
1. Click “Workflows” in the top dashboard
2. Scroll down to the Workflows Summary Table
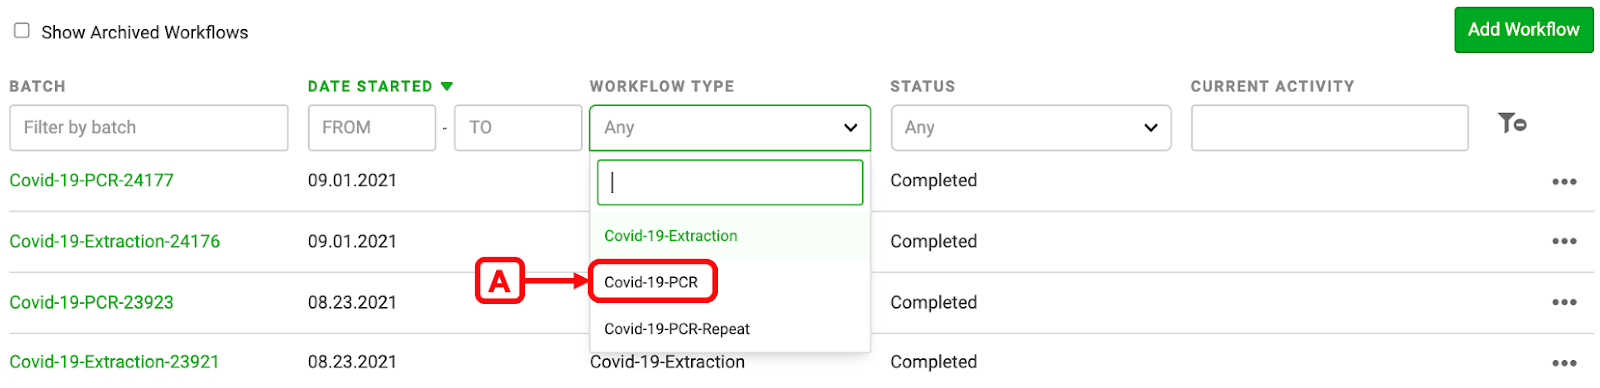
A. Select the appropriate workflow from the Workflow filter
B. Select the Completed Status from the Status filter
C. Click the Workflow Batch ID to find samples with reports available to sign
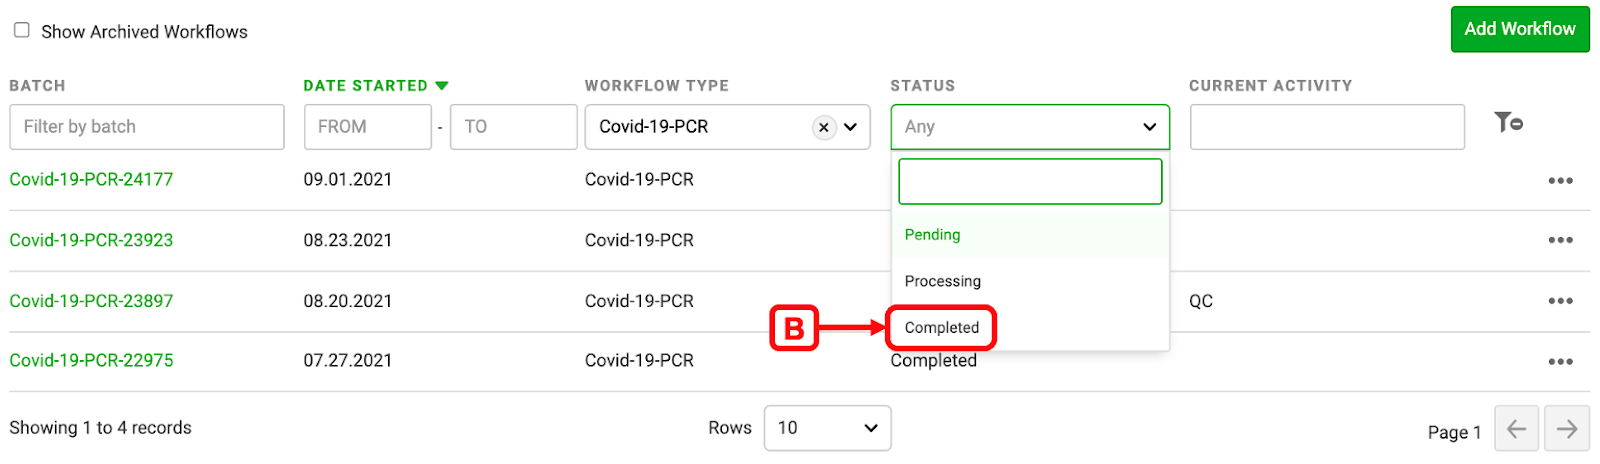

3. Click the Green Sign Report button next to your sample of interest

Note: We recommend opening the Sample ID page (Sign Report button) in a new tab for easier navigation back to your Completed Workflow Batch if you want to sign multiple individual reports
4. Select the “Reports” tab to see all reports associated with this sample

See our Signing/Deleting Individual Reports Article to finish your process.
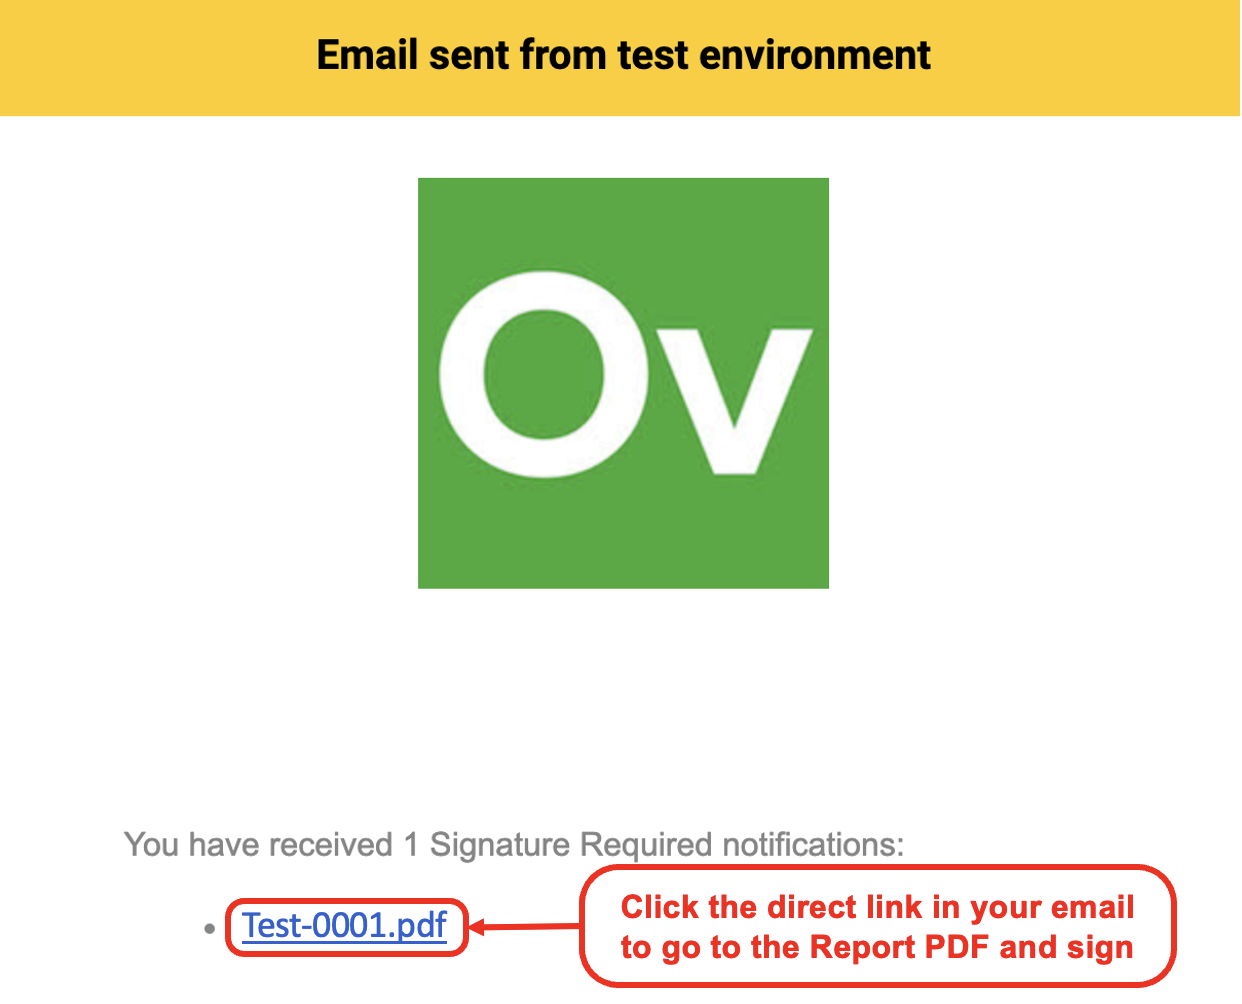
Navigating to Individual Reports from the Email
1. Open your email and locate emails with the Subject Line “You have received X Signature Required Notifications”
Note: X in the subject line of your Signature Required email(s) indicates the number of reports that are ready to sign. There are links to each report within the email. The number of emails you get depends on your Report Notifications Settings. See the article on Individual User Settings for more details.
2. Click the blue link to the report you wish to sign
See our Signing/Deleting Individual Reports Article to finish your process.